Docs / Getting Started
What is Termly Event and How to Use It (trials and drop-ins)
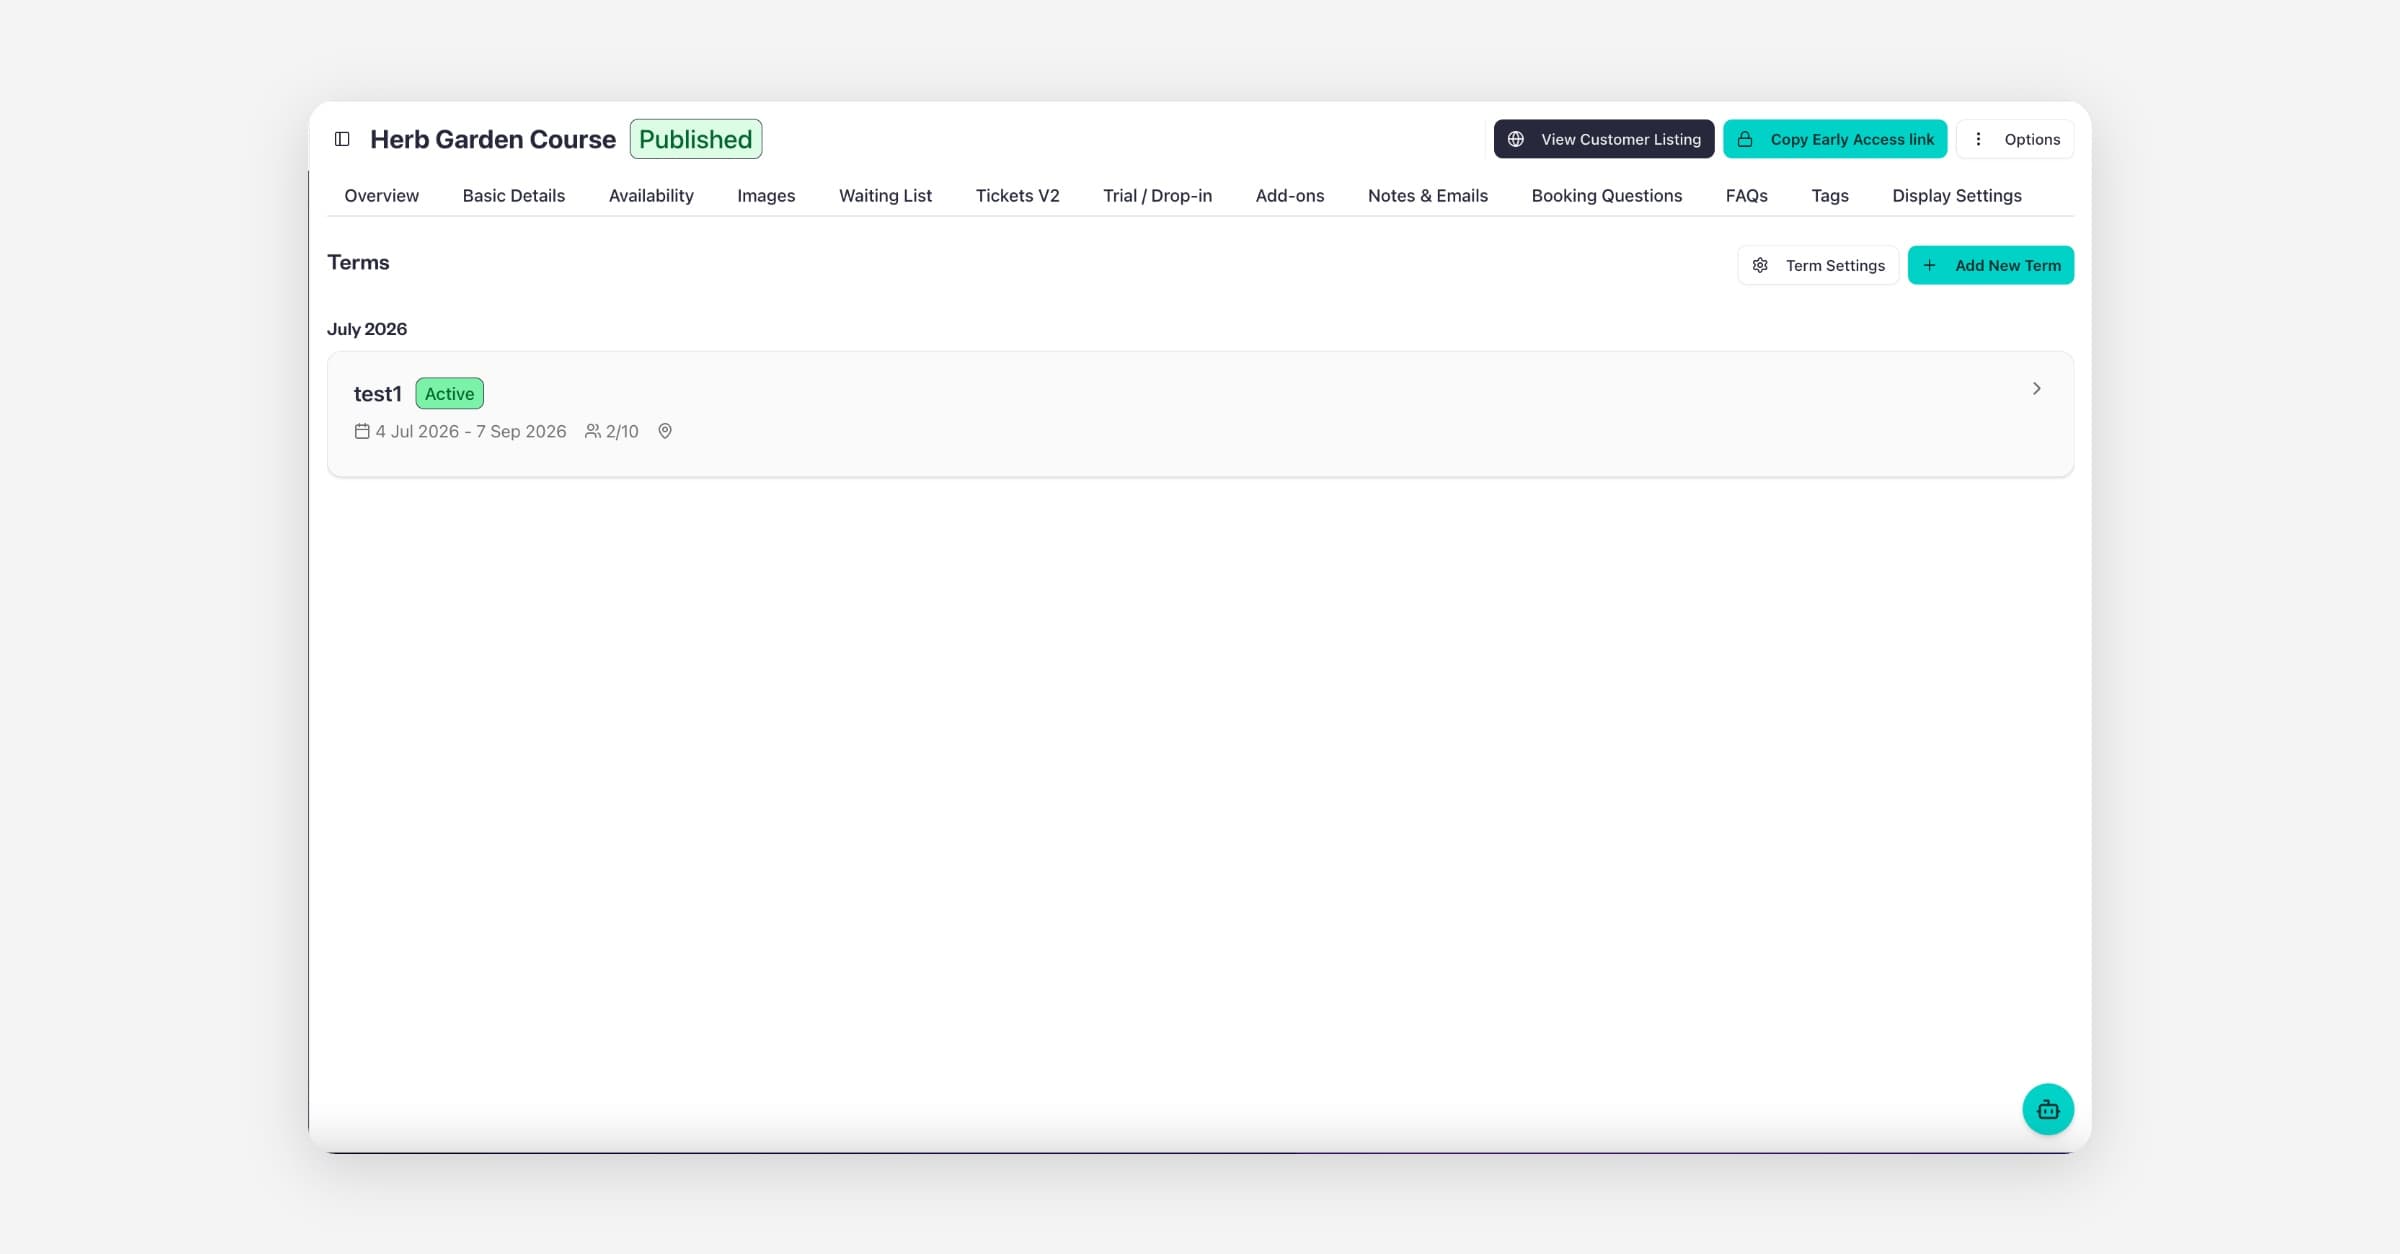
Term events are recurring sessions that run over a fixed period of time. They are ideal for courses, term-based programmes, or multi-week workshops where customers book for a full term rather than individual sessions.
Step 1: Create a Termly Listing
When creating a new listing, you’ll first see the “How would you like to start?” screen.
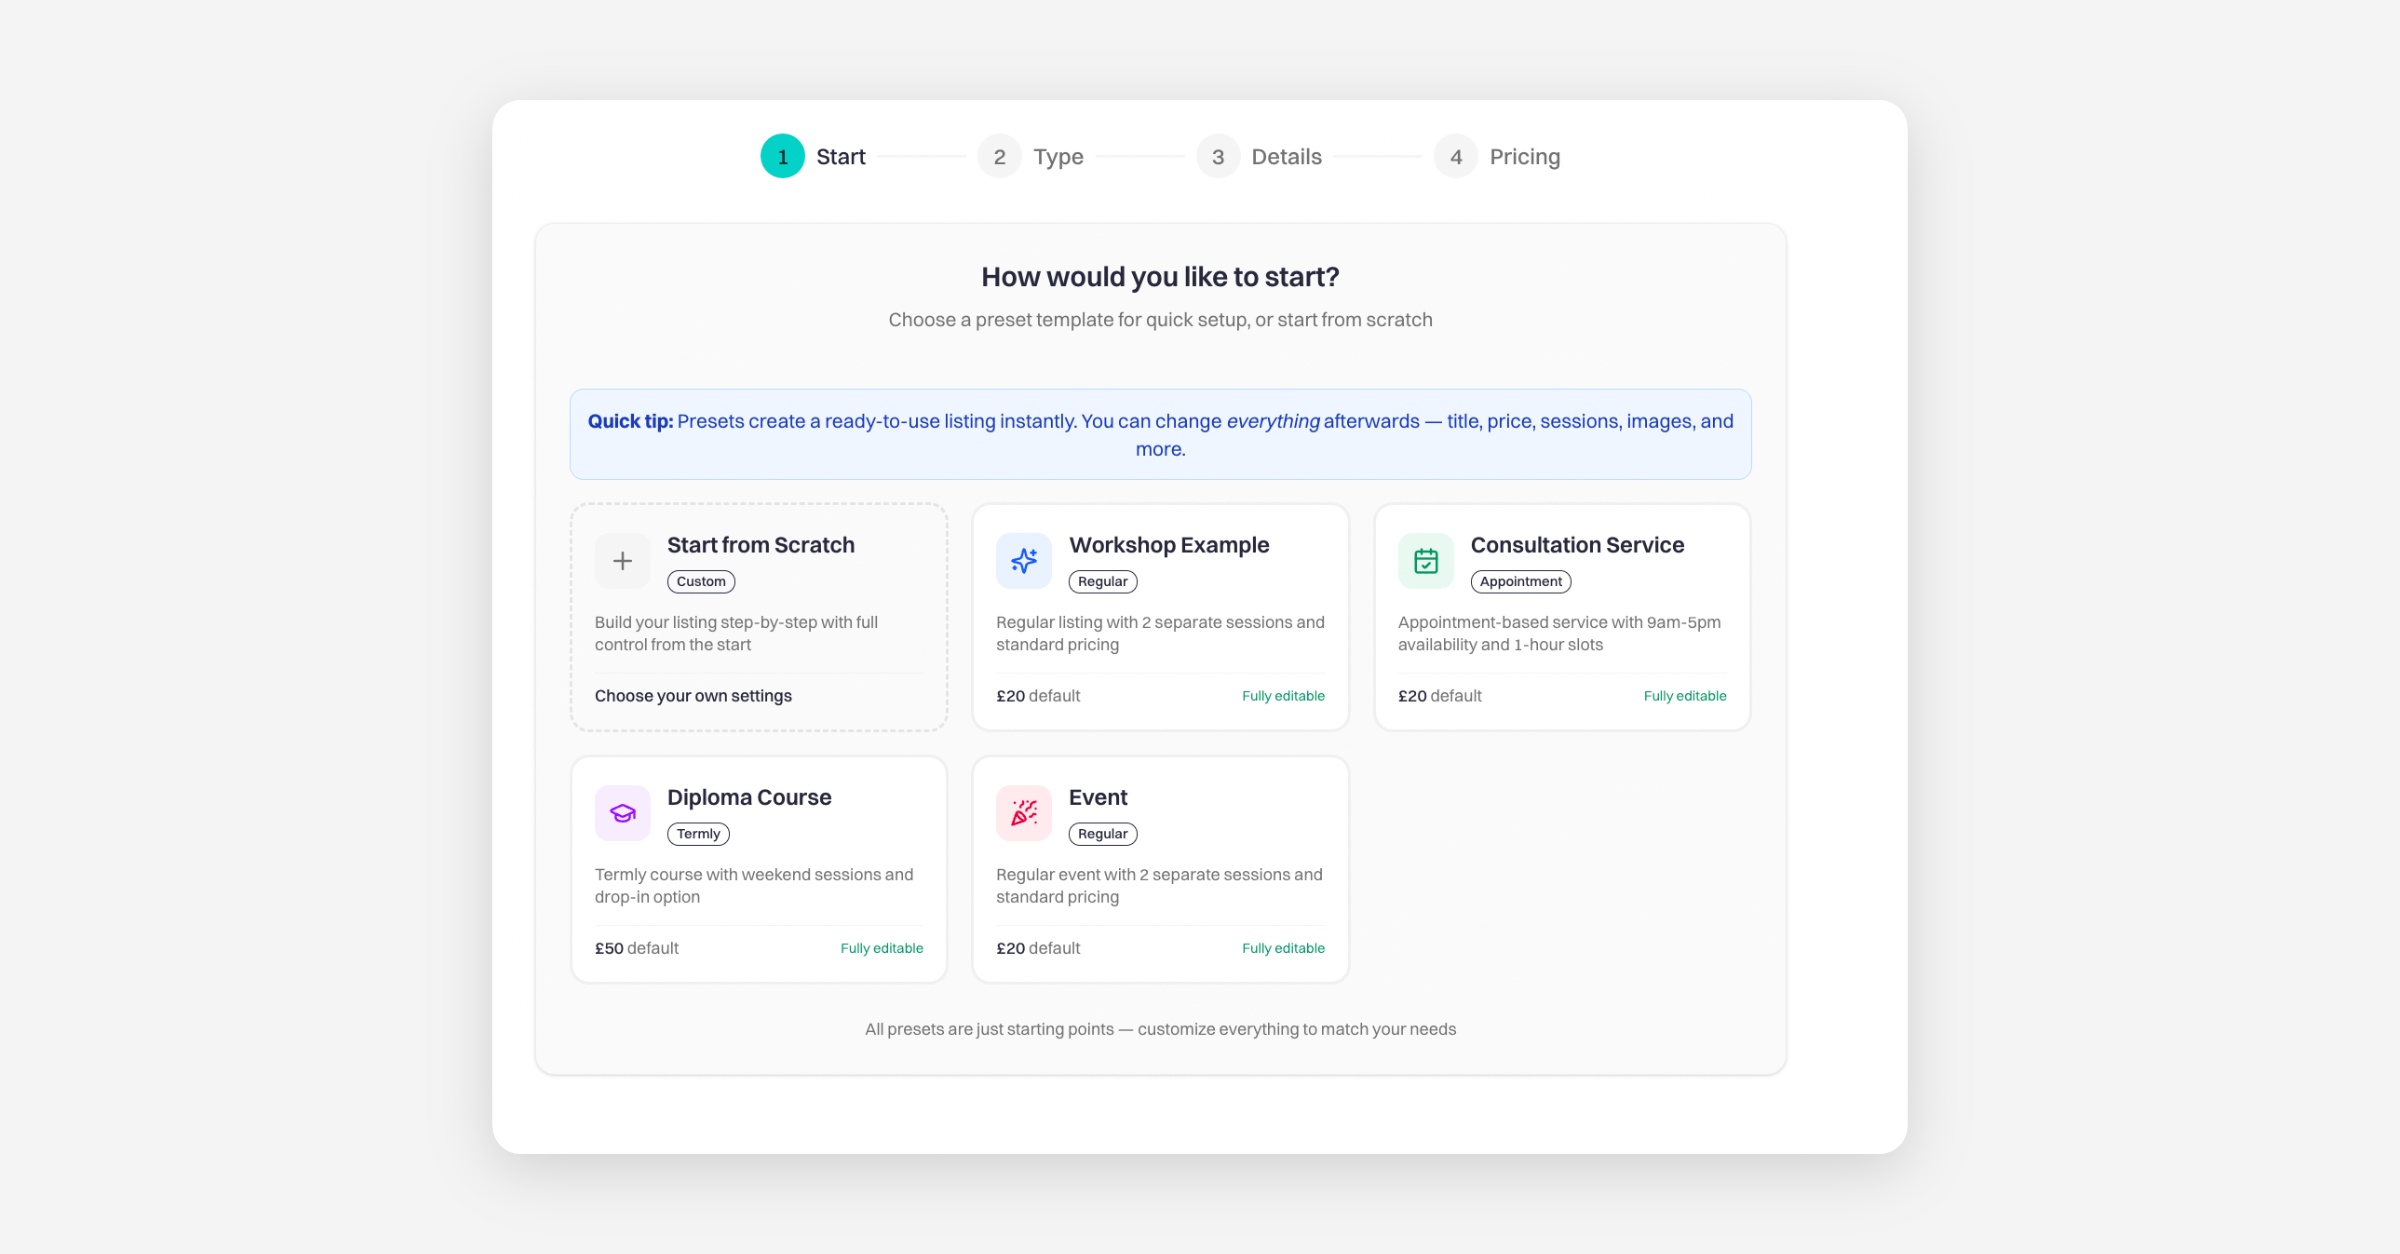
You have two options:
Option 1: Start from Scratch
If you select Start from Scratch, you’ll need to:
Click Add New Listing
Choose Termly as your listing type
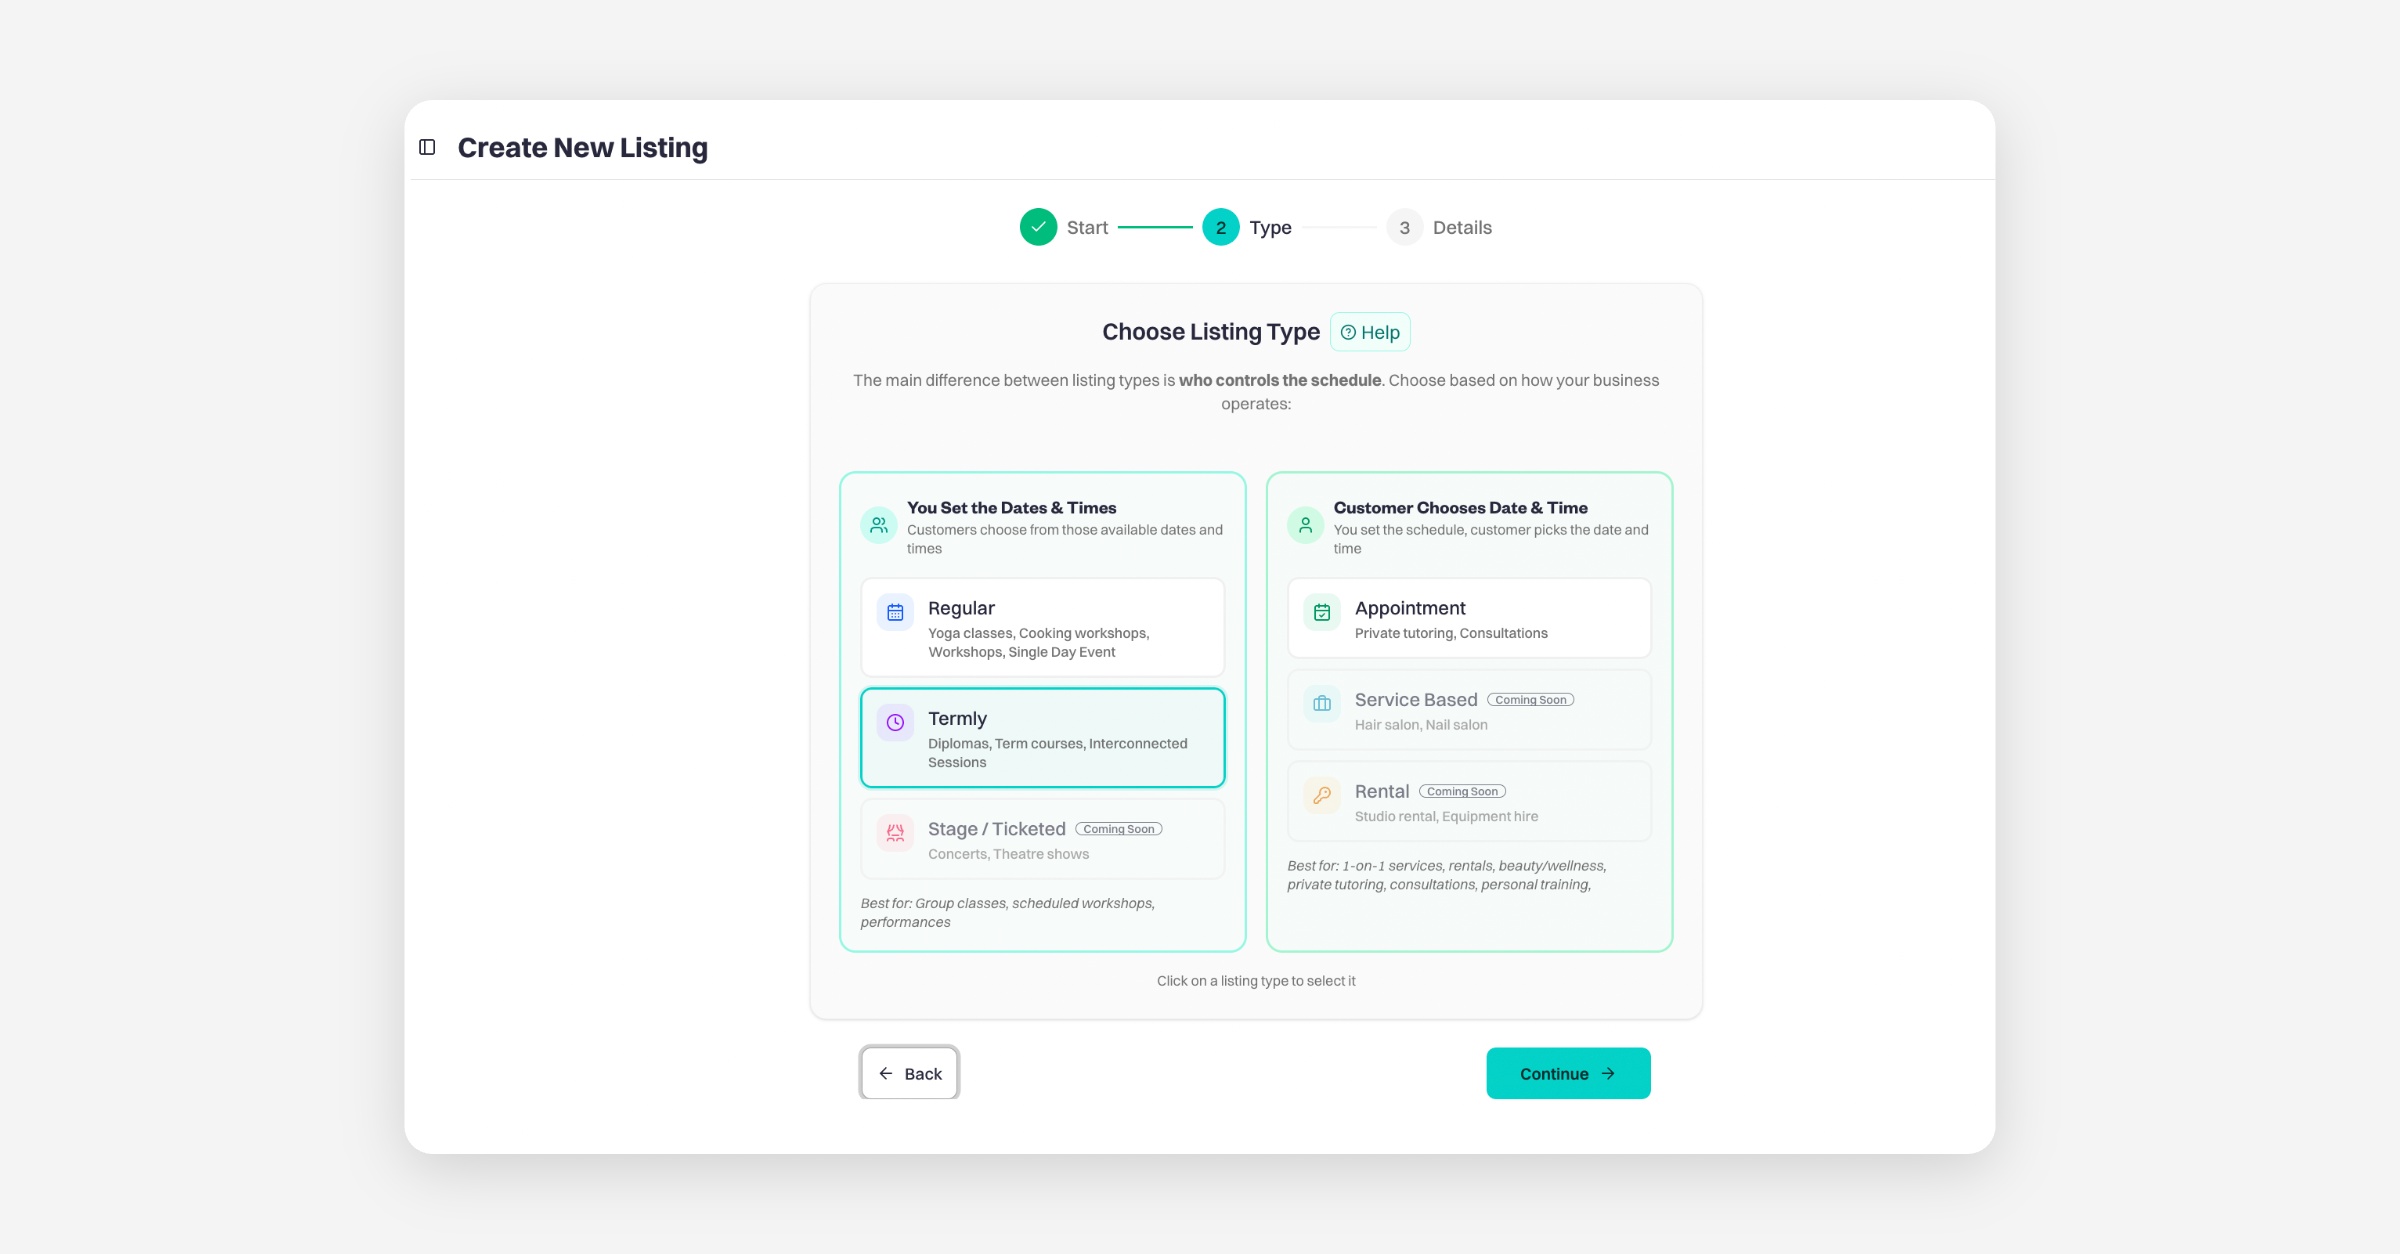
Then fill in the usual details, such as:
Event name
Description
Image
And any other relevant information
Once you’ve completed this step, you’ll be taken to the Basic Details page of your new event, where you can continue setting up availability, tickets, and other settings.
Option 2: Use a Preset (e.g. Diploma Course)
You can also select a preset such as Diploma Course (Termly).
This will automatically apply recommended settings for a term-based course, which you can fully edit afterwards. It’s a quicker way to set up a structured, term-style programme.
Step 2: Configure Basic Details & Display Settings
Fill in the Basic Details tab as normal.
Then head to Display Settings.
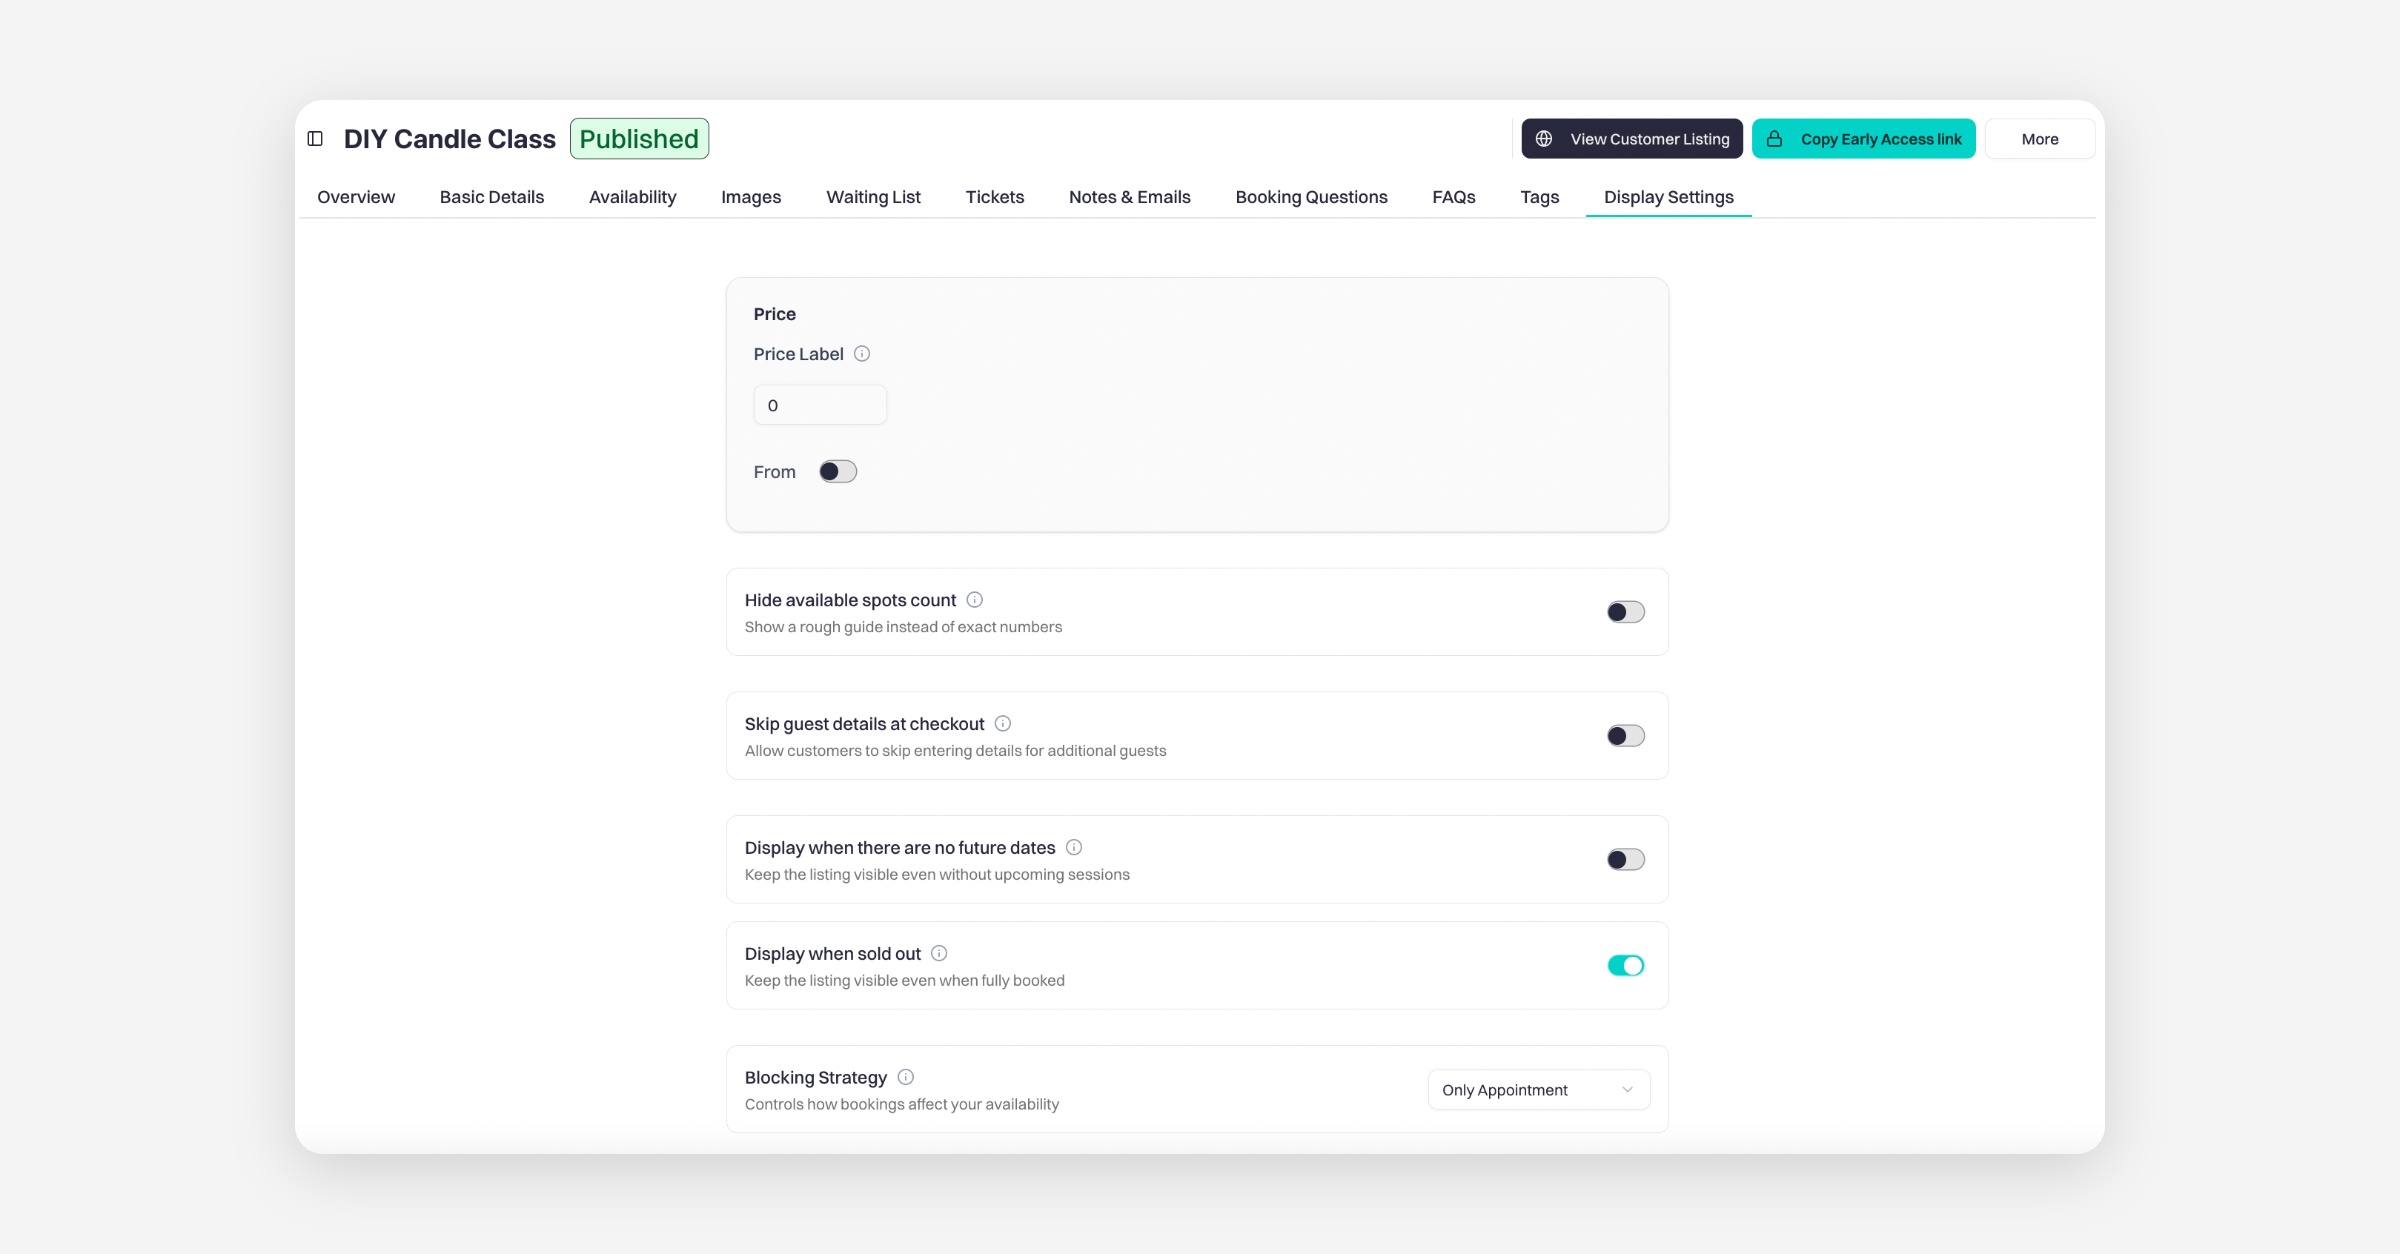
Display when there are no future dates
If enabled, your listing will remain visible even when there are no upcoming sessions available.
This is useful if you’d like customers to still view the event and potentially join a waiting list.
Display when sold out
When this is turned on, your listing will stay visible even when all sessions are fully booked.
This allows customers to see the event and join the waiting list instead of the listing disappearing.
Hide available spots count
If enabled, customers will not see the exact number of remaining spots.
Instead of showing precise availability (e.g. “3 spots left”), it will display a more general indicator.
Blocking Strategy
This setting controls how bookings affect availability.
Once these options are set, click Save changes.
Step 3: Add Tickets
Next, go to the Tickets tab and click Add Ticket.
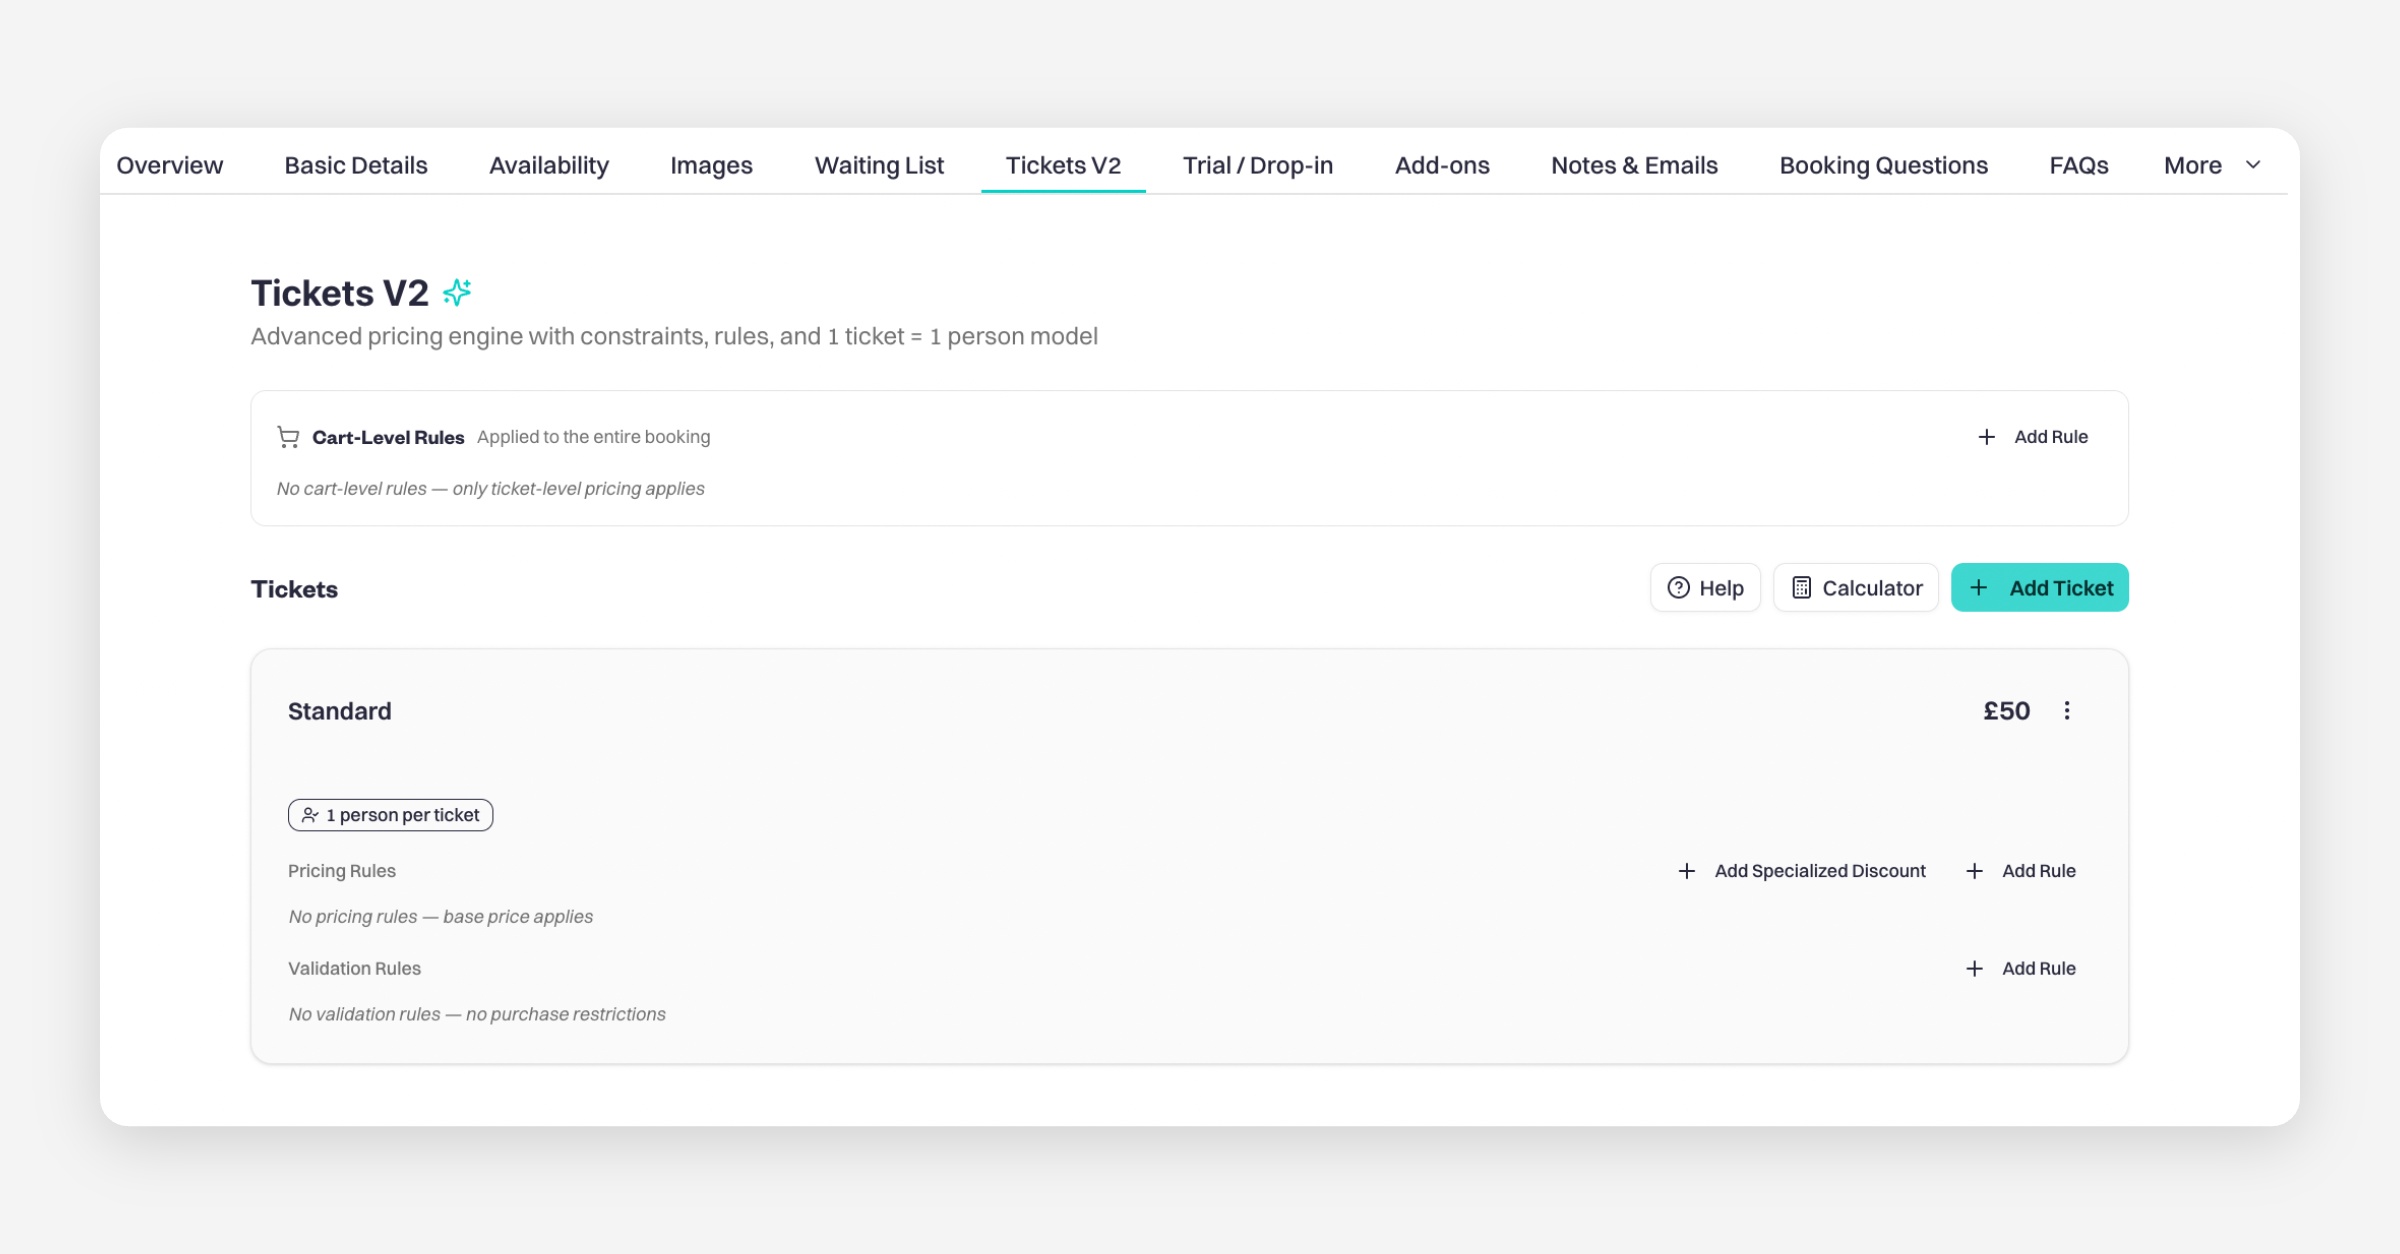
Step 4: Create a Term & Add Availability
Go to the Availability tab and click Add term.
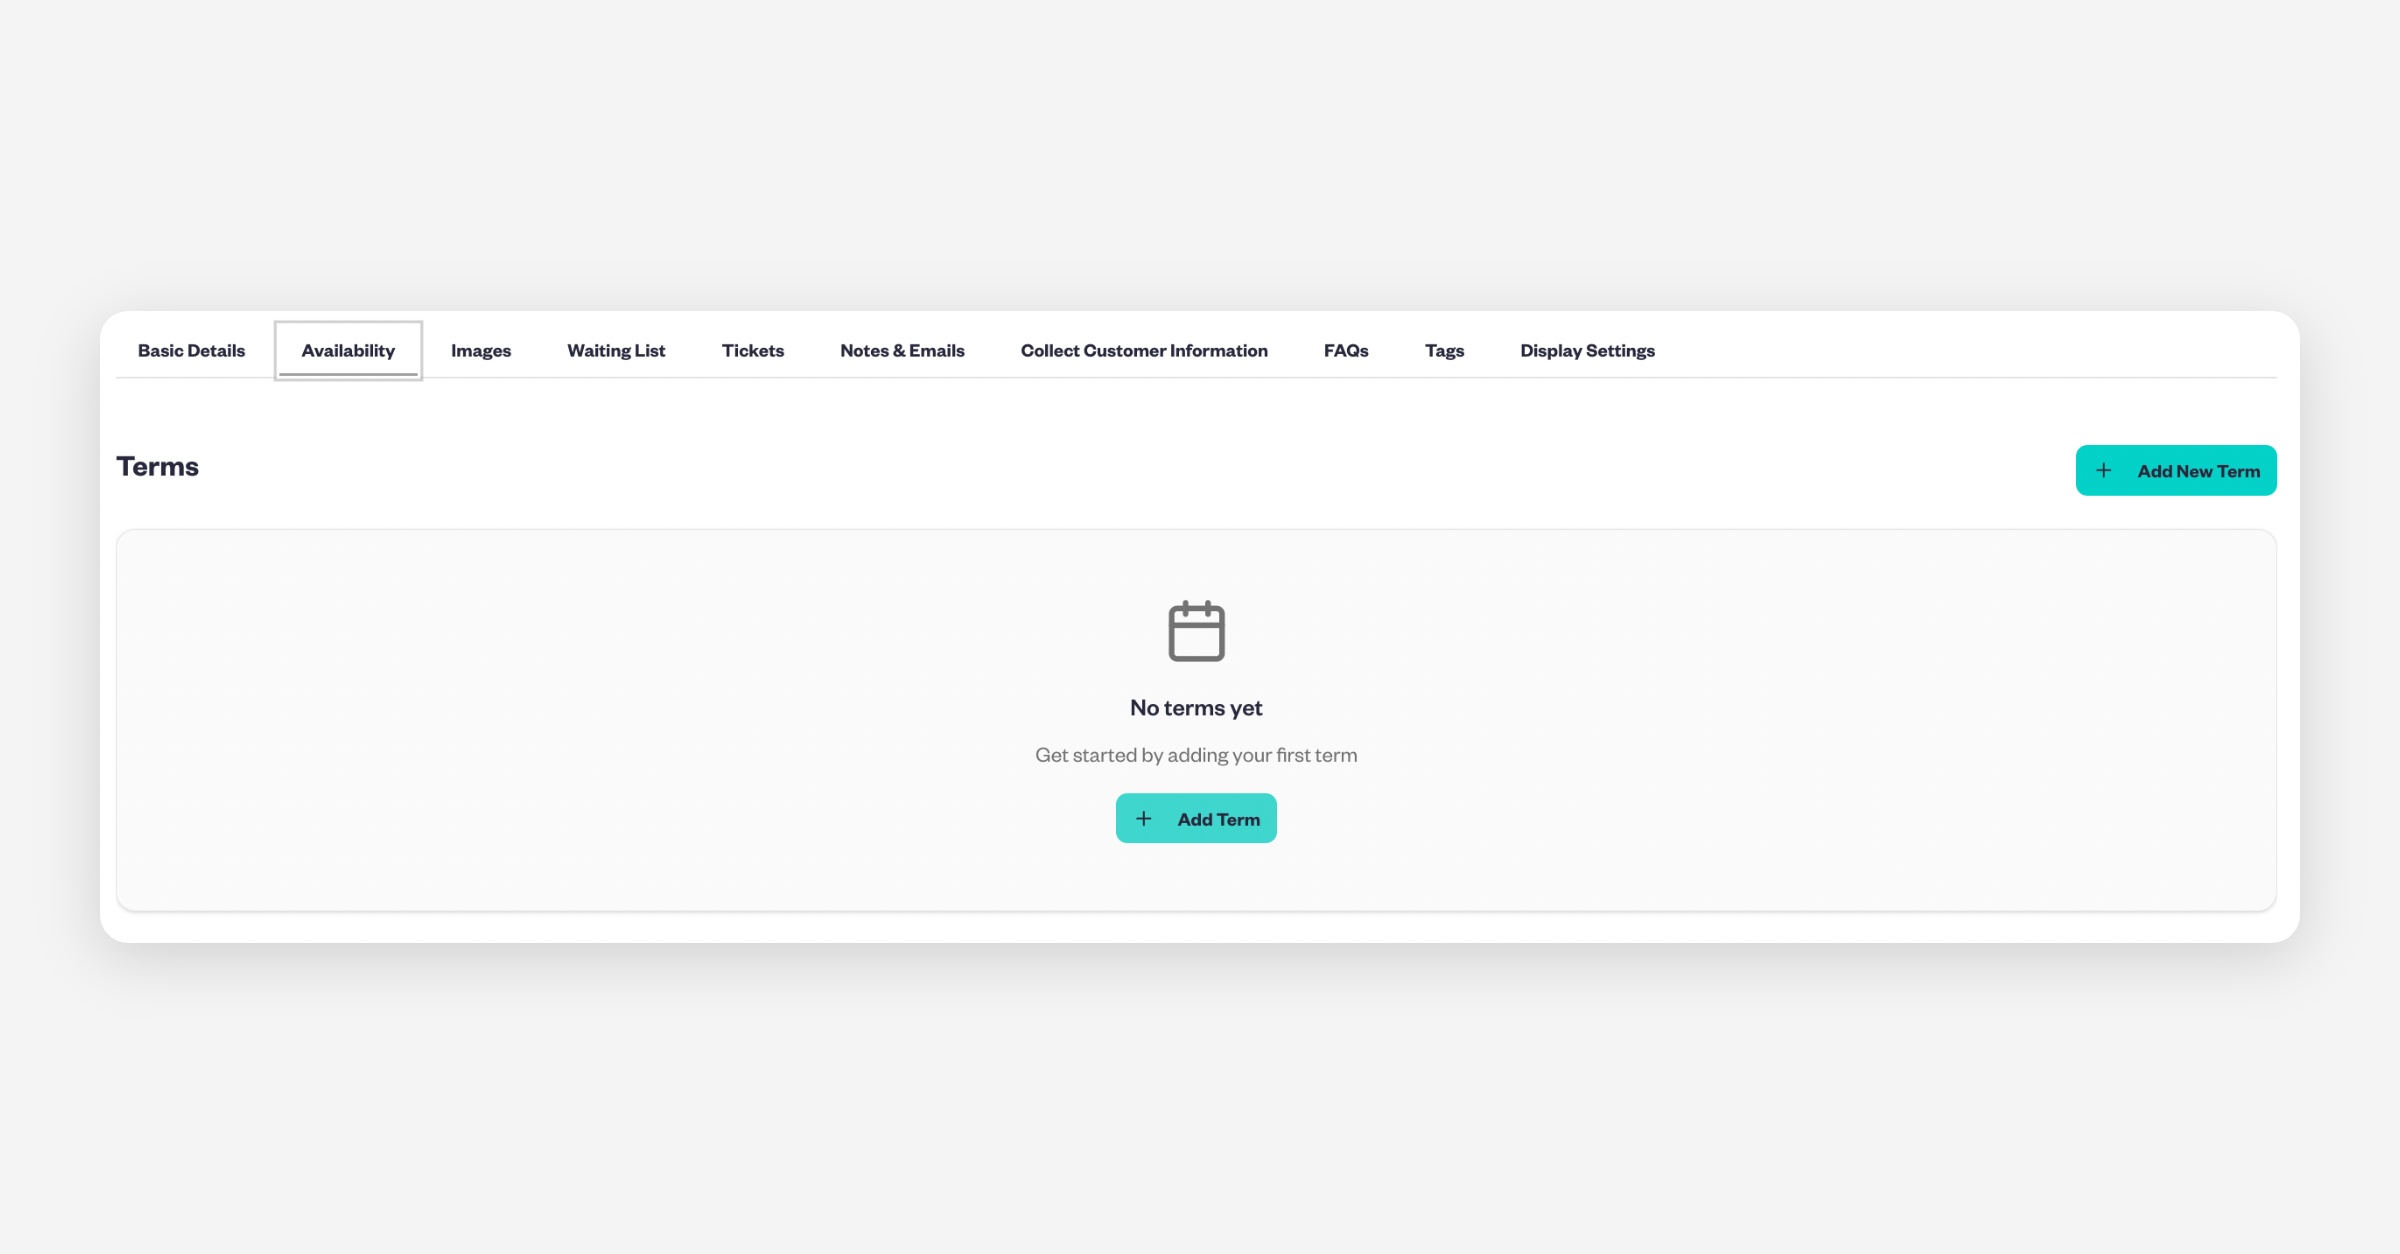
Enter a Term name (e.g. Spring Term).
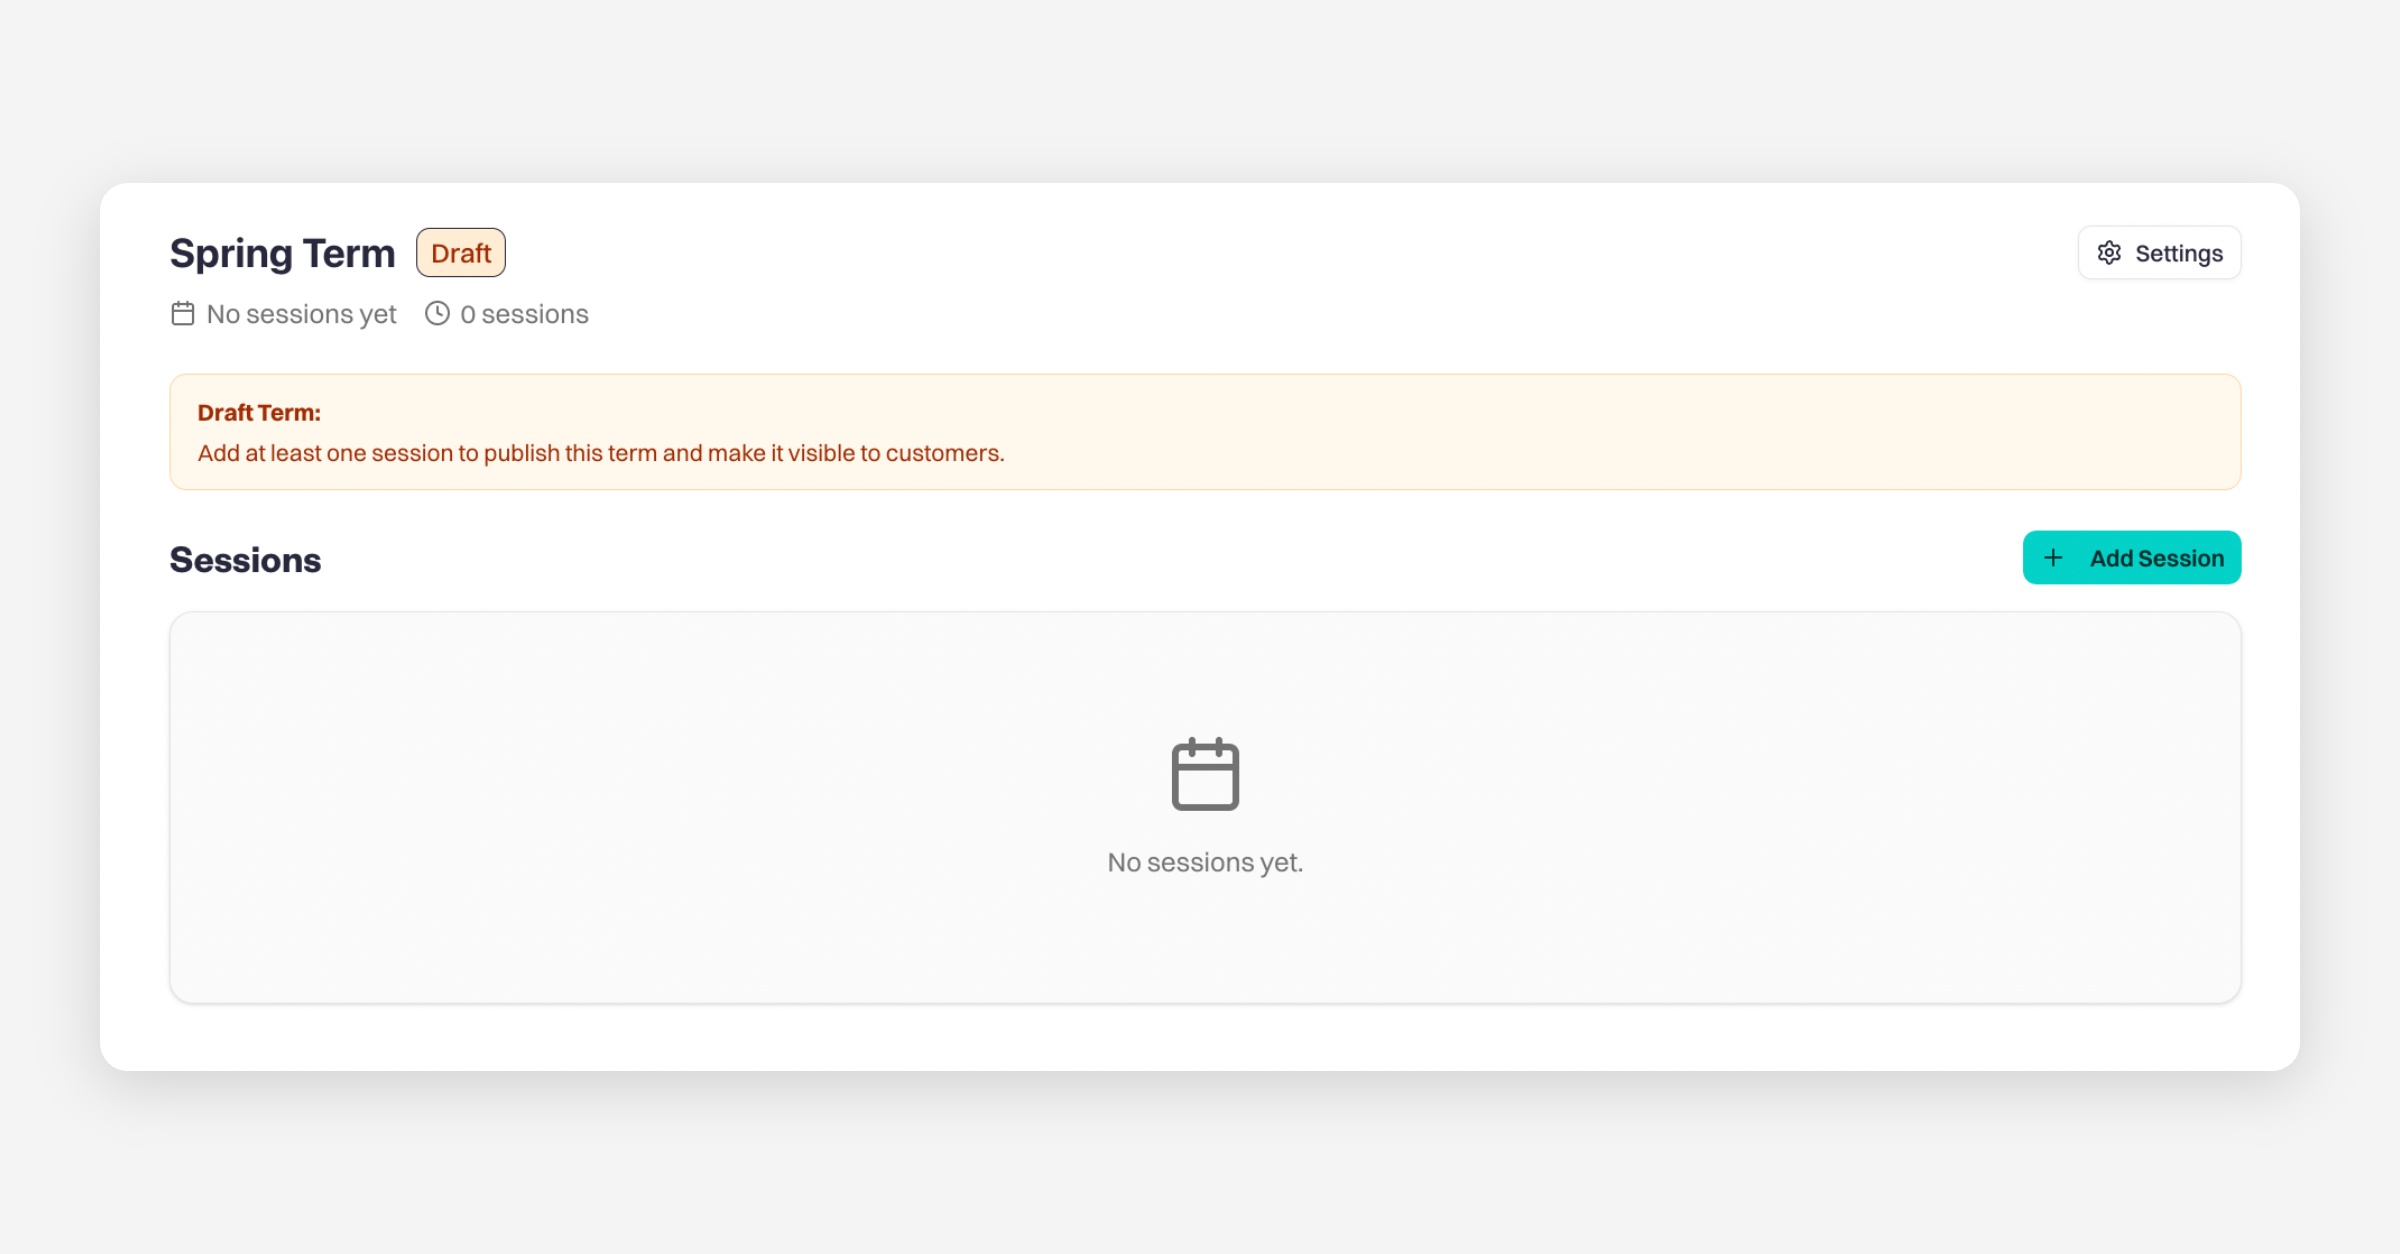
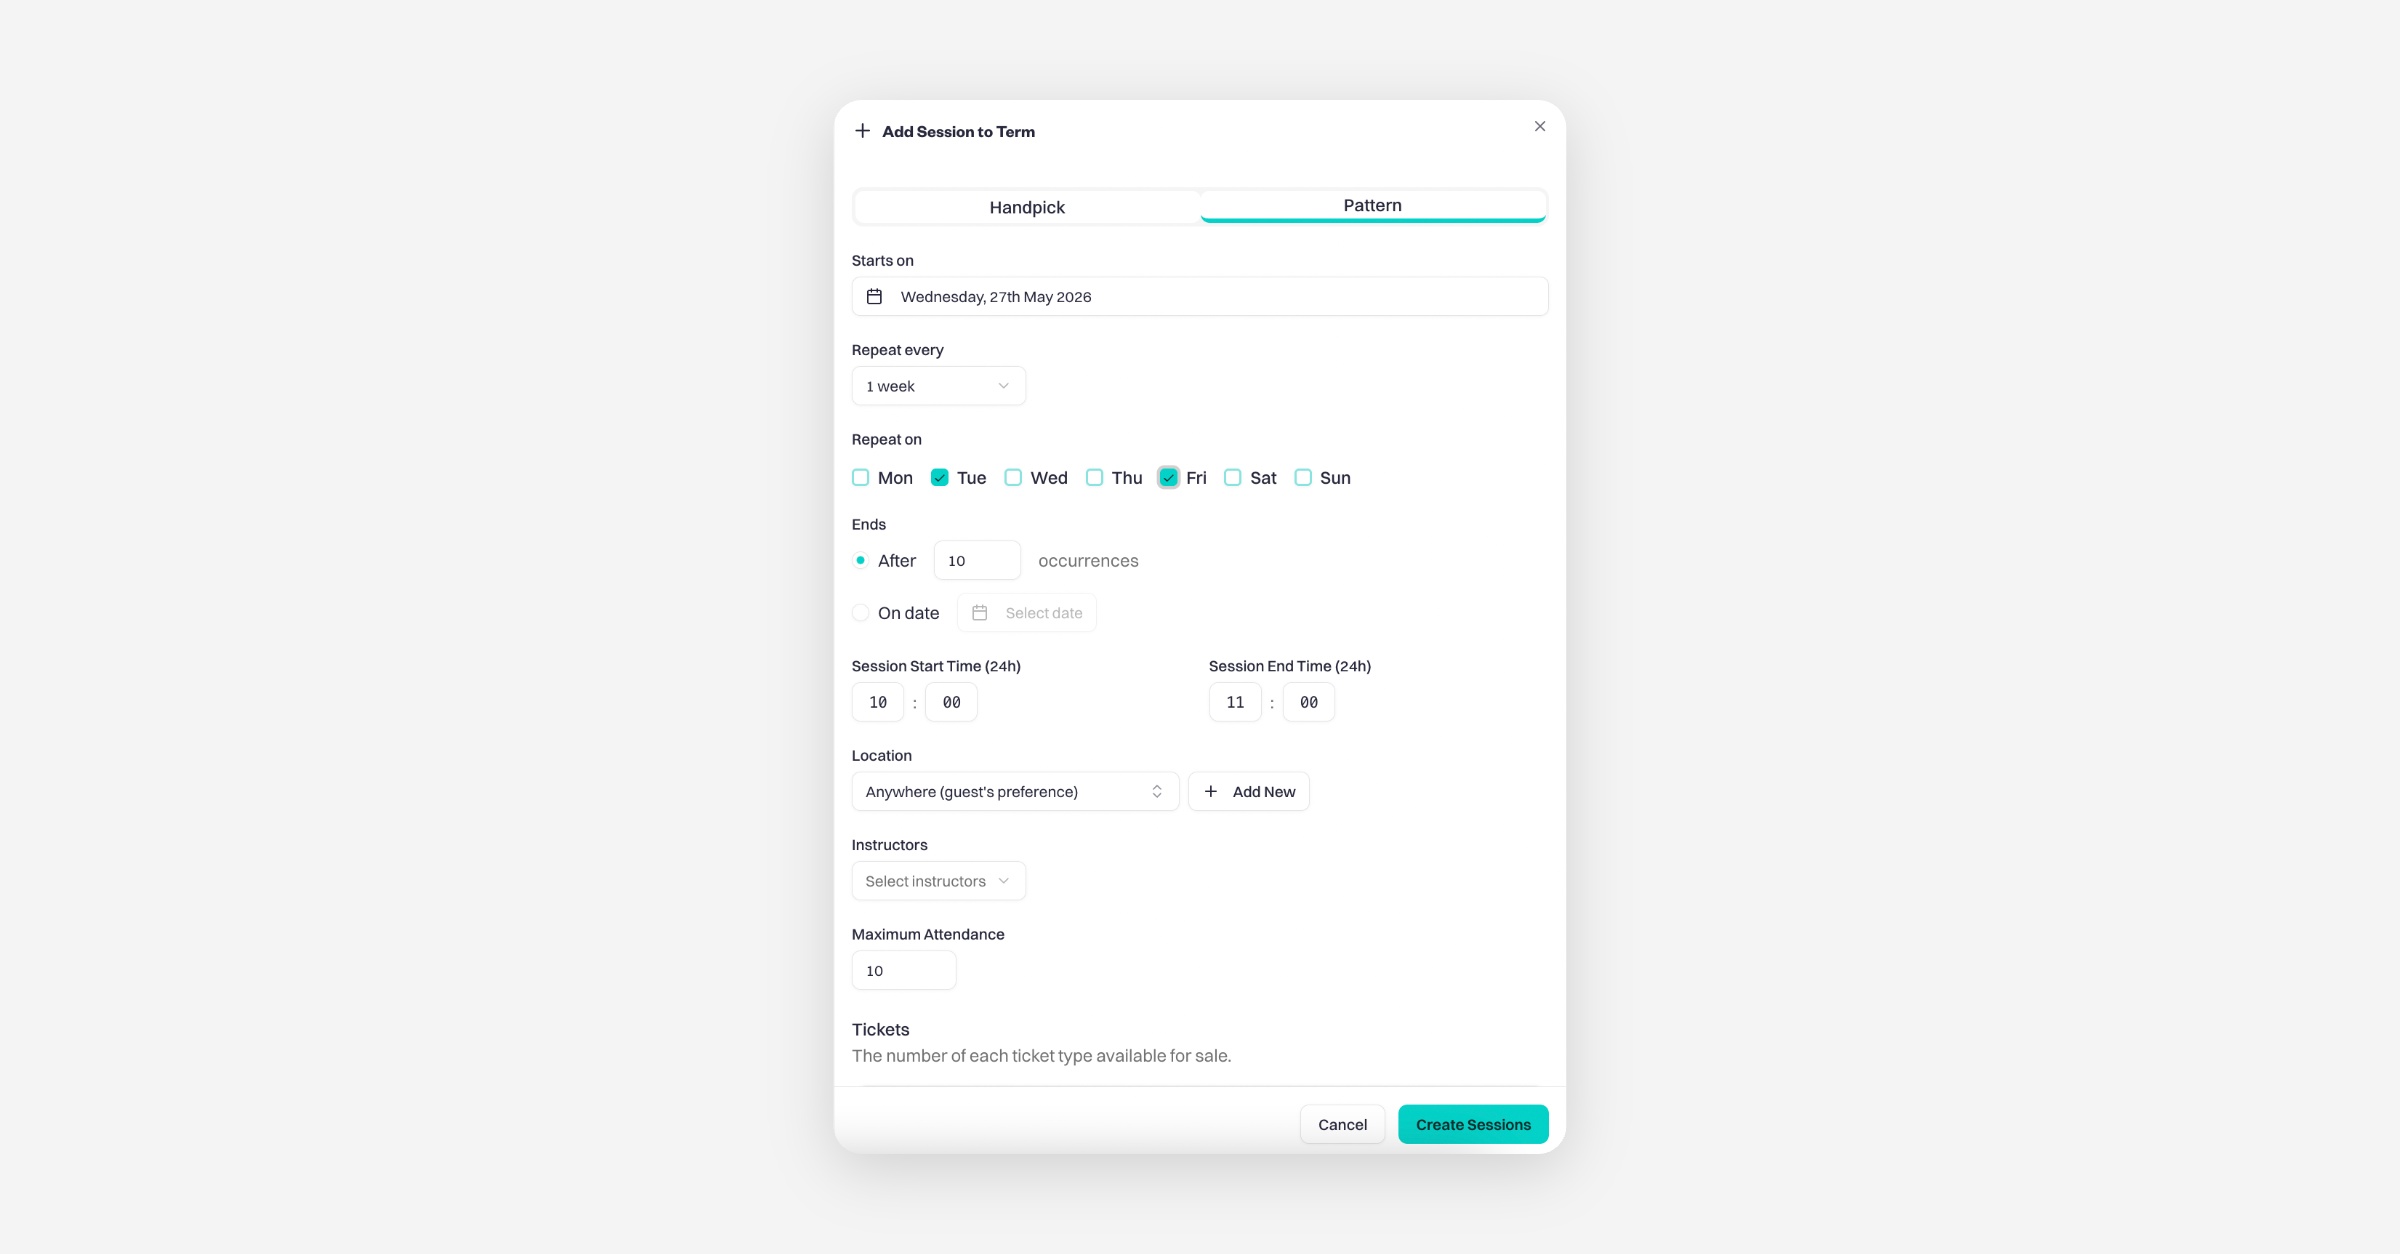
Click Add sessions
You have two options for adding sessions:
Handpick – manually select specific dates for your sessions
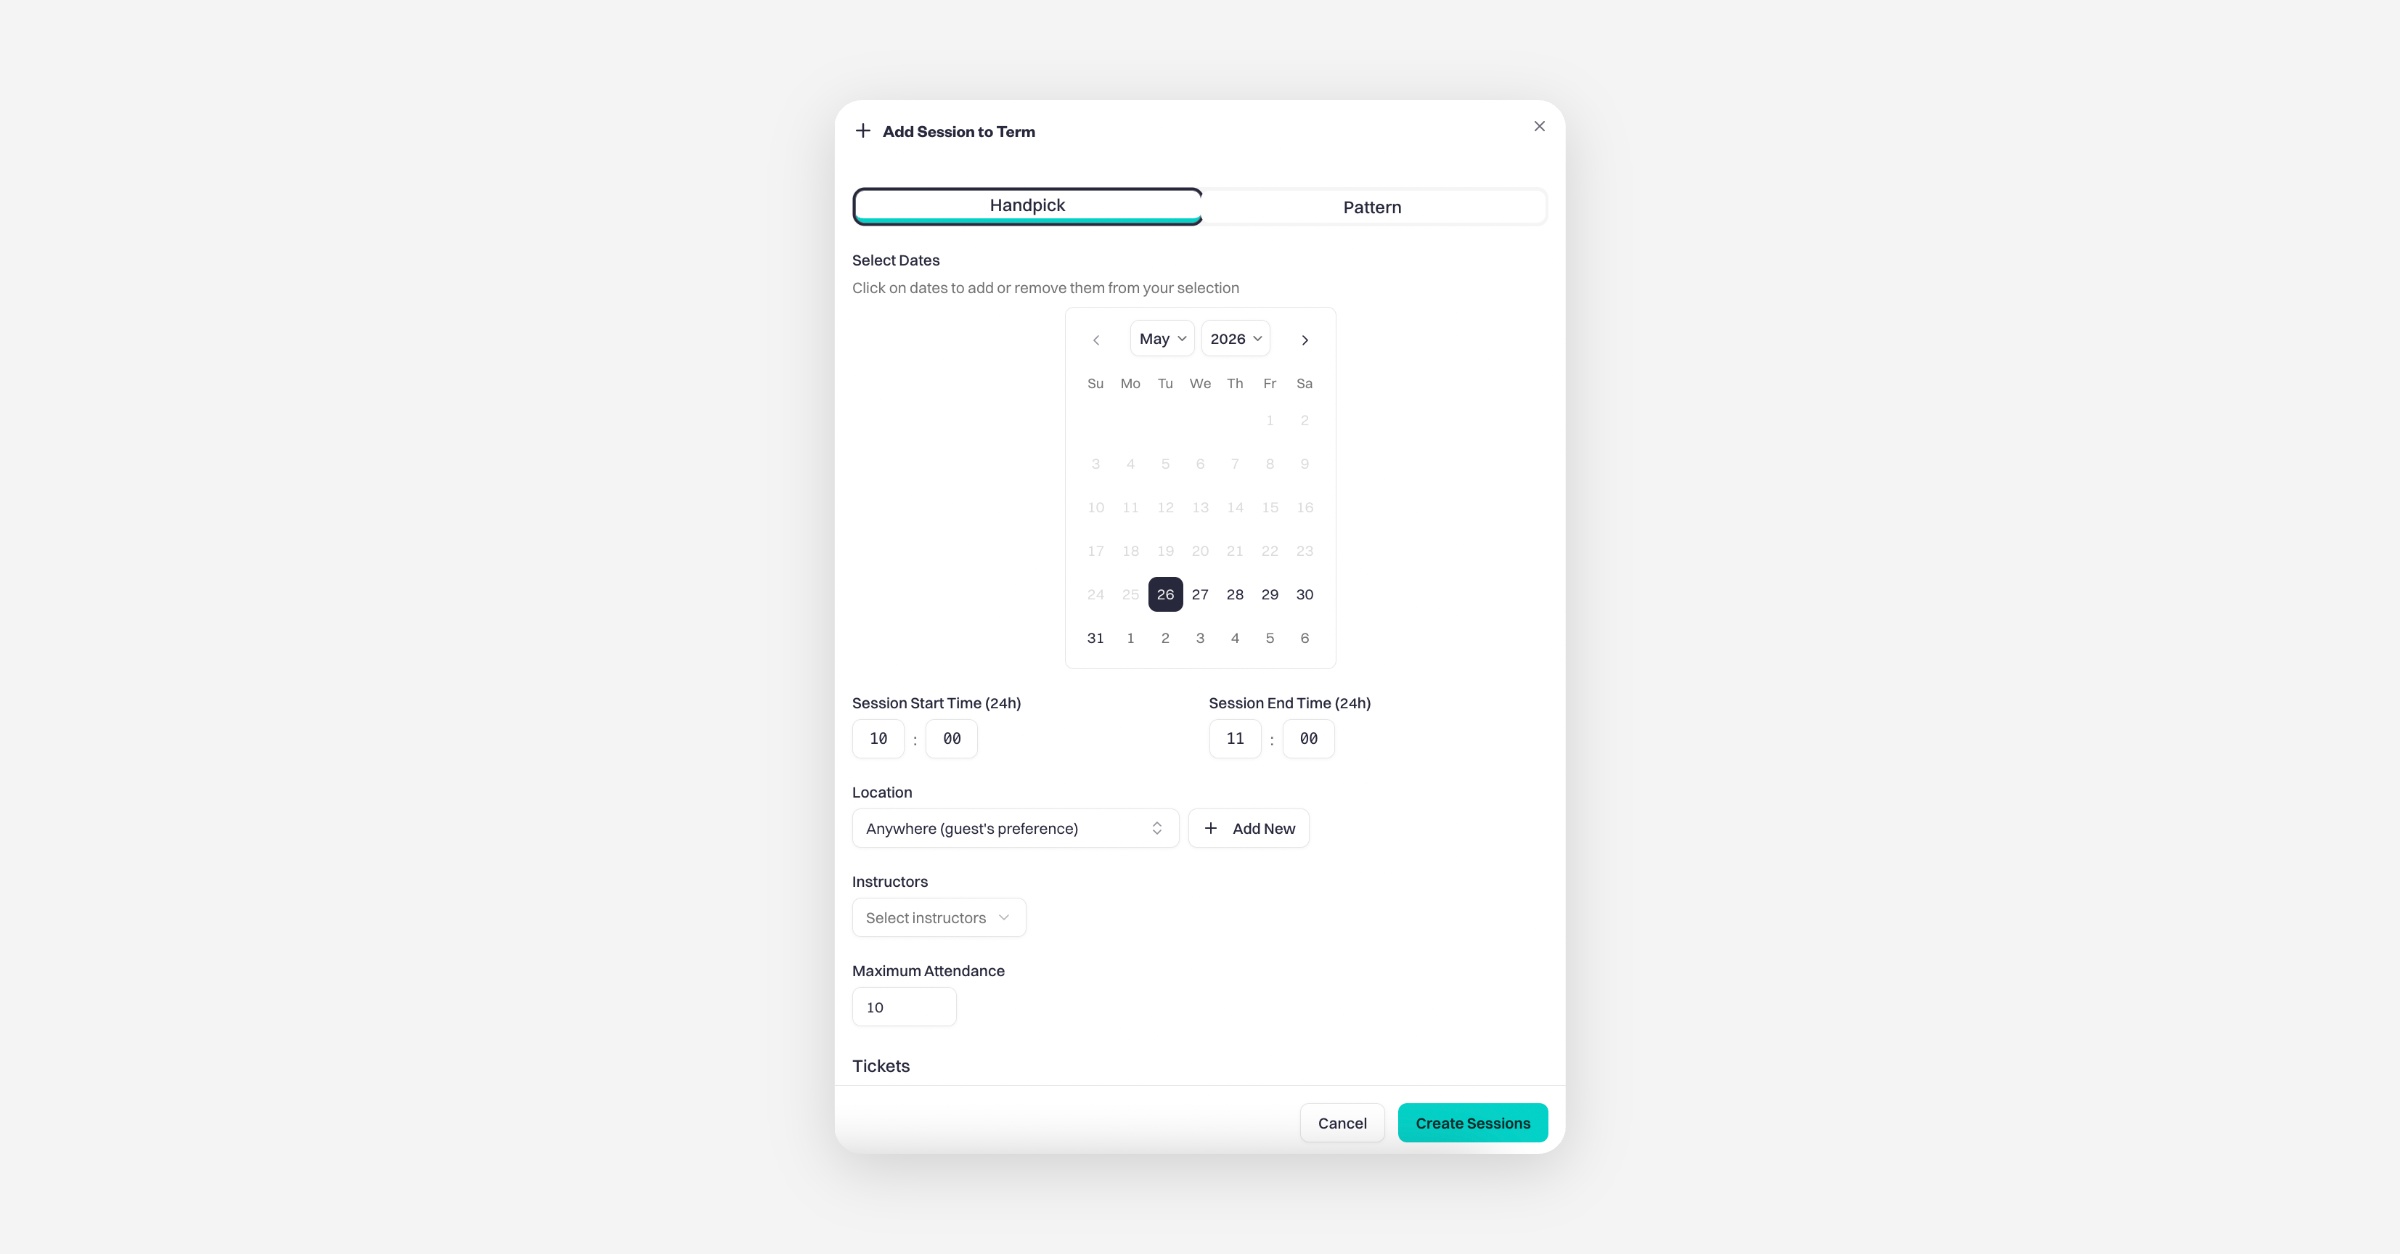
Pattern – create repeating sessions on a set schedule (e.g. weekly)
Step 5: Manage Your Term Sessions
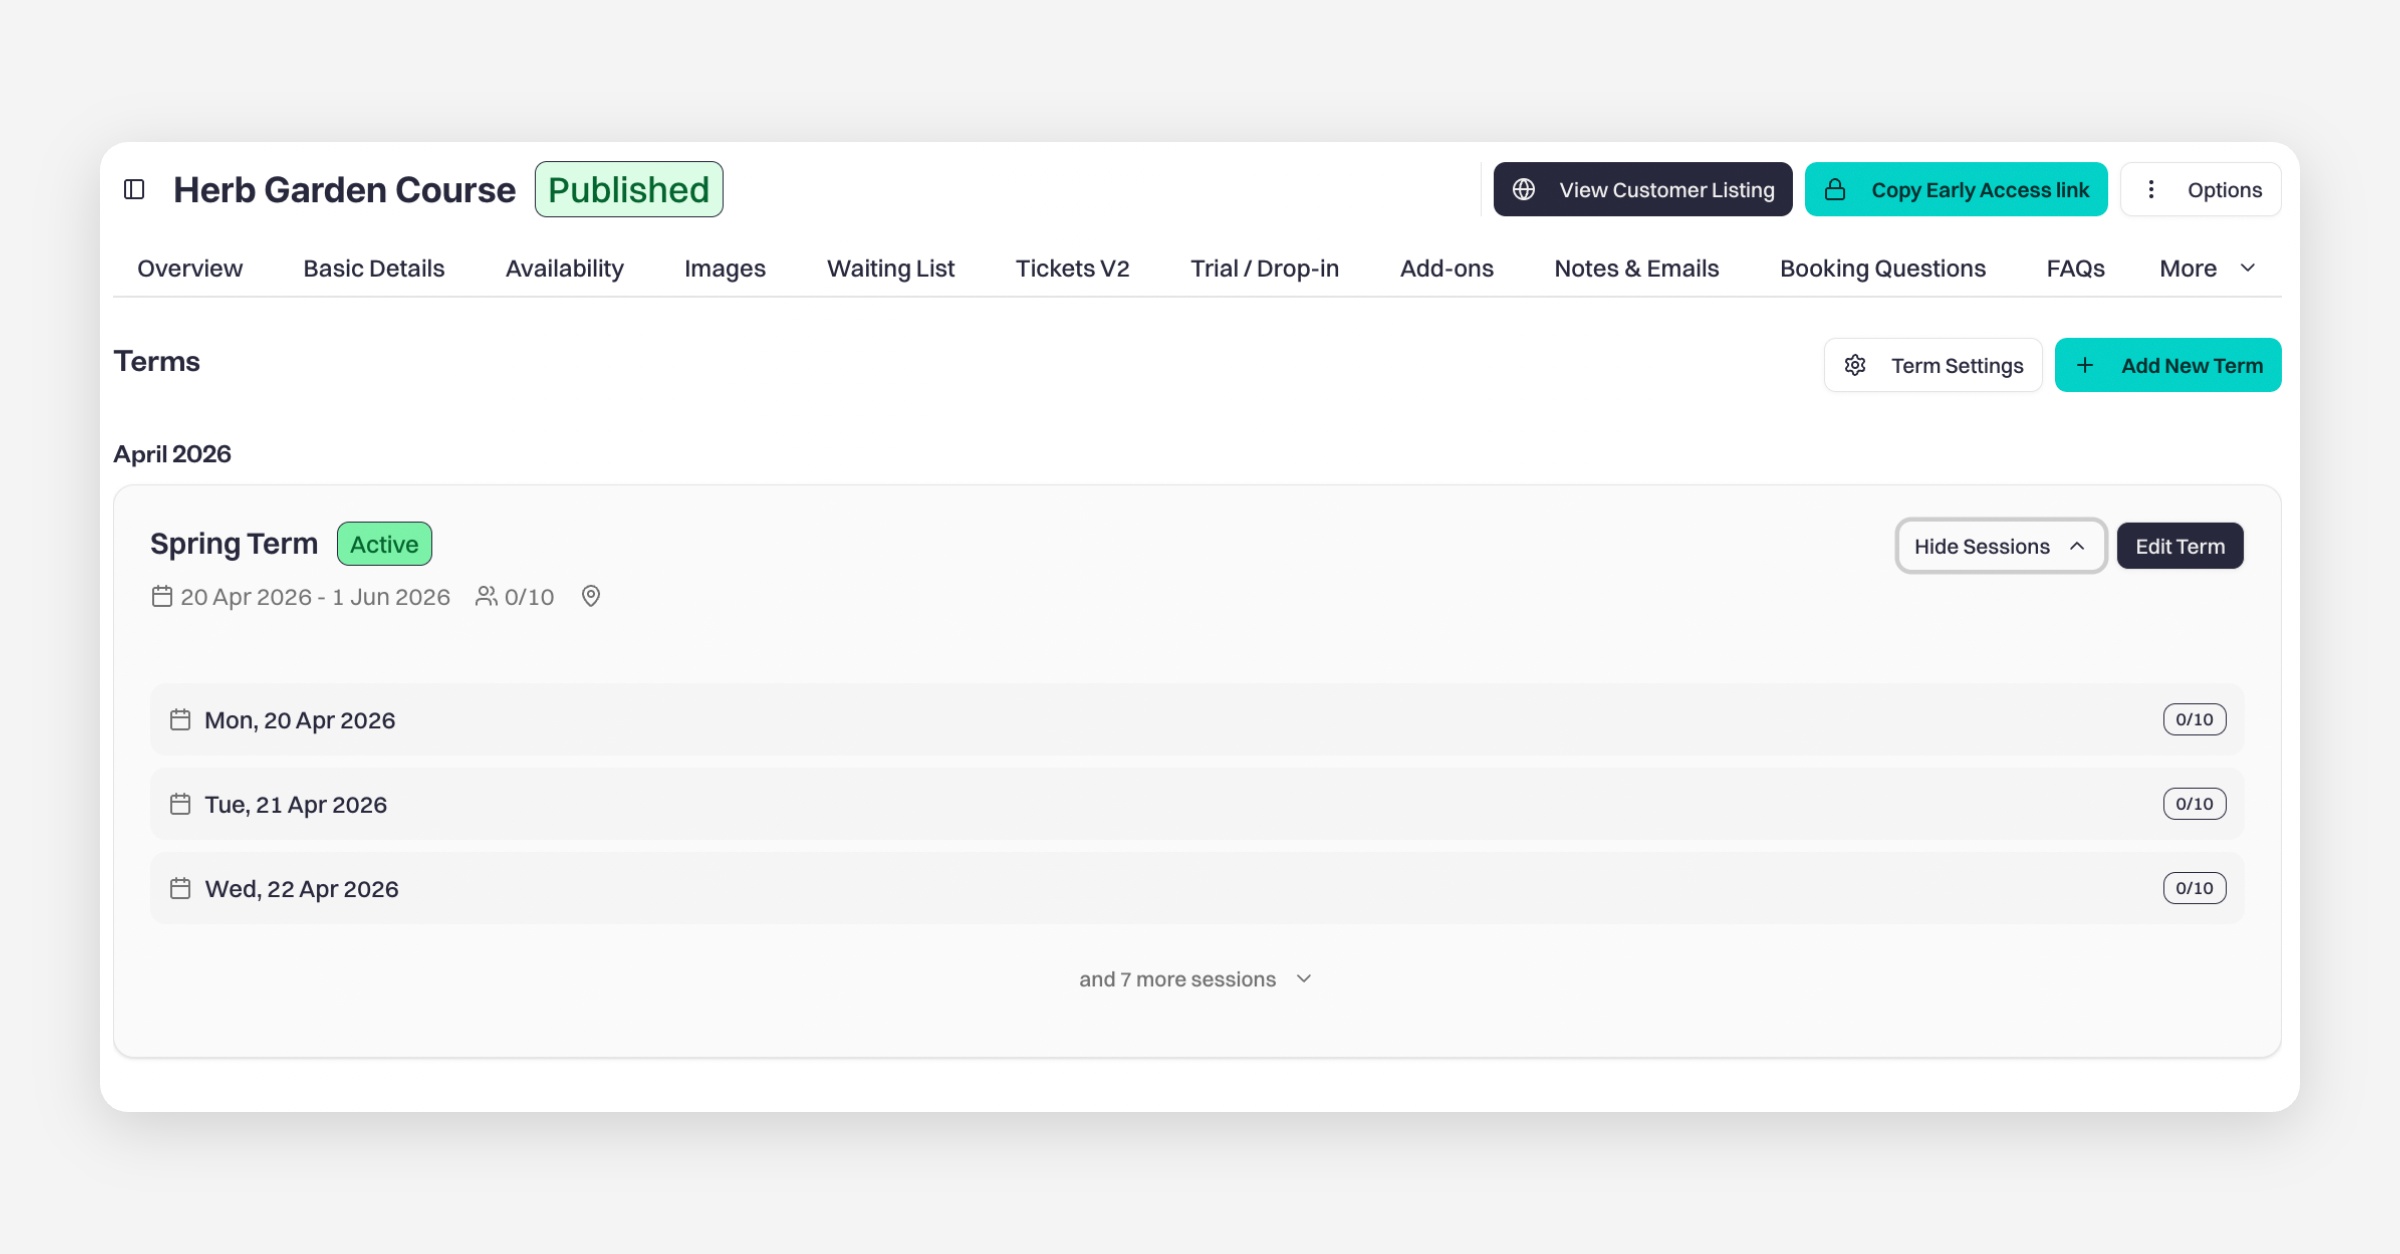
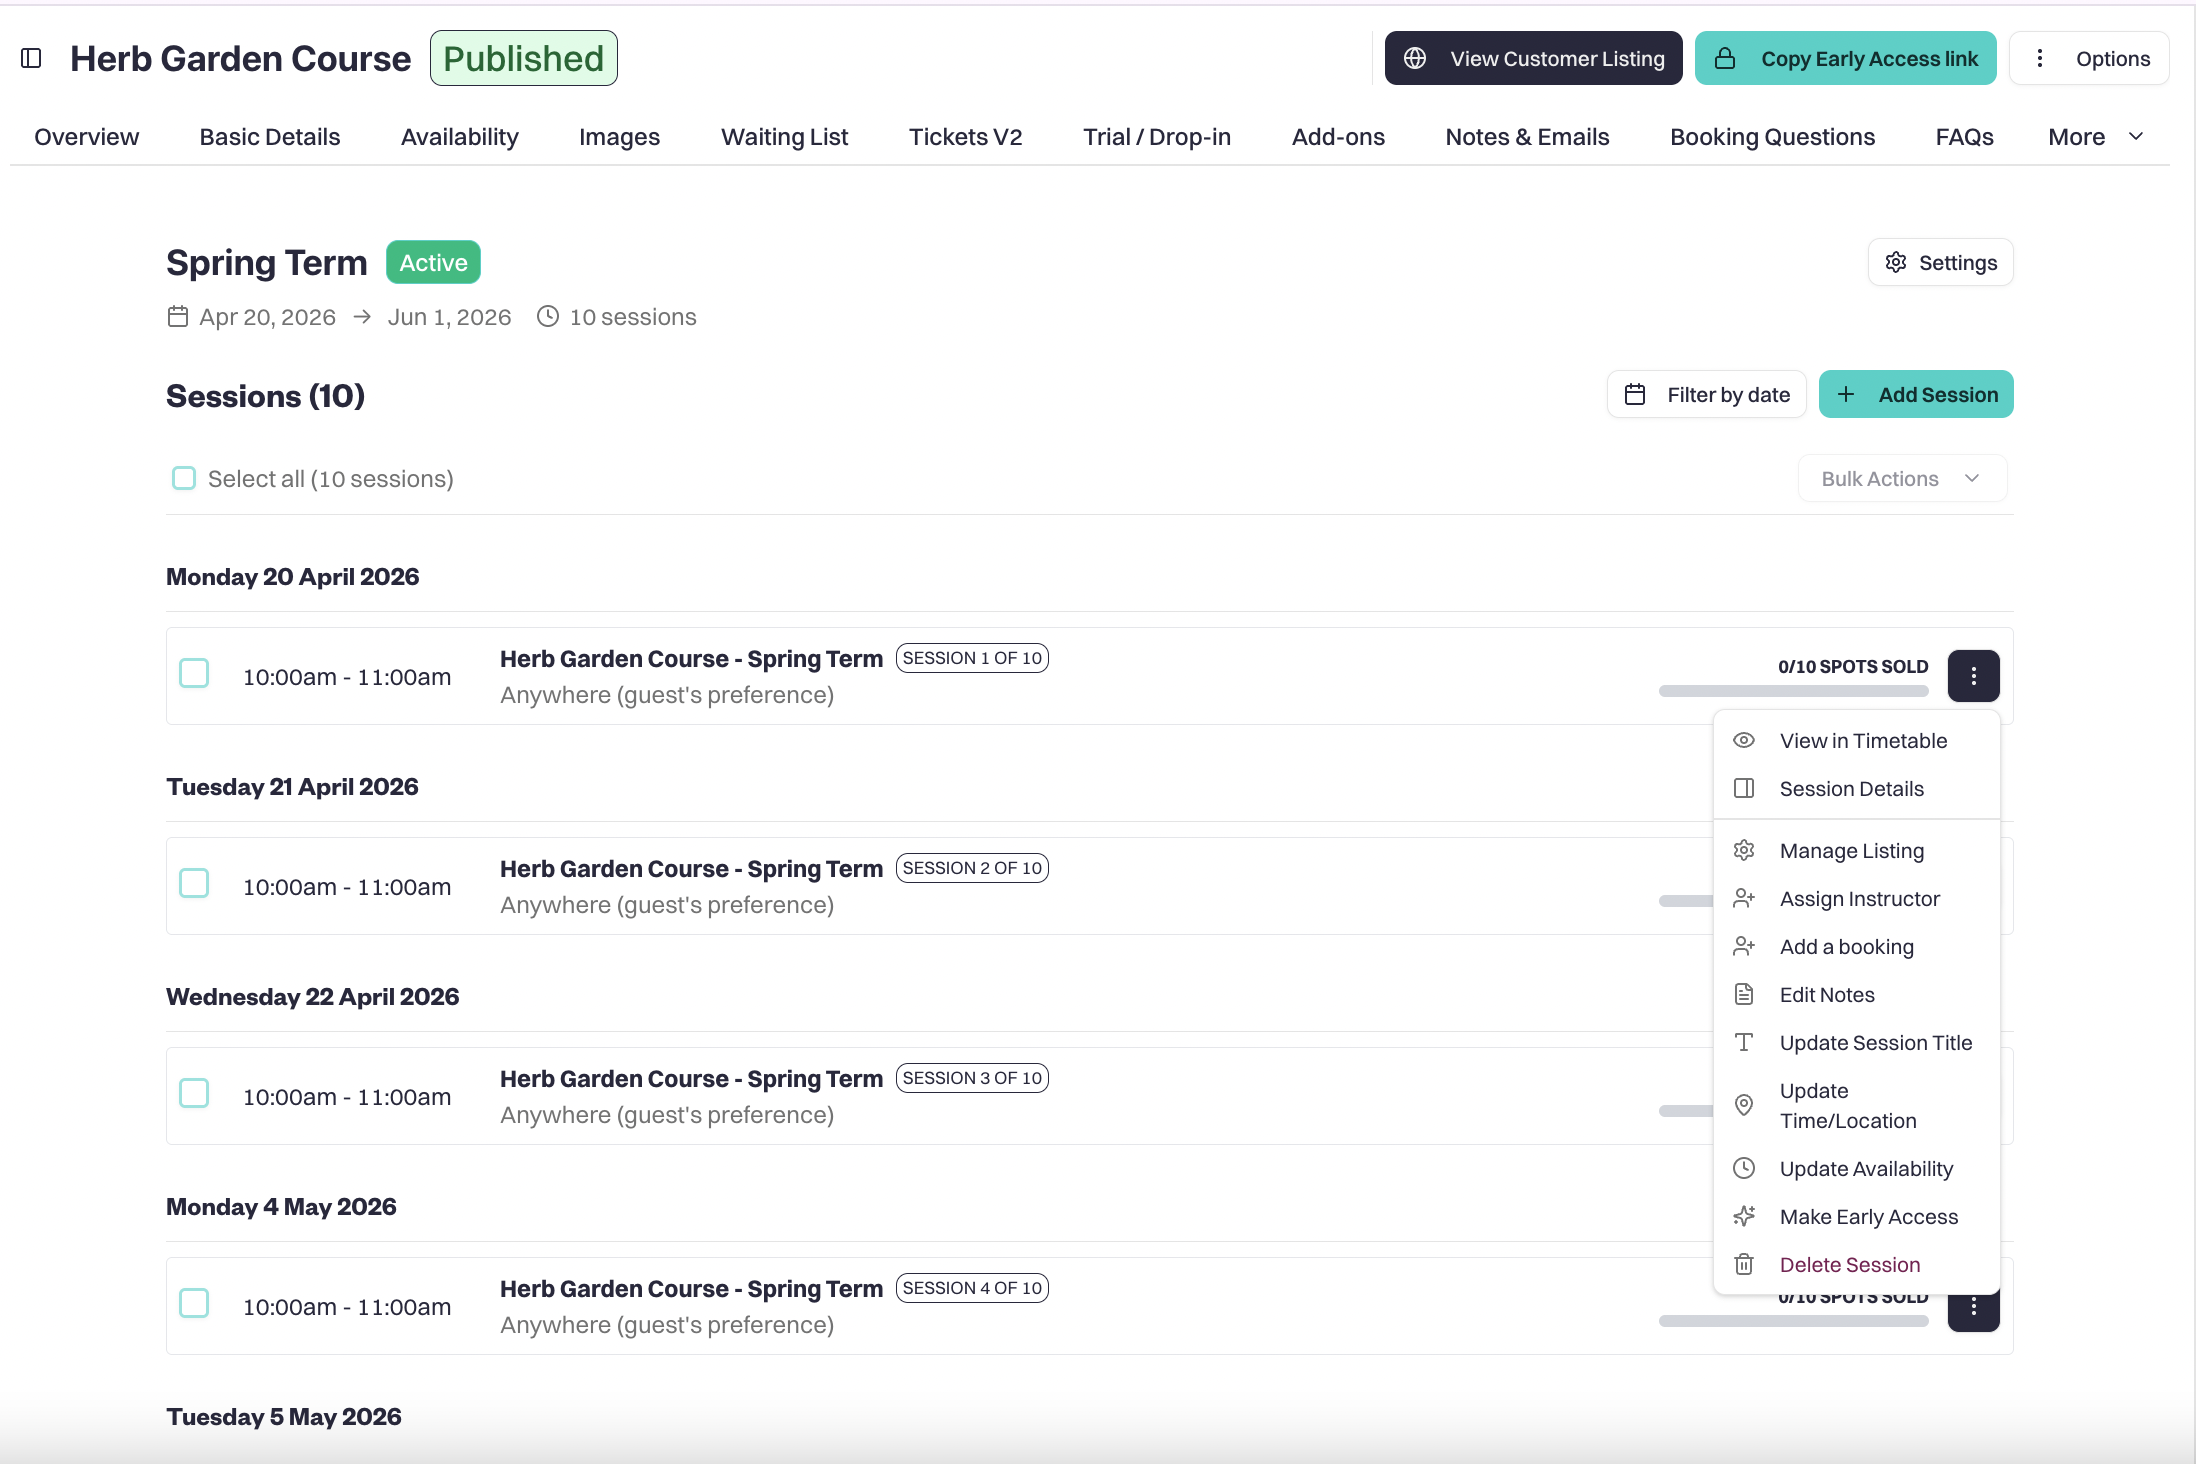
In the Availability tab, click Edit on the term you wish to update. From there, you will be able to:
Edit each session individually
Add additional sessions
Remove sessions
Trial/Drop-in tab
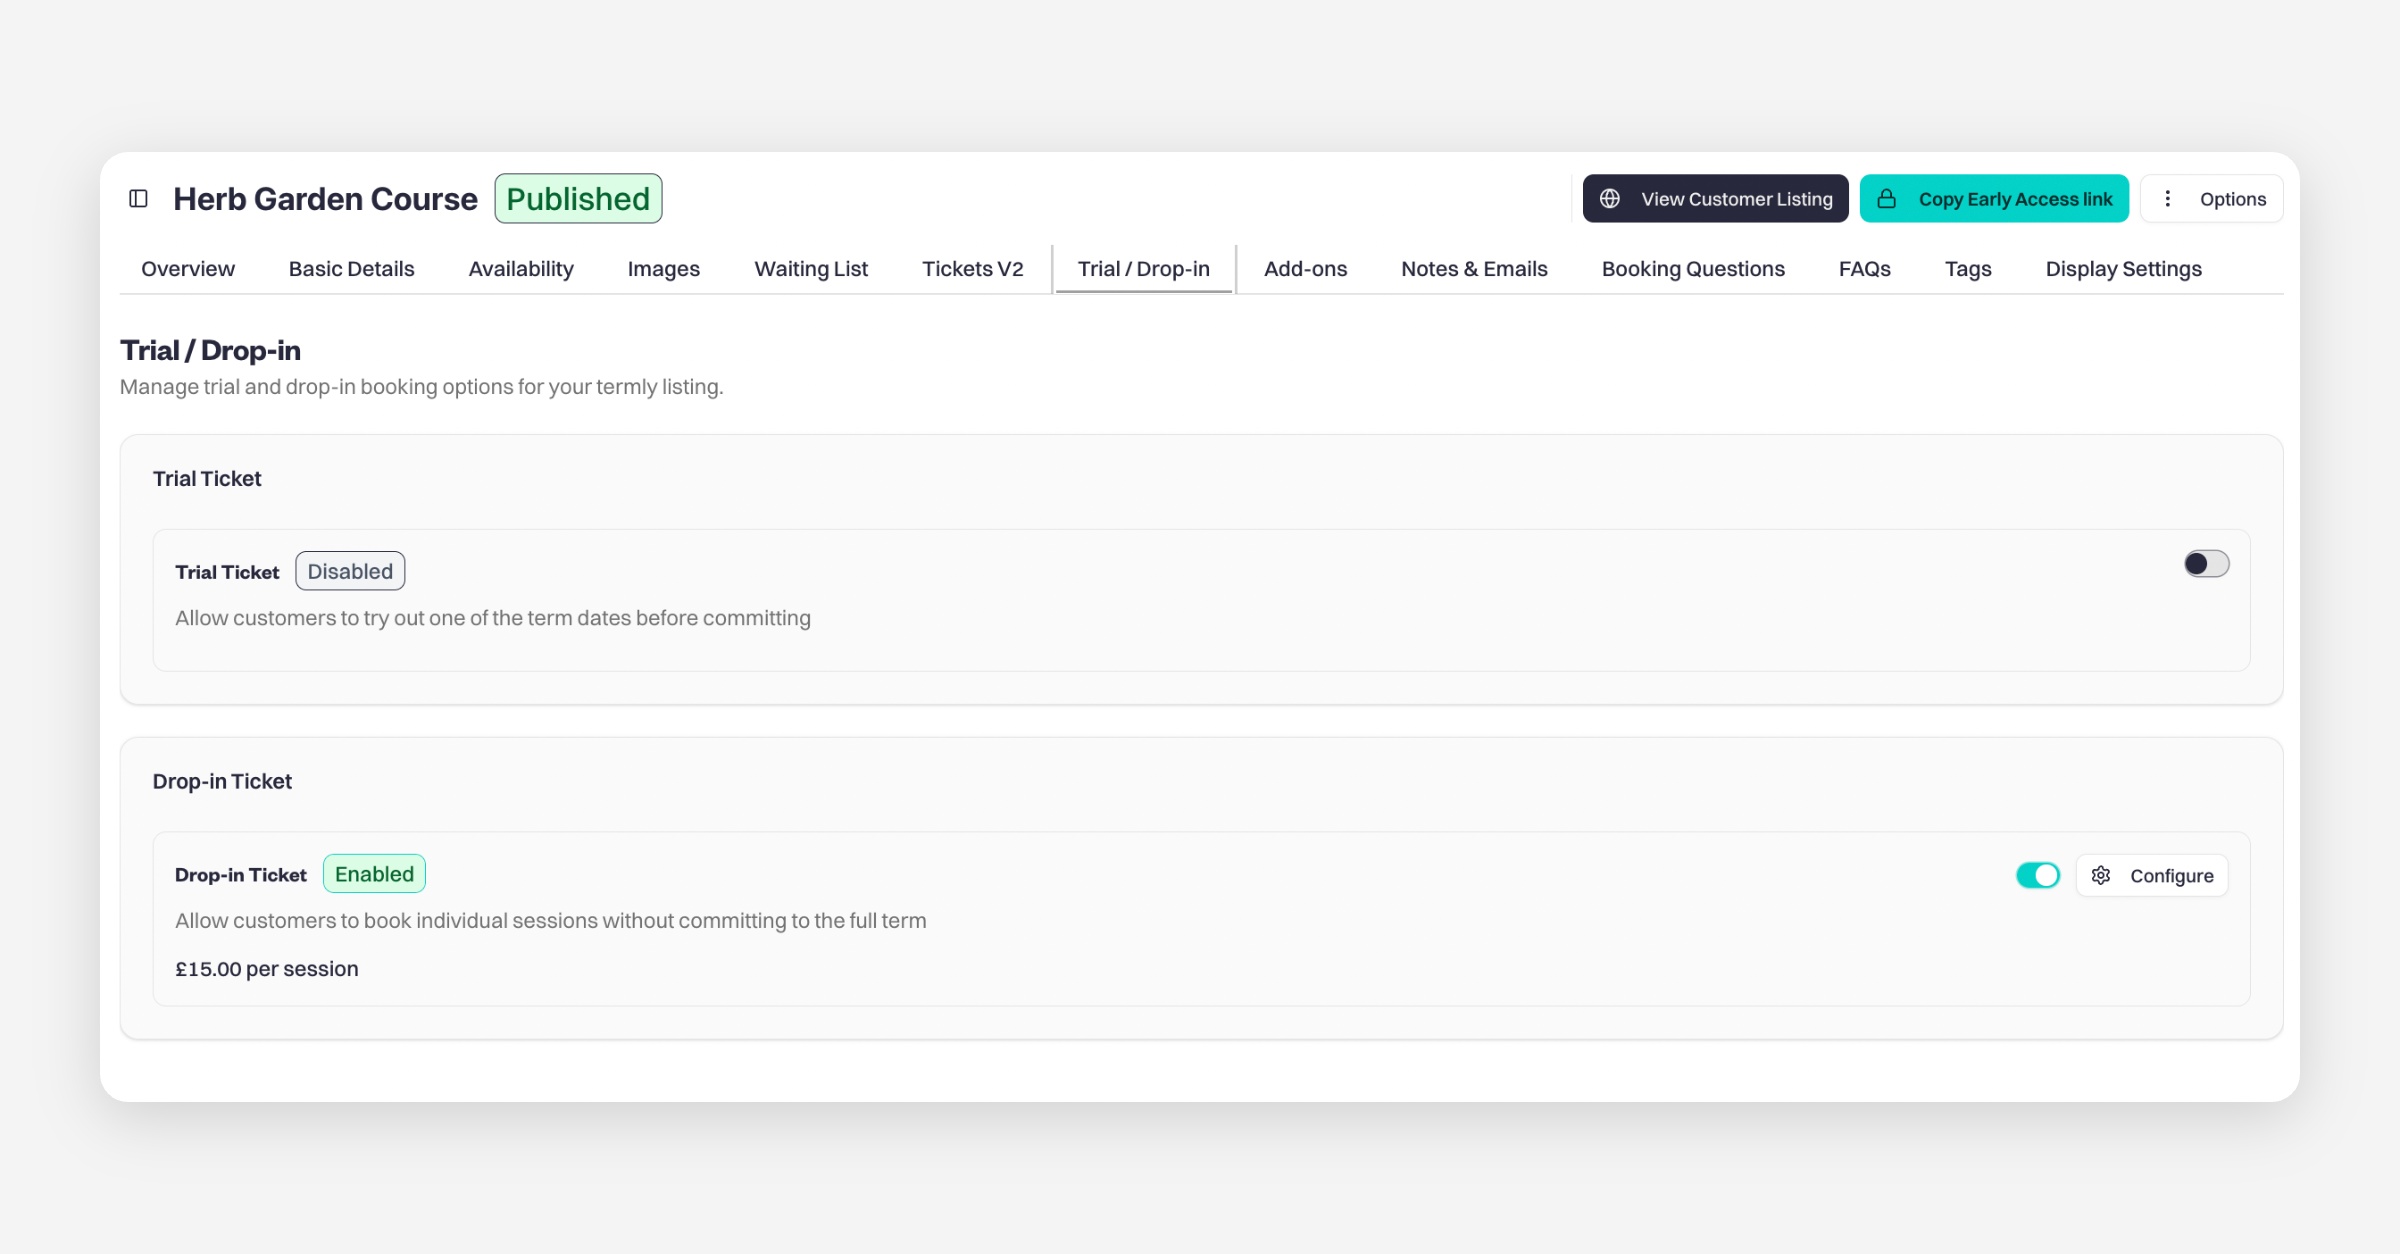
If you go to the Trial/Drop-in tab, you can enable drop-ins and trials for all terms across the listing.
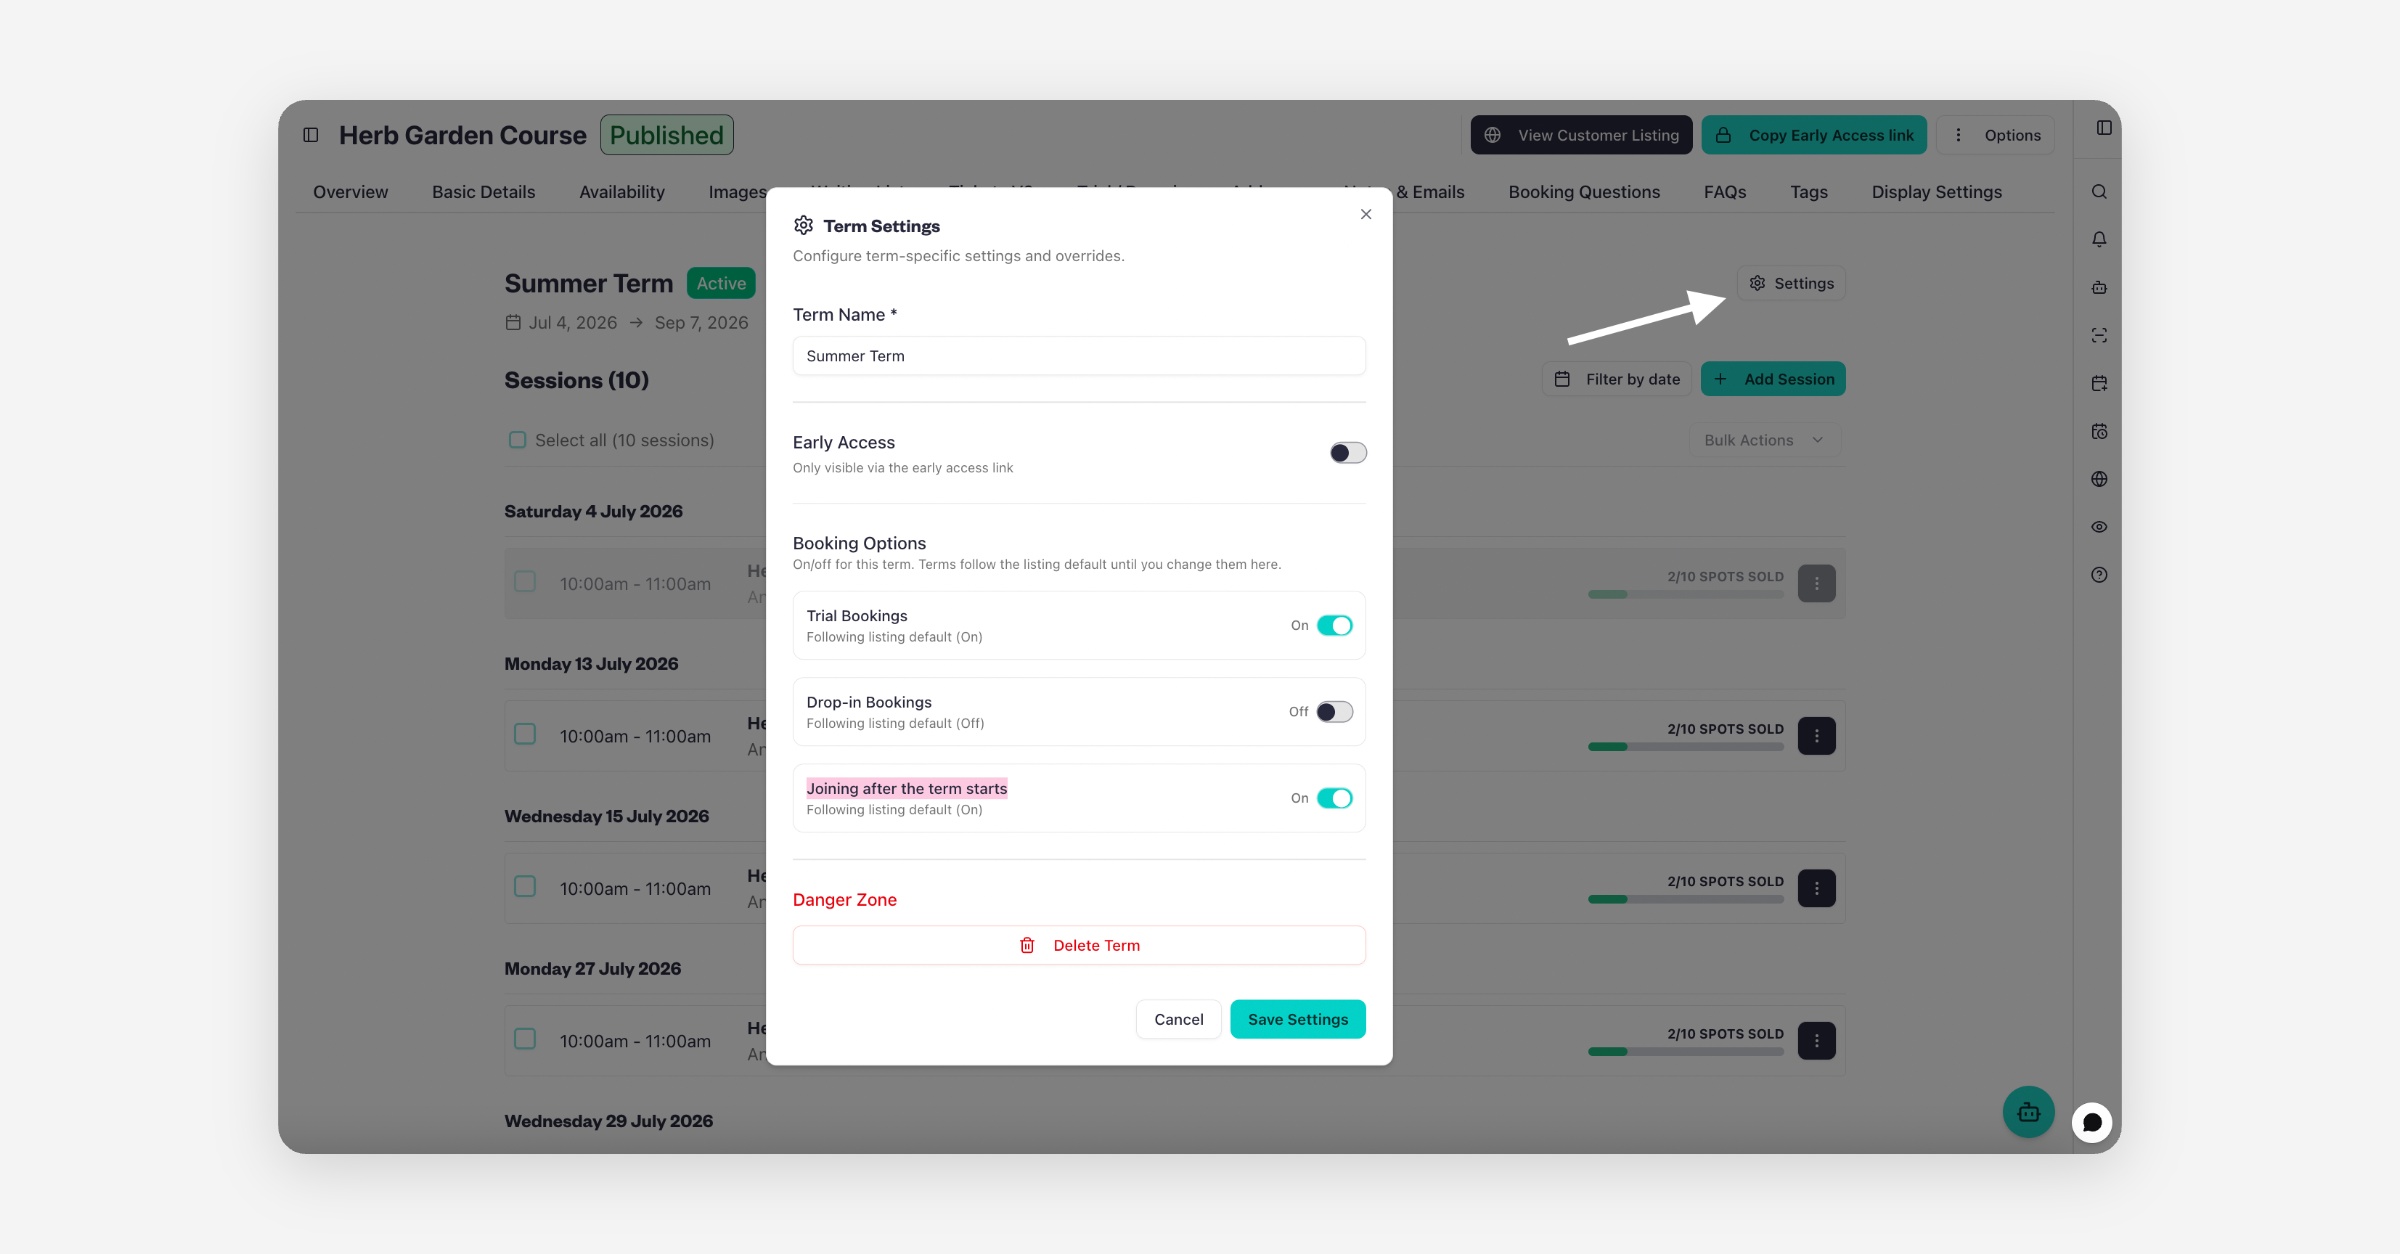
If you want to disable drop-ins or trials for a specific term only, you need to:
Open the specific term
Click Settings
Enable Override
Untick the option to enable drop-ins or trials for that term/event
For pro-rata pricing (Joining after the term starts), this is only managed at the individual term level. To enable it, open the specific term, go to Settings, and enable Pro-rata pricing there.
Difference between trial and drop in tickets
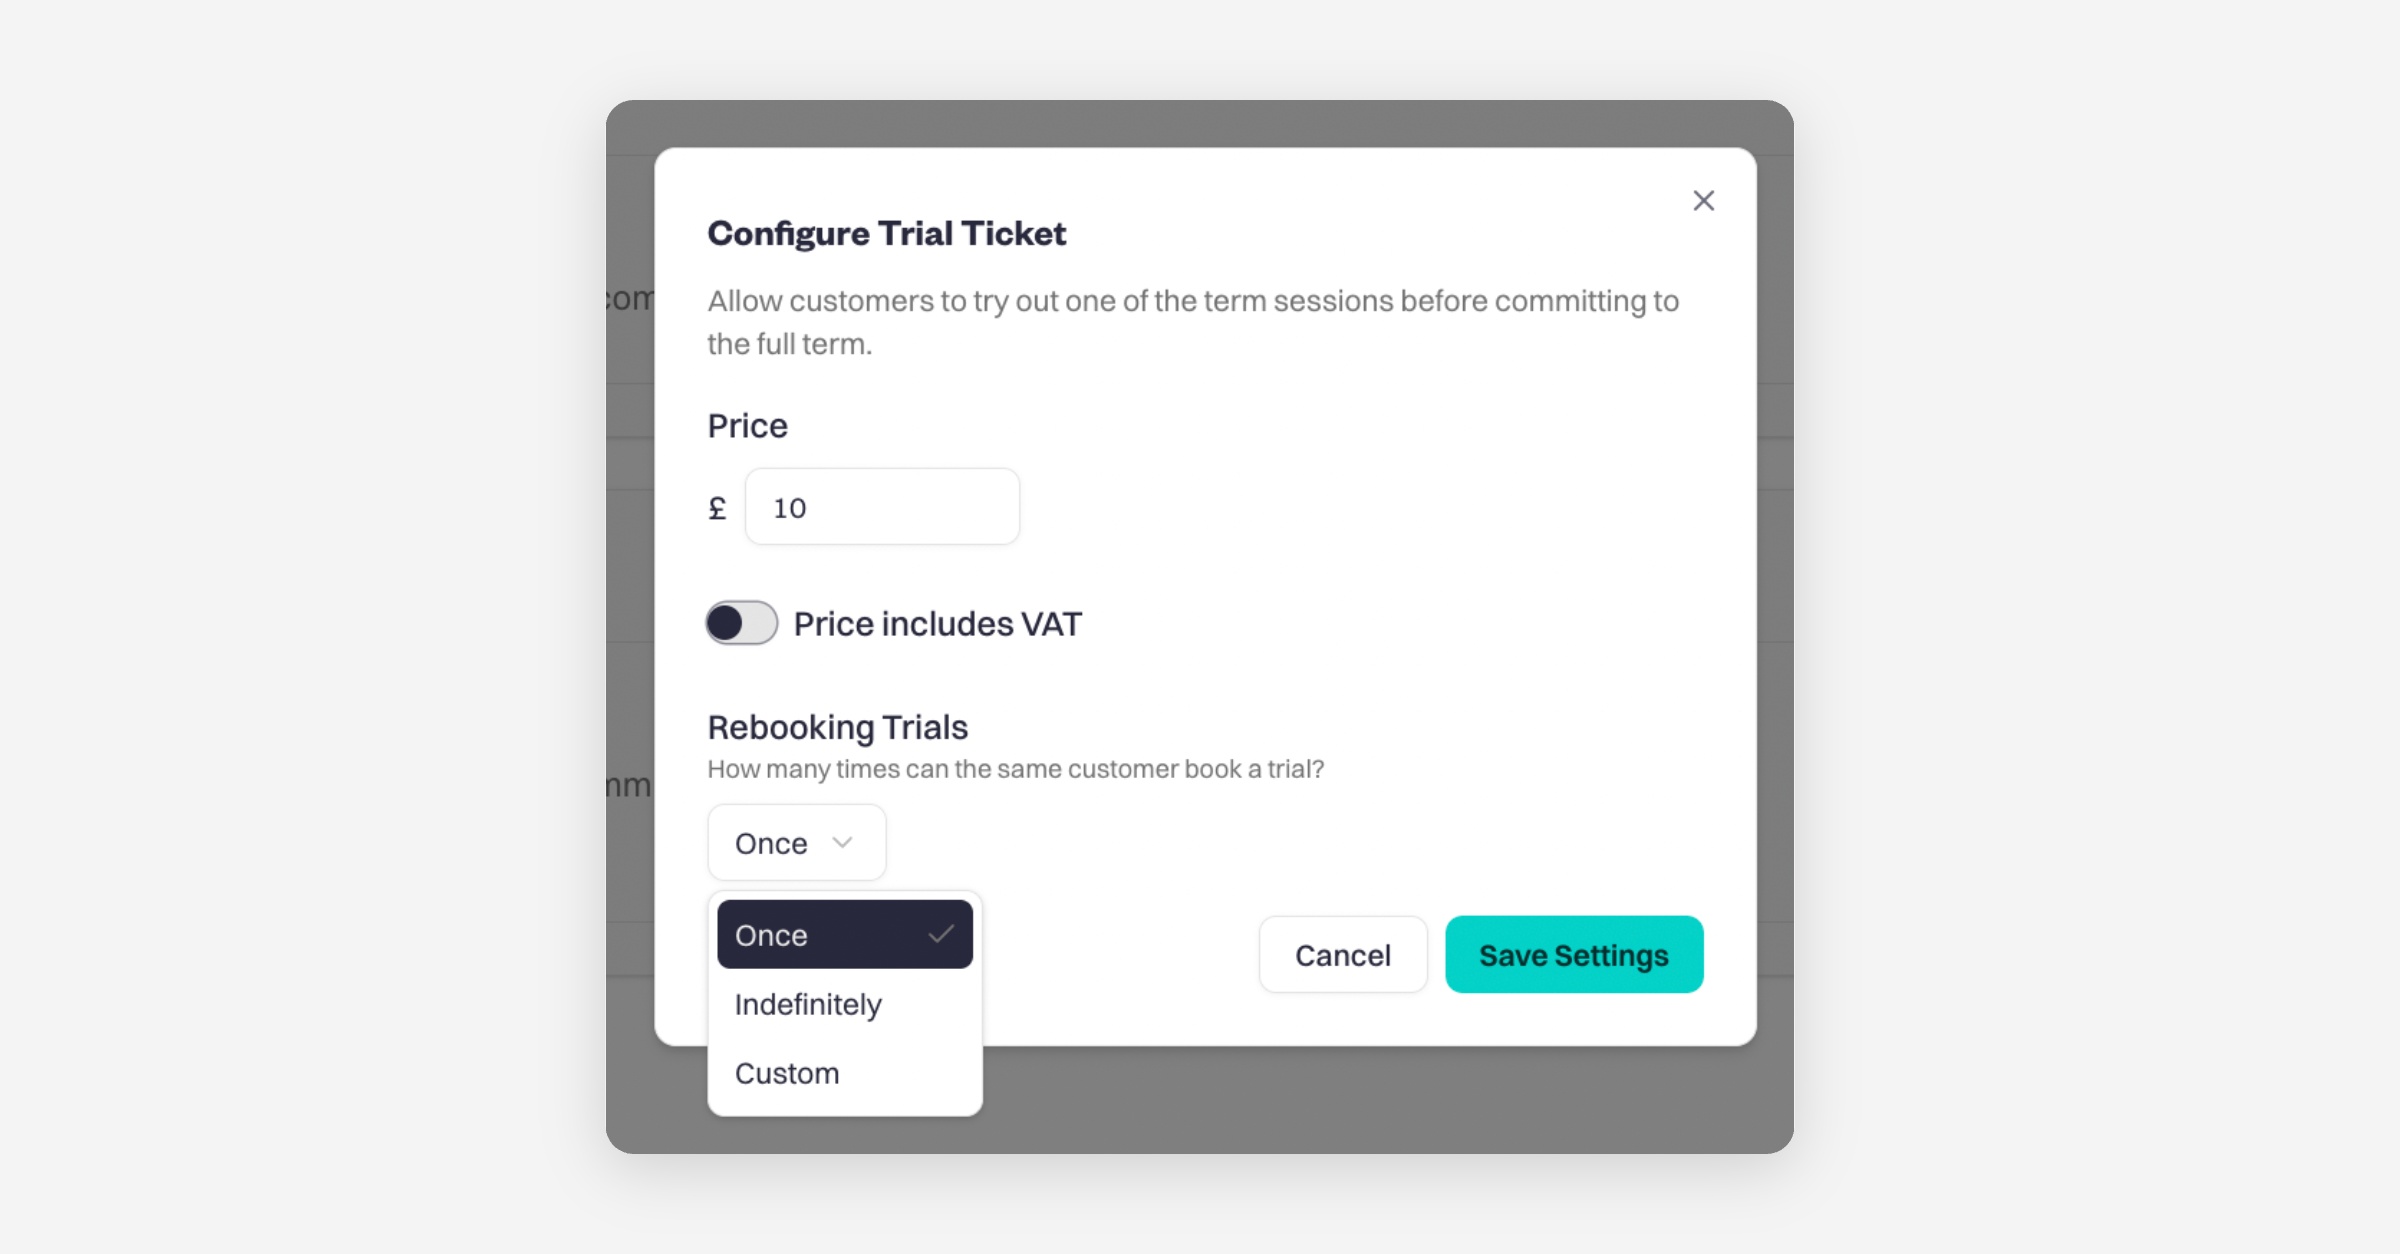
With trial tickets, you can:
Limit how many times the same customer can book
Choose which sessions they can attend (all future sessions, the next session only, the next two sessions, or the next three sessions)
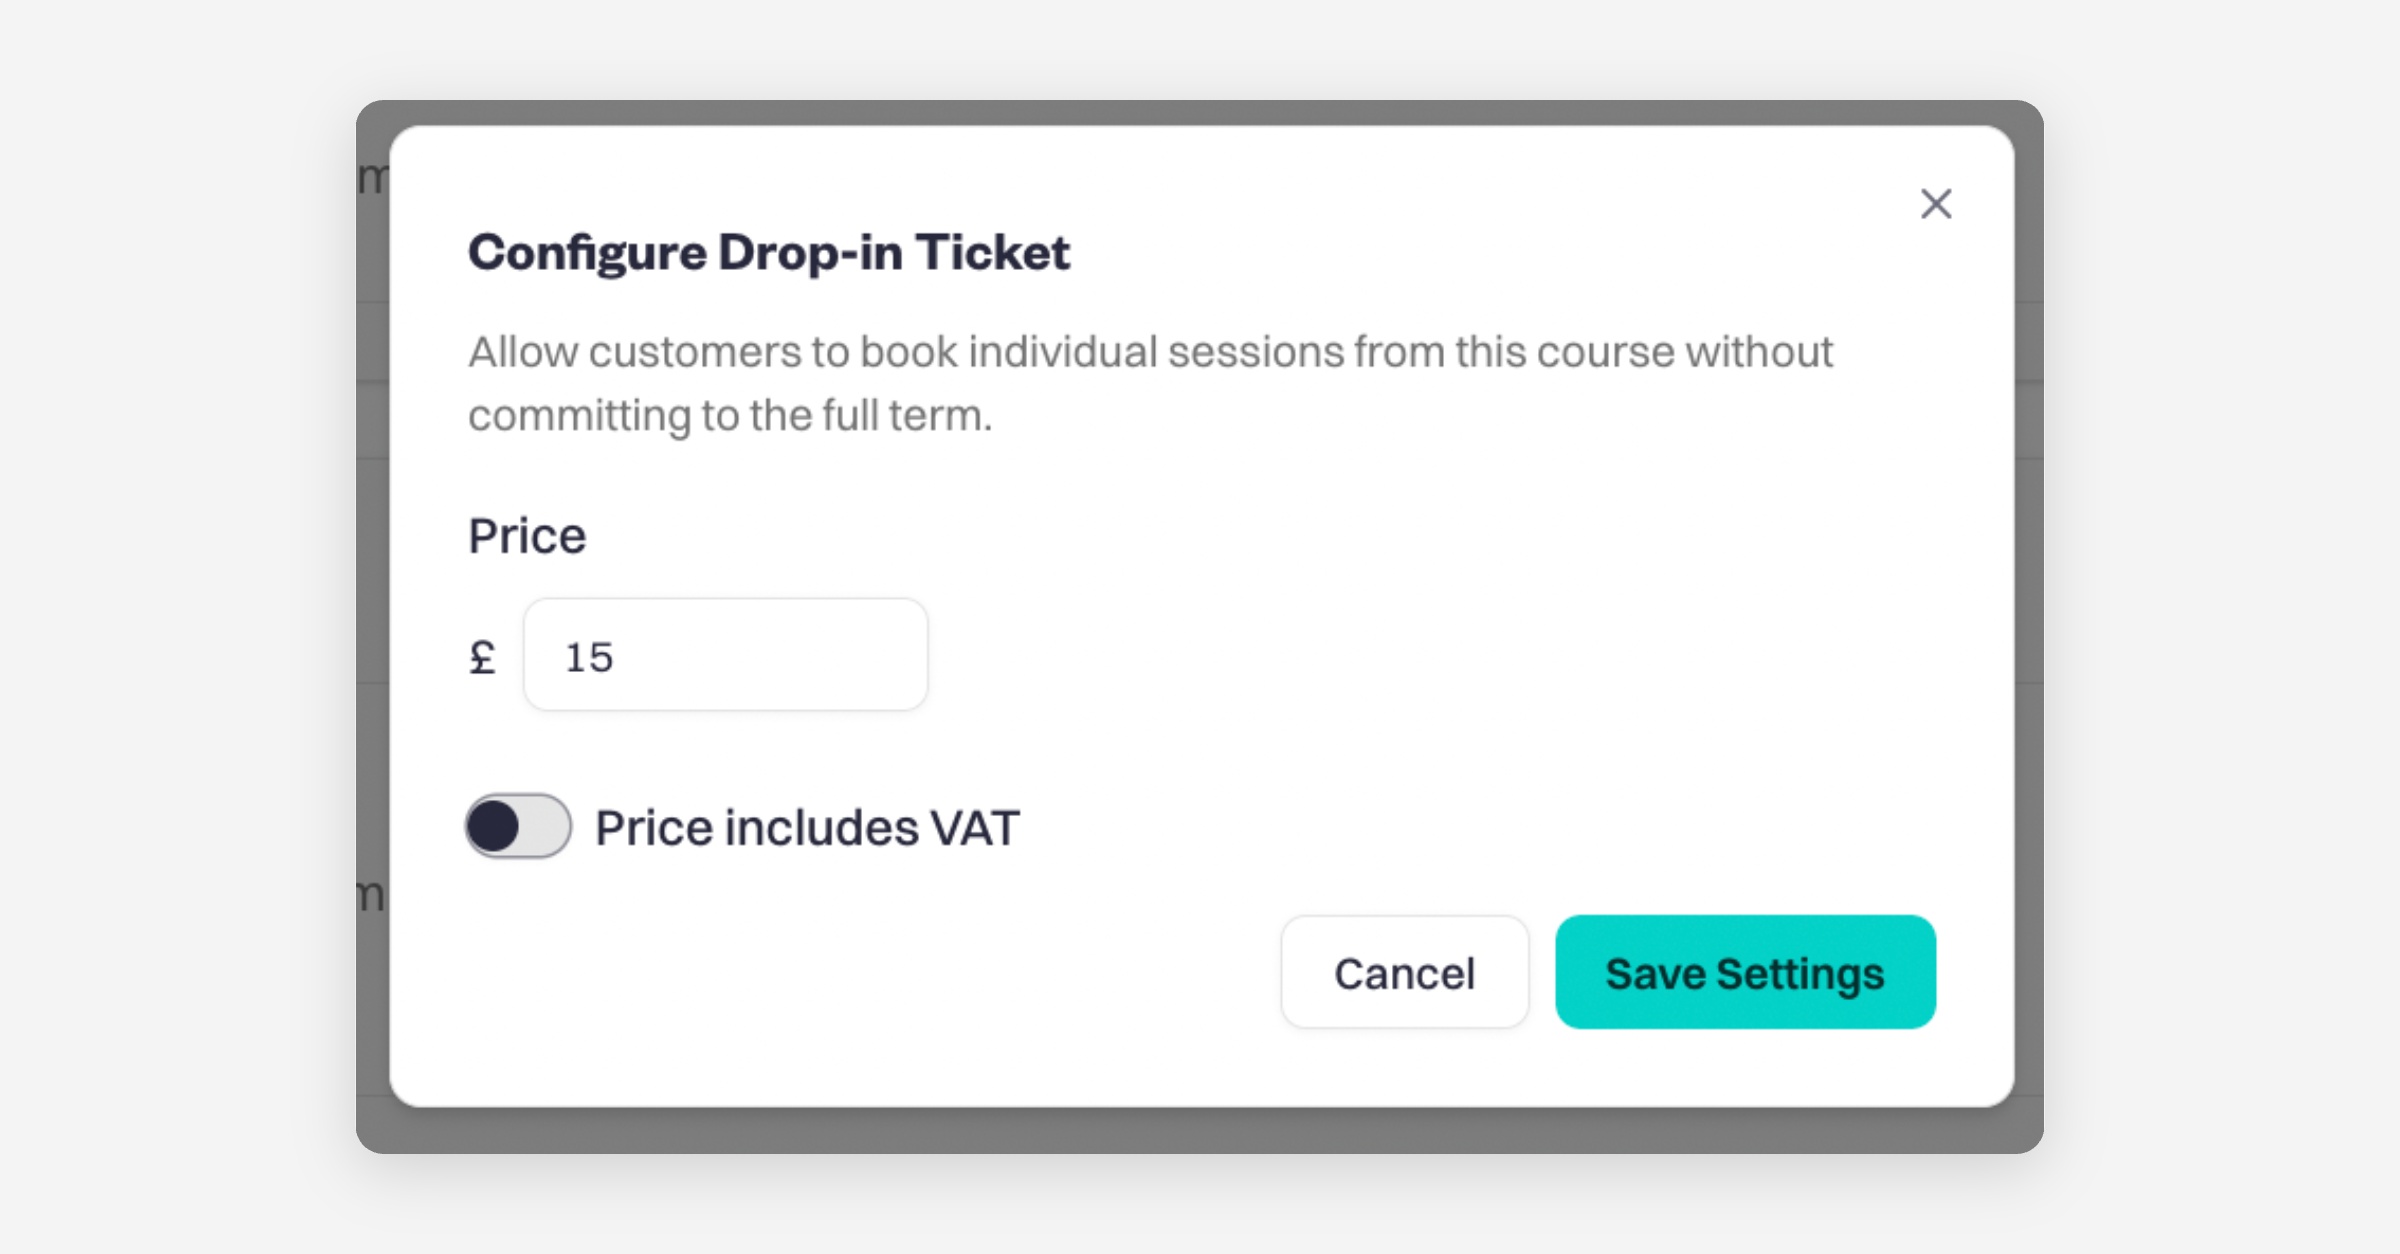
With drop-in tickets, customers can book any available individual session within the term.
Was this helpful?