Docs / Getting Started
How to Add a Regular Event?
Regular events are ideal for one-off classes, workshops, or standalone sessions.
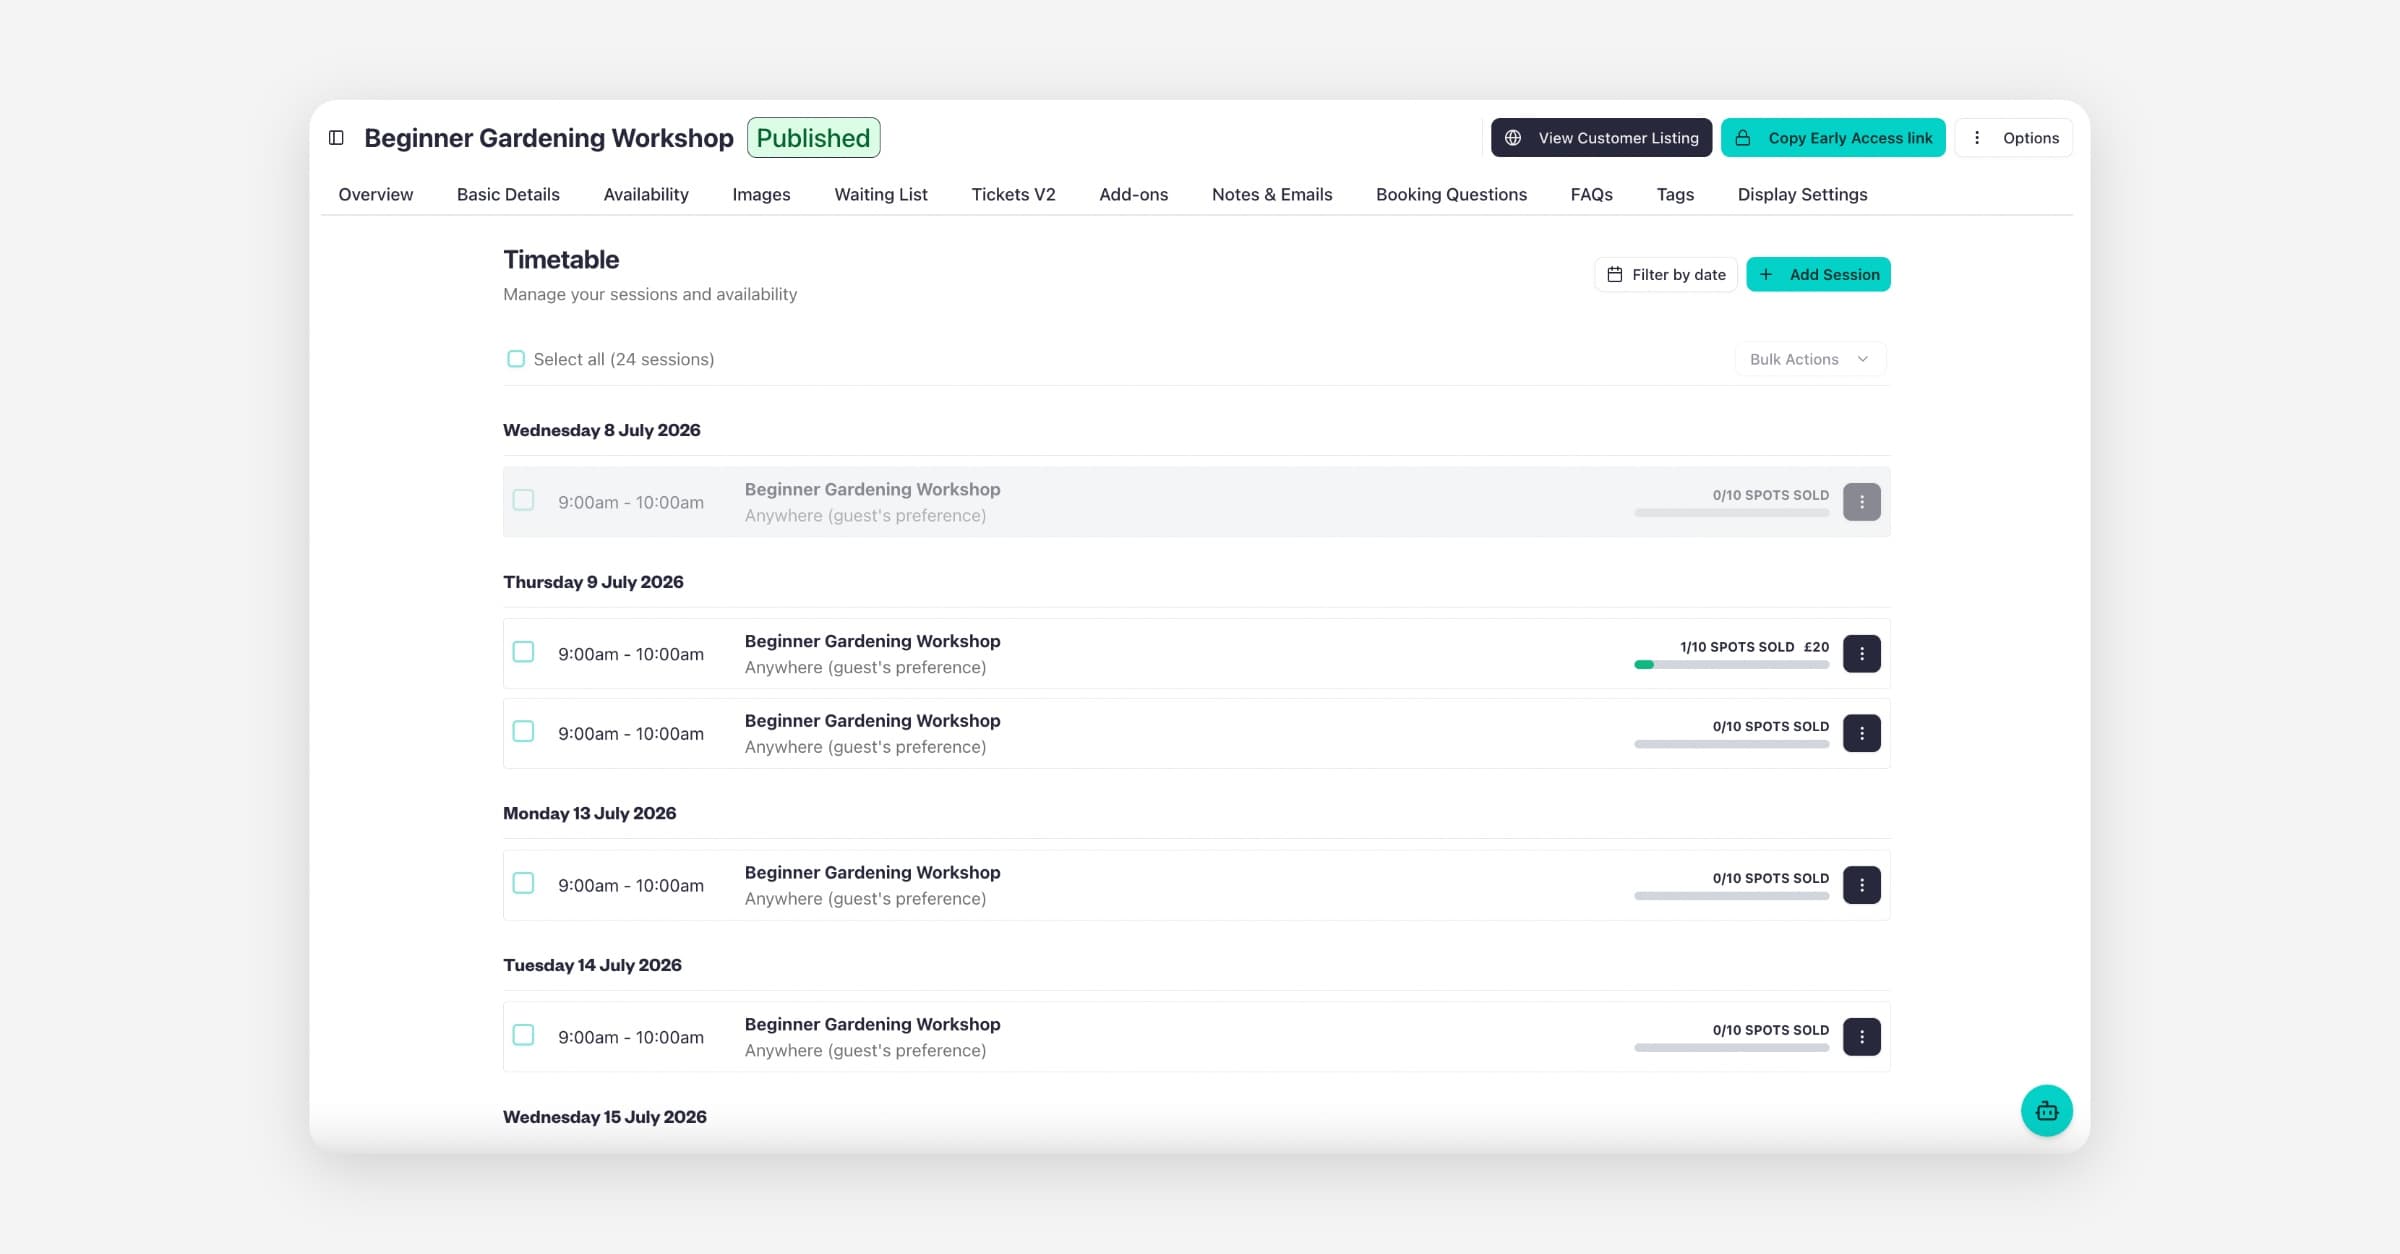
Follow the steps below to create a regular event on Baluu.
Create a Regular Listing
Go to Services and select Listings
Click Add a listing
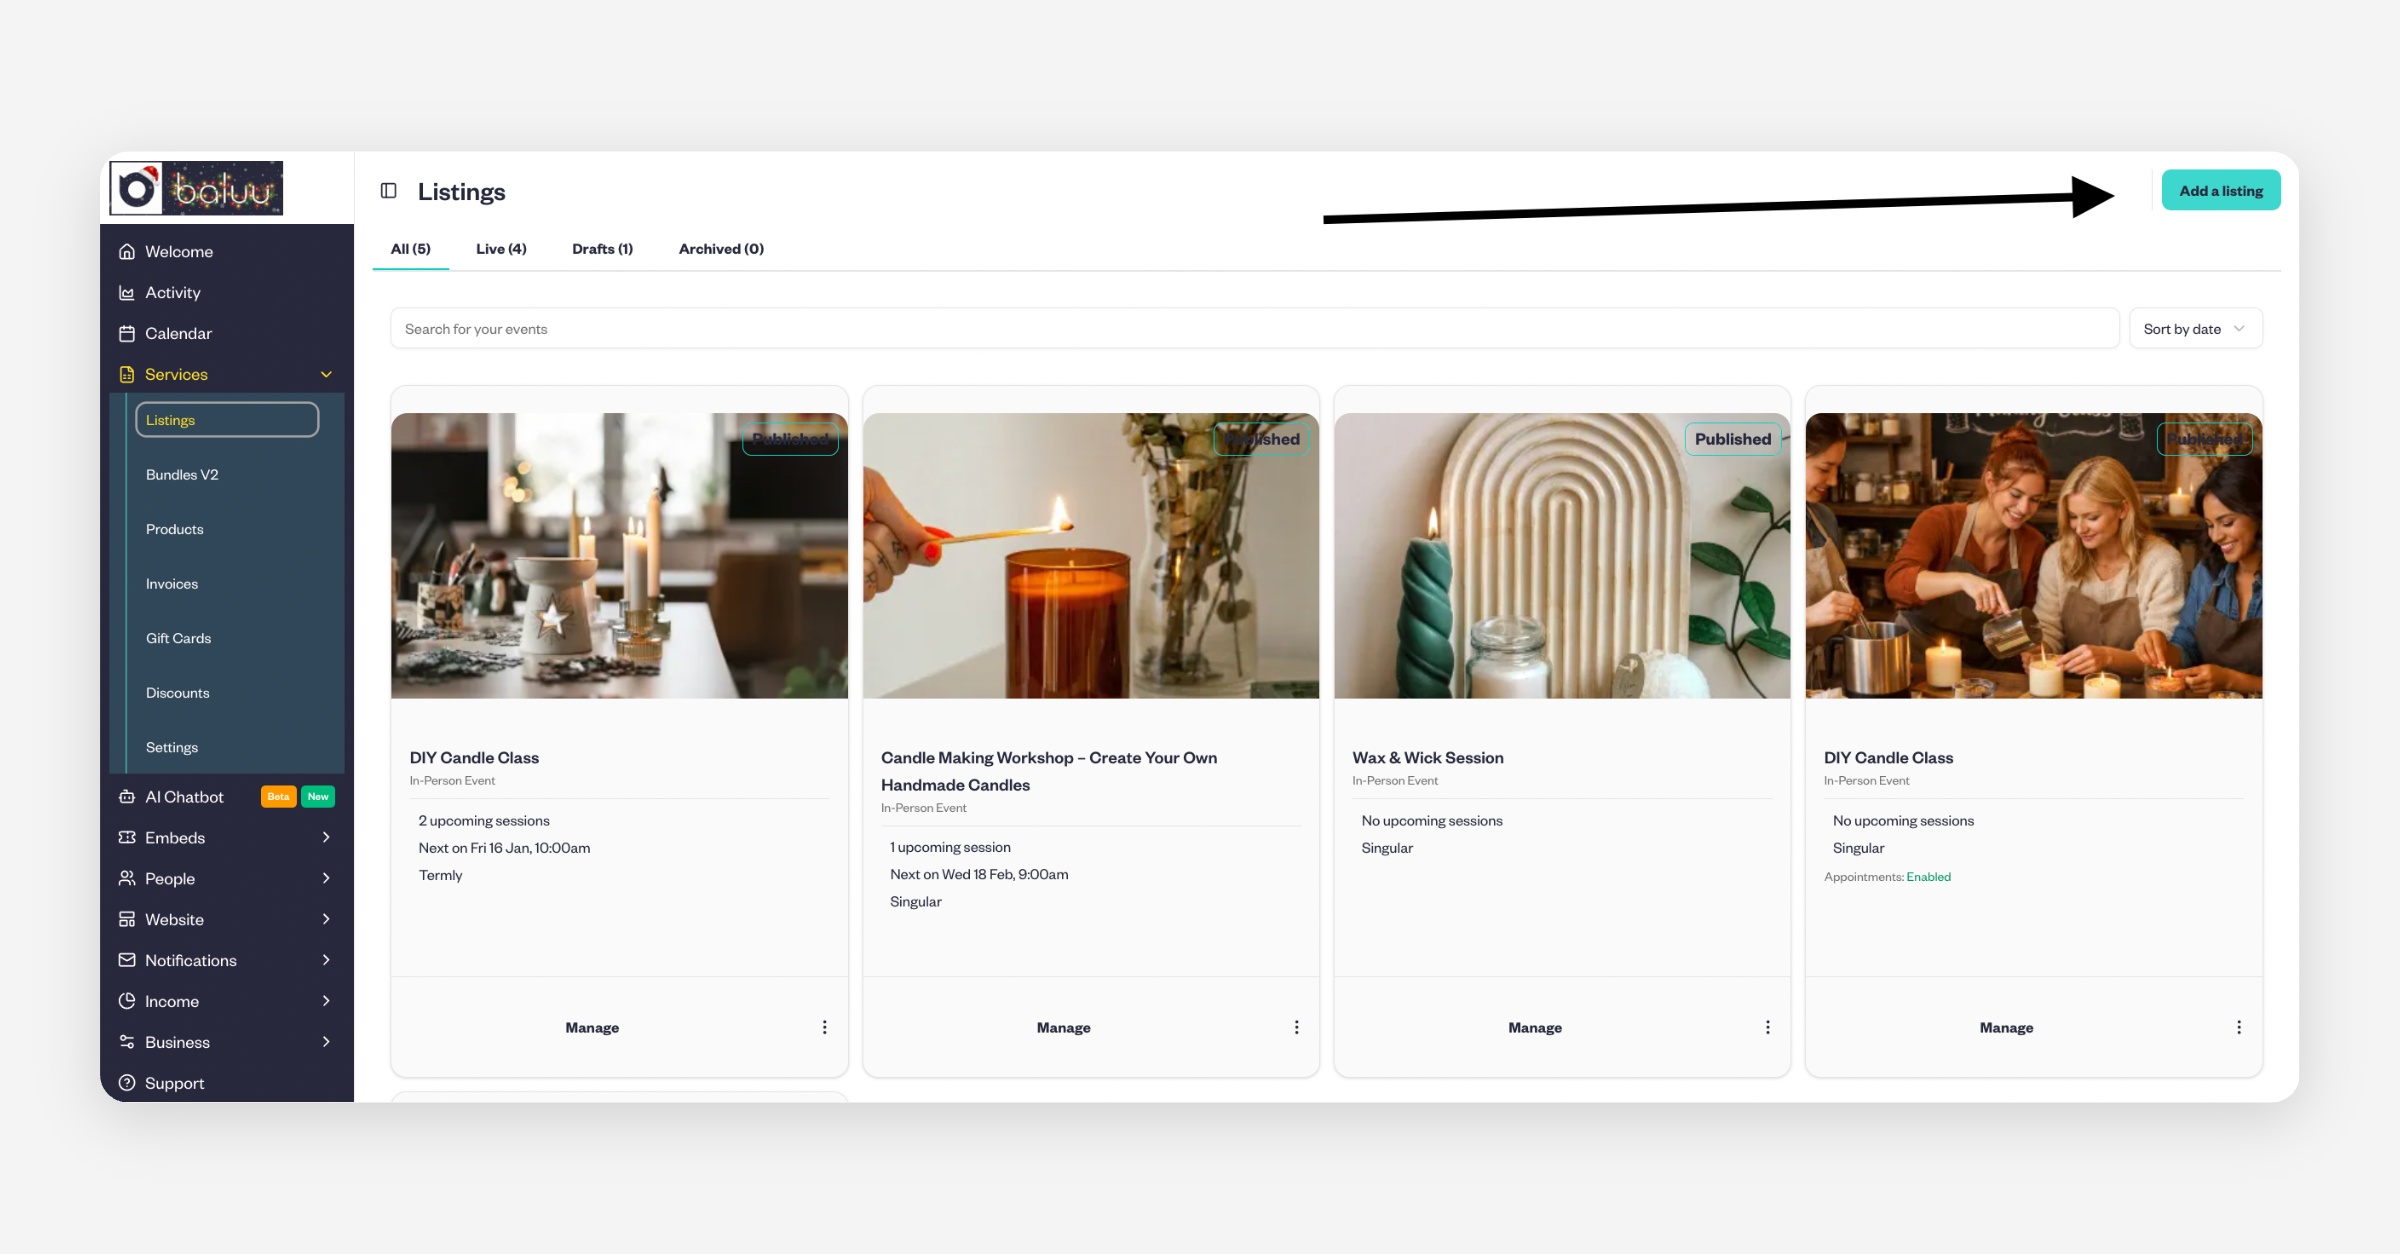
You can either:
choose a prepared template such as the Workshop example, or
start from scratch by selecting a blank listing.
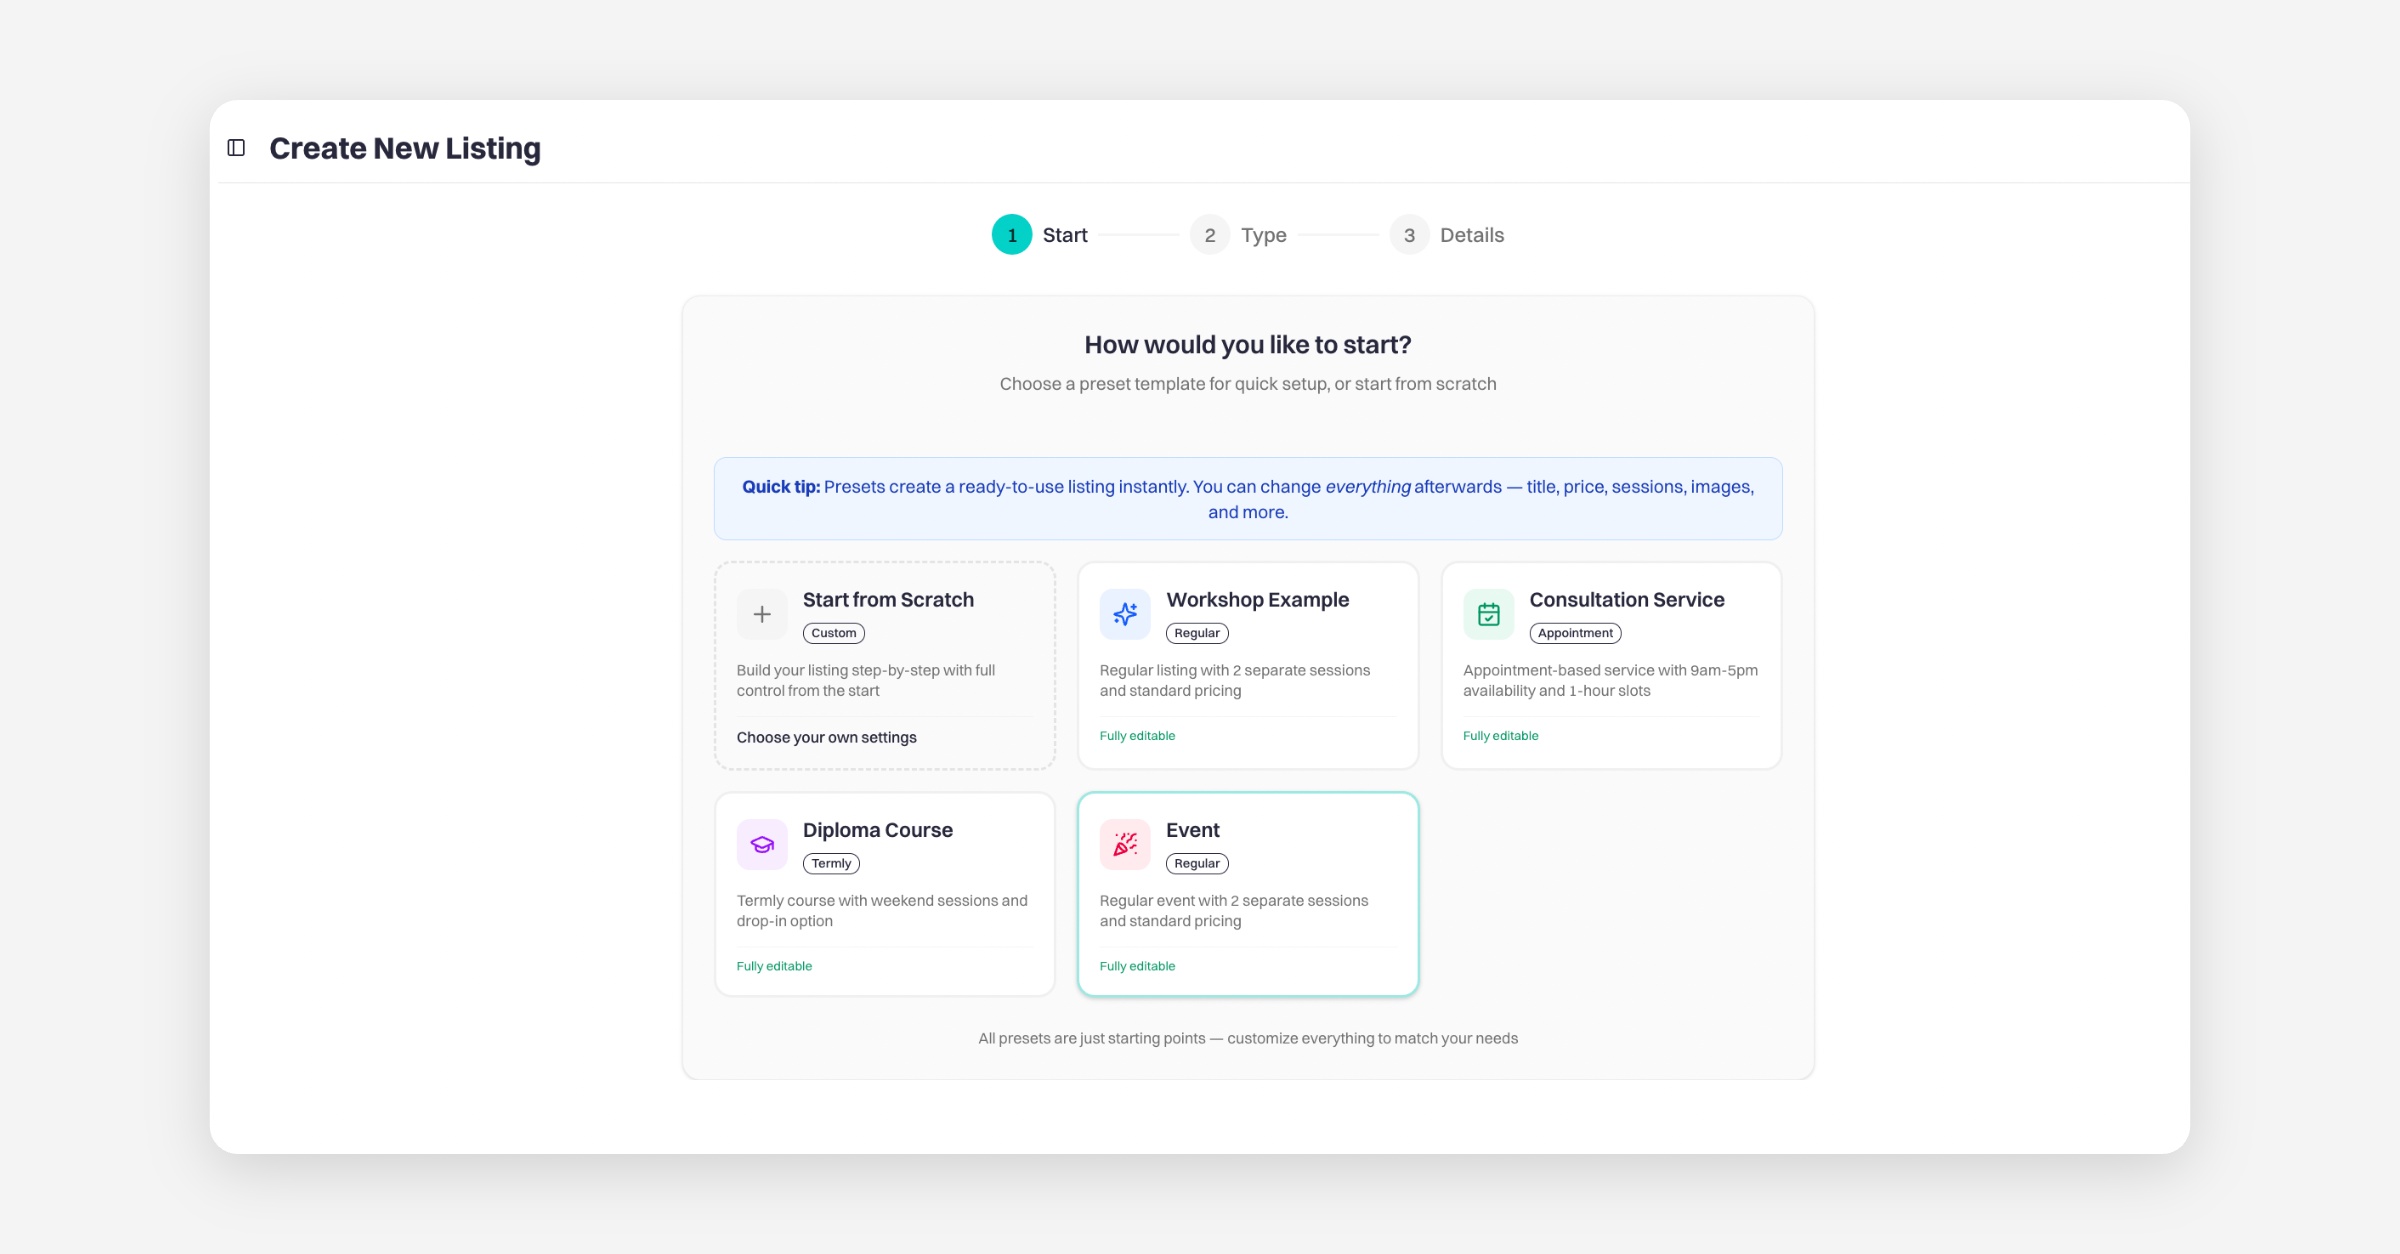
If you click Start from scratch choose Regular as the listing type.
In this example, we will use the Workshop template.
Basic Details
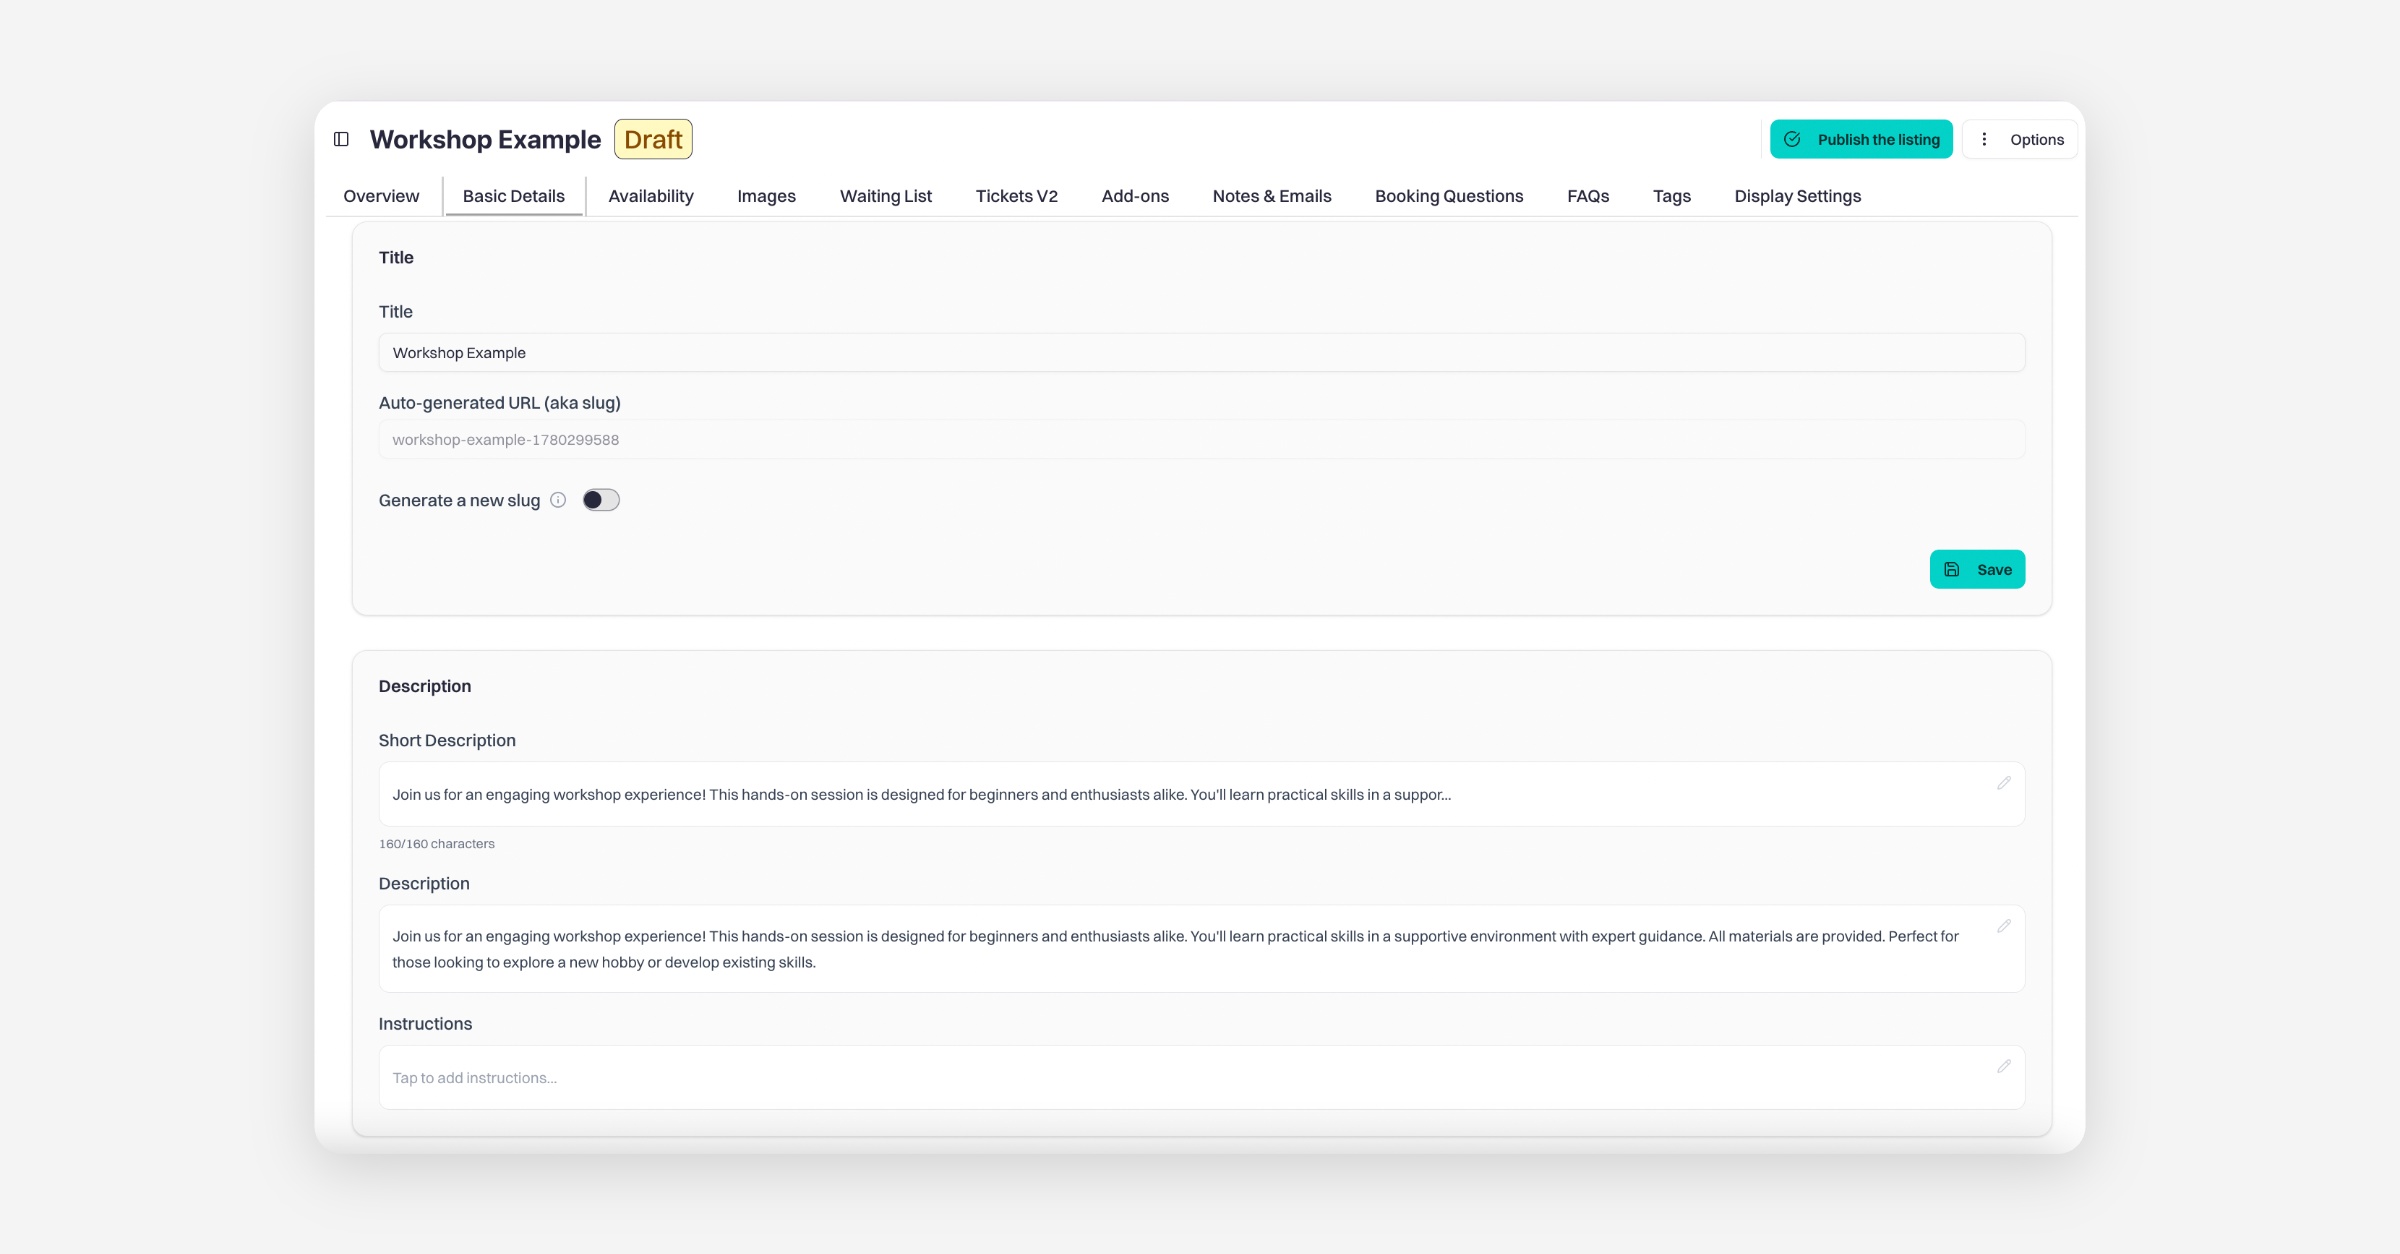
Open the Basic Details tab.
Here you can:
add your listing title
add the description that will appear on your listing page
Availability
Go to the Availability tab.
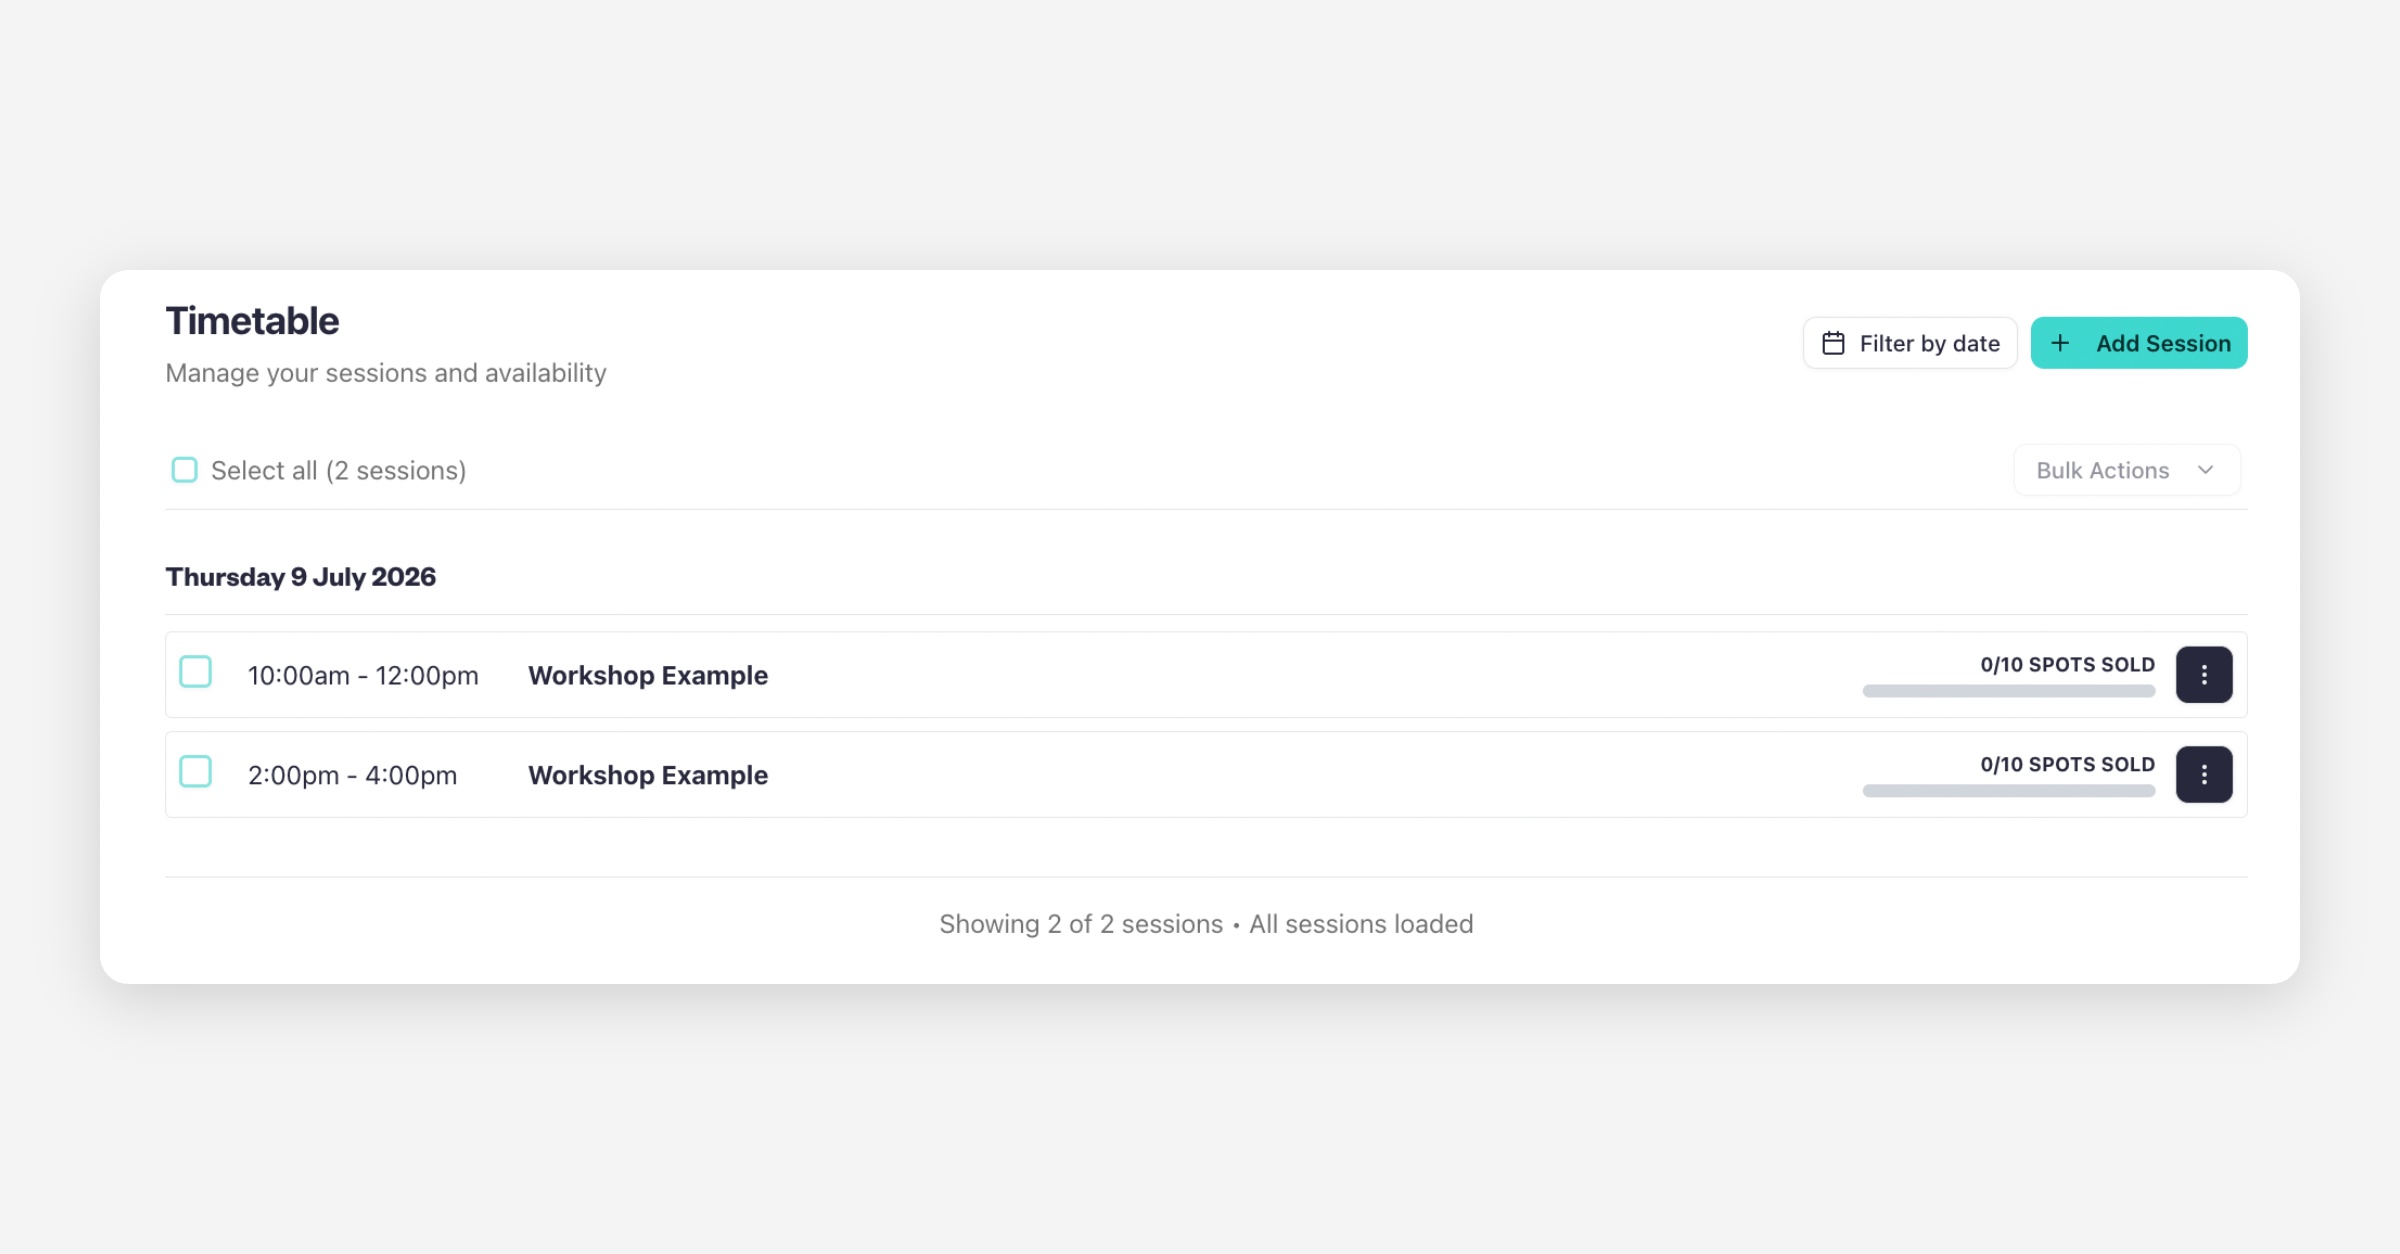
If you are using a prepared template, you may already see example sessions added. You can:
edit them
remove them by clicking the 3-dot settings menu
To create new sessions, click Add Session.
If your sessions happen on random dates
Choose the dates manually by hand-picking them.
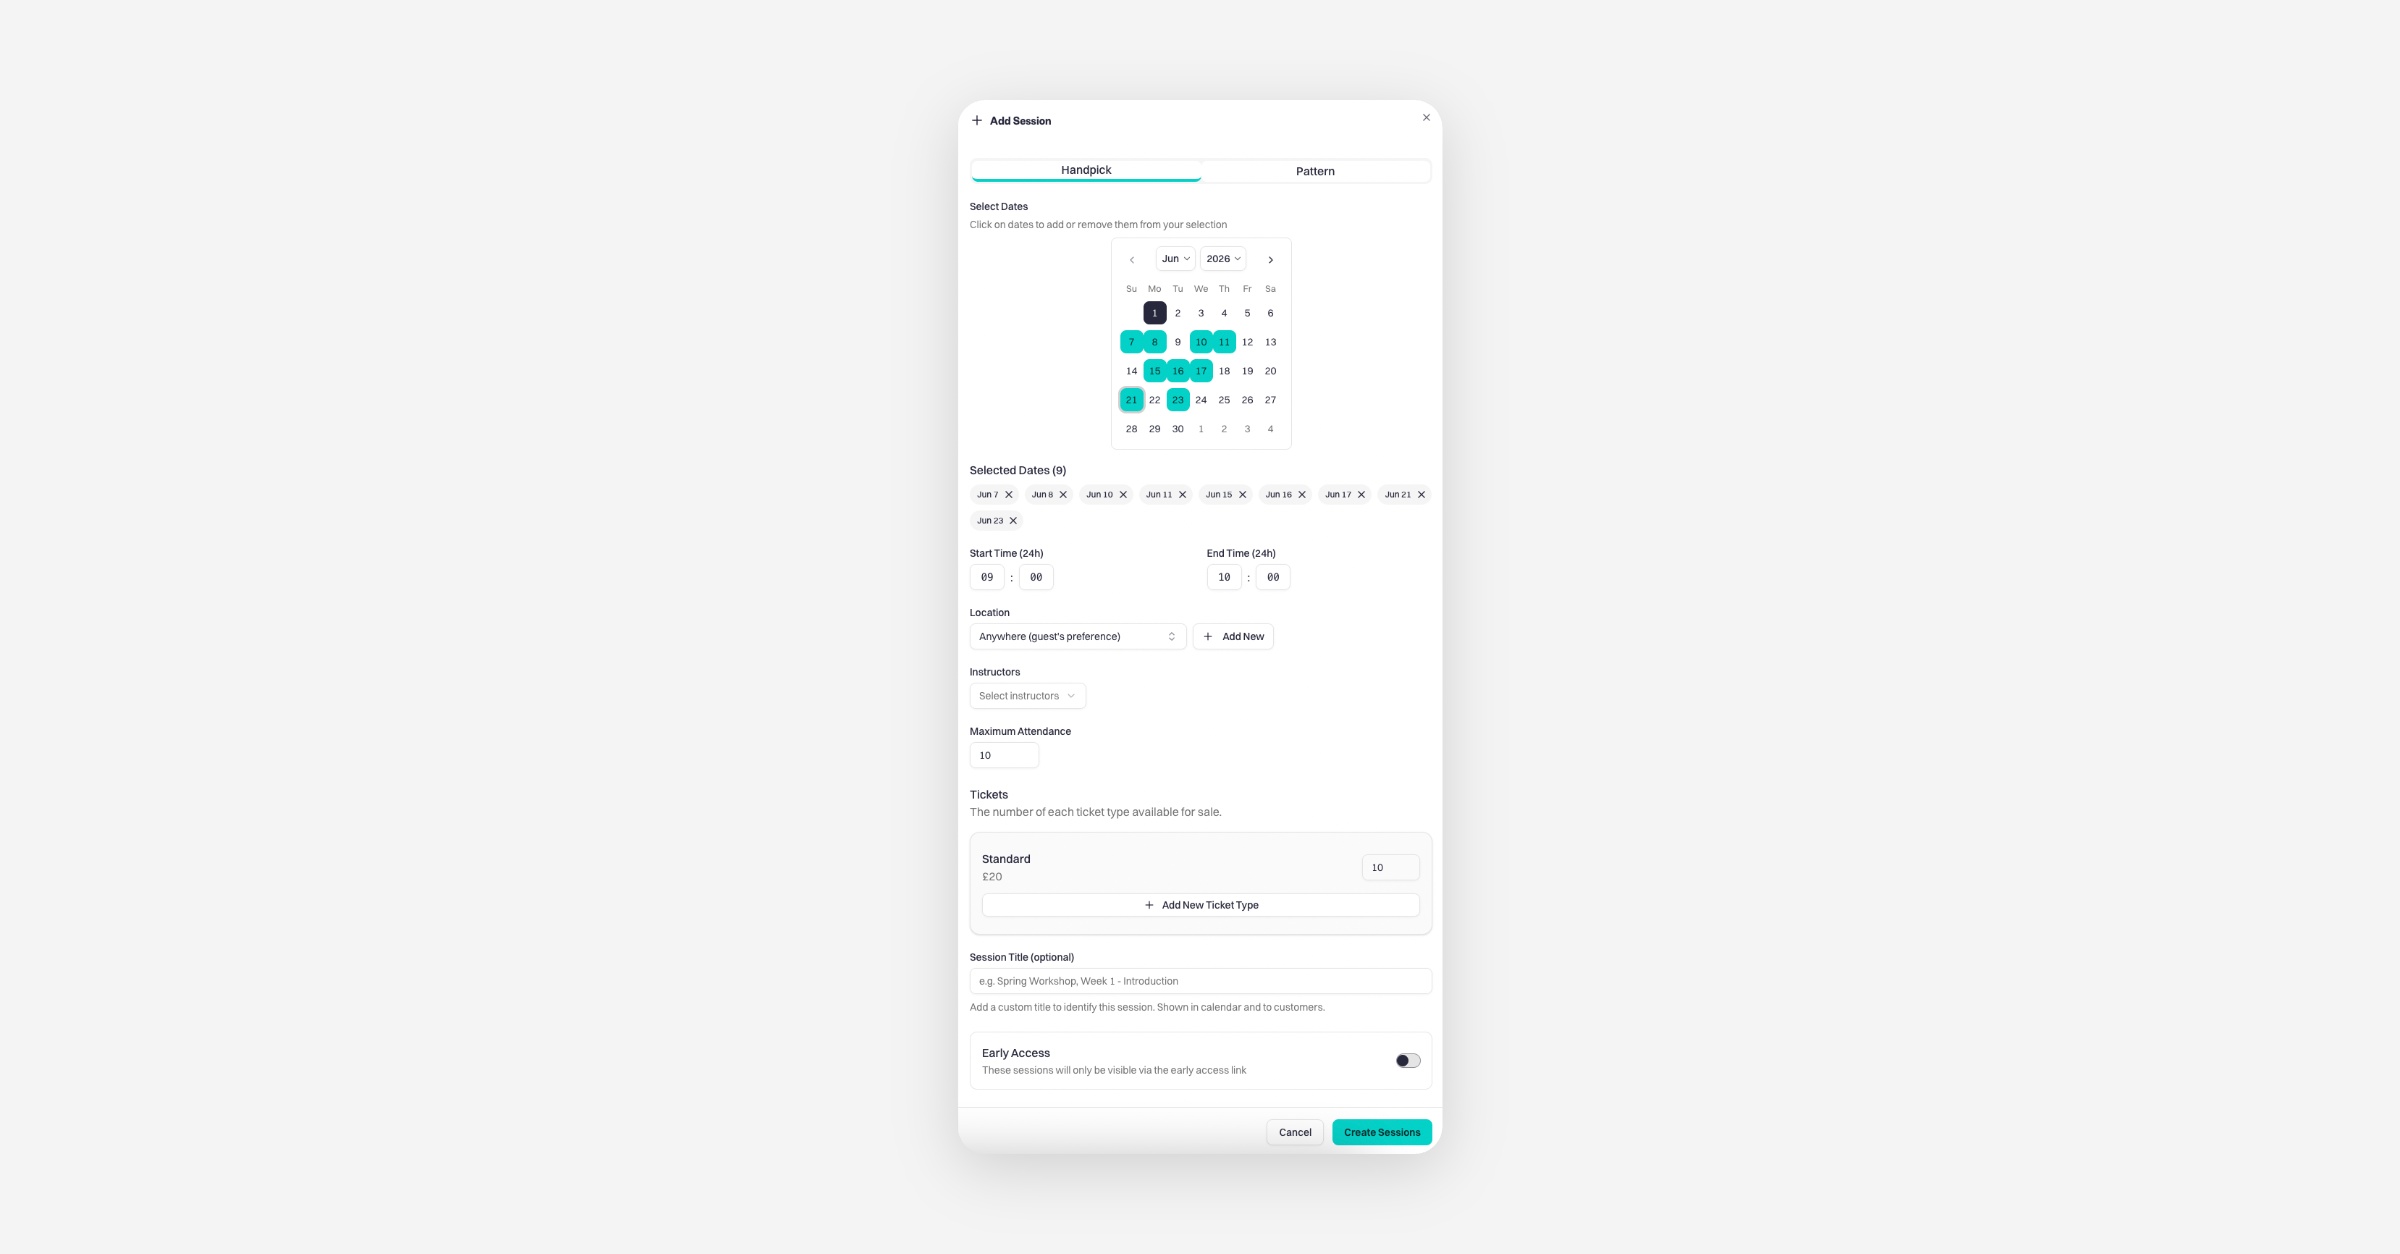
Then add:
location
instructor
tickets
Finally, click Create Sessions.
If your sessions follow a recurring pattern
For example:
every week
every 2 weeks
every 3 or 4 weeks
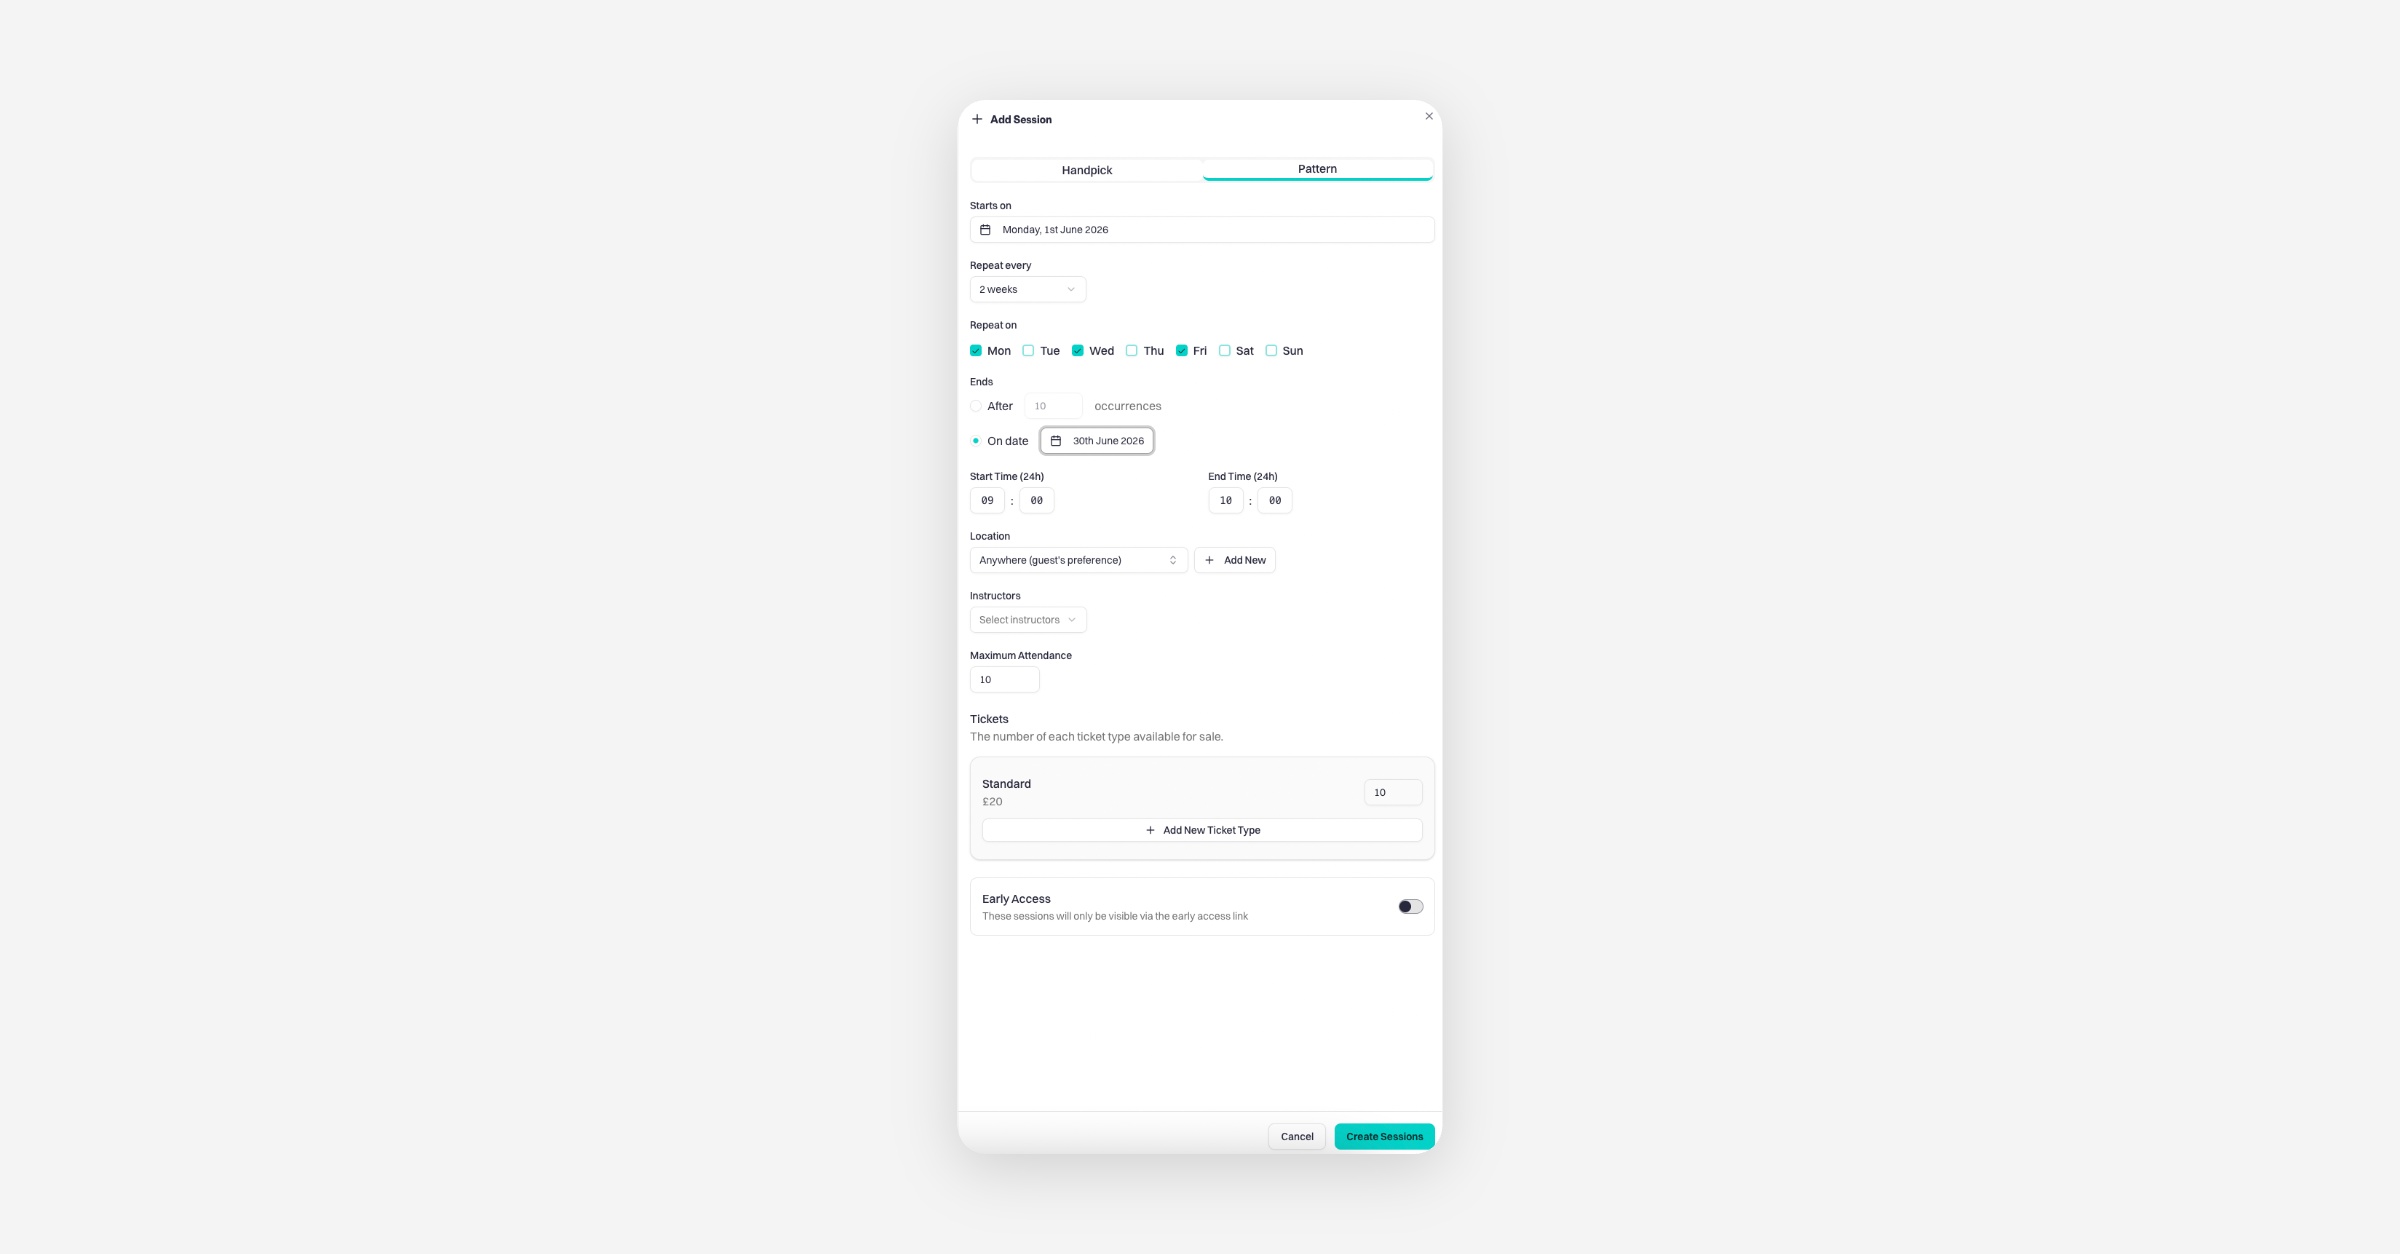
Click Pattern and configure:
start date
repeat frequency
days of the week
You can then choose:
Ends after X occurrences
Example: 10 sessionsor Ends on a specific date
The system will automatically generate the sessions based on your setup.
You can also add:
session time
instructors
attendance limits
tickets
You can always edit sessions later by clicking the 3-dot settings menu next to a session.
If you need help, you can always contact support at:
[email protected]
Images
In the Images tab, upload the main image for your event.
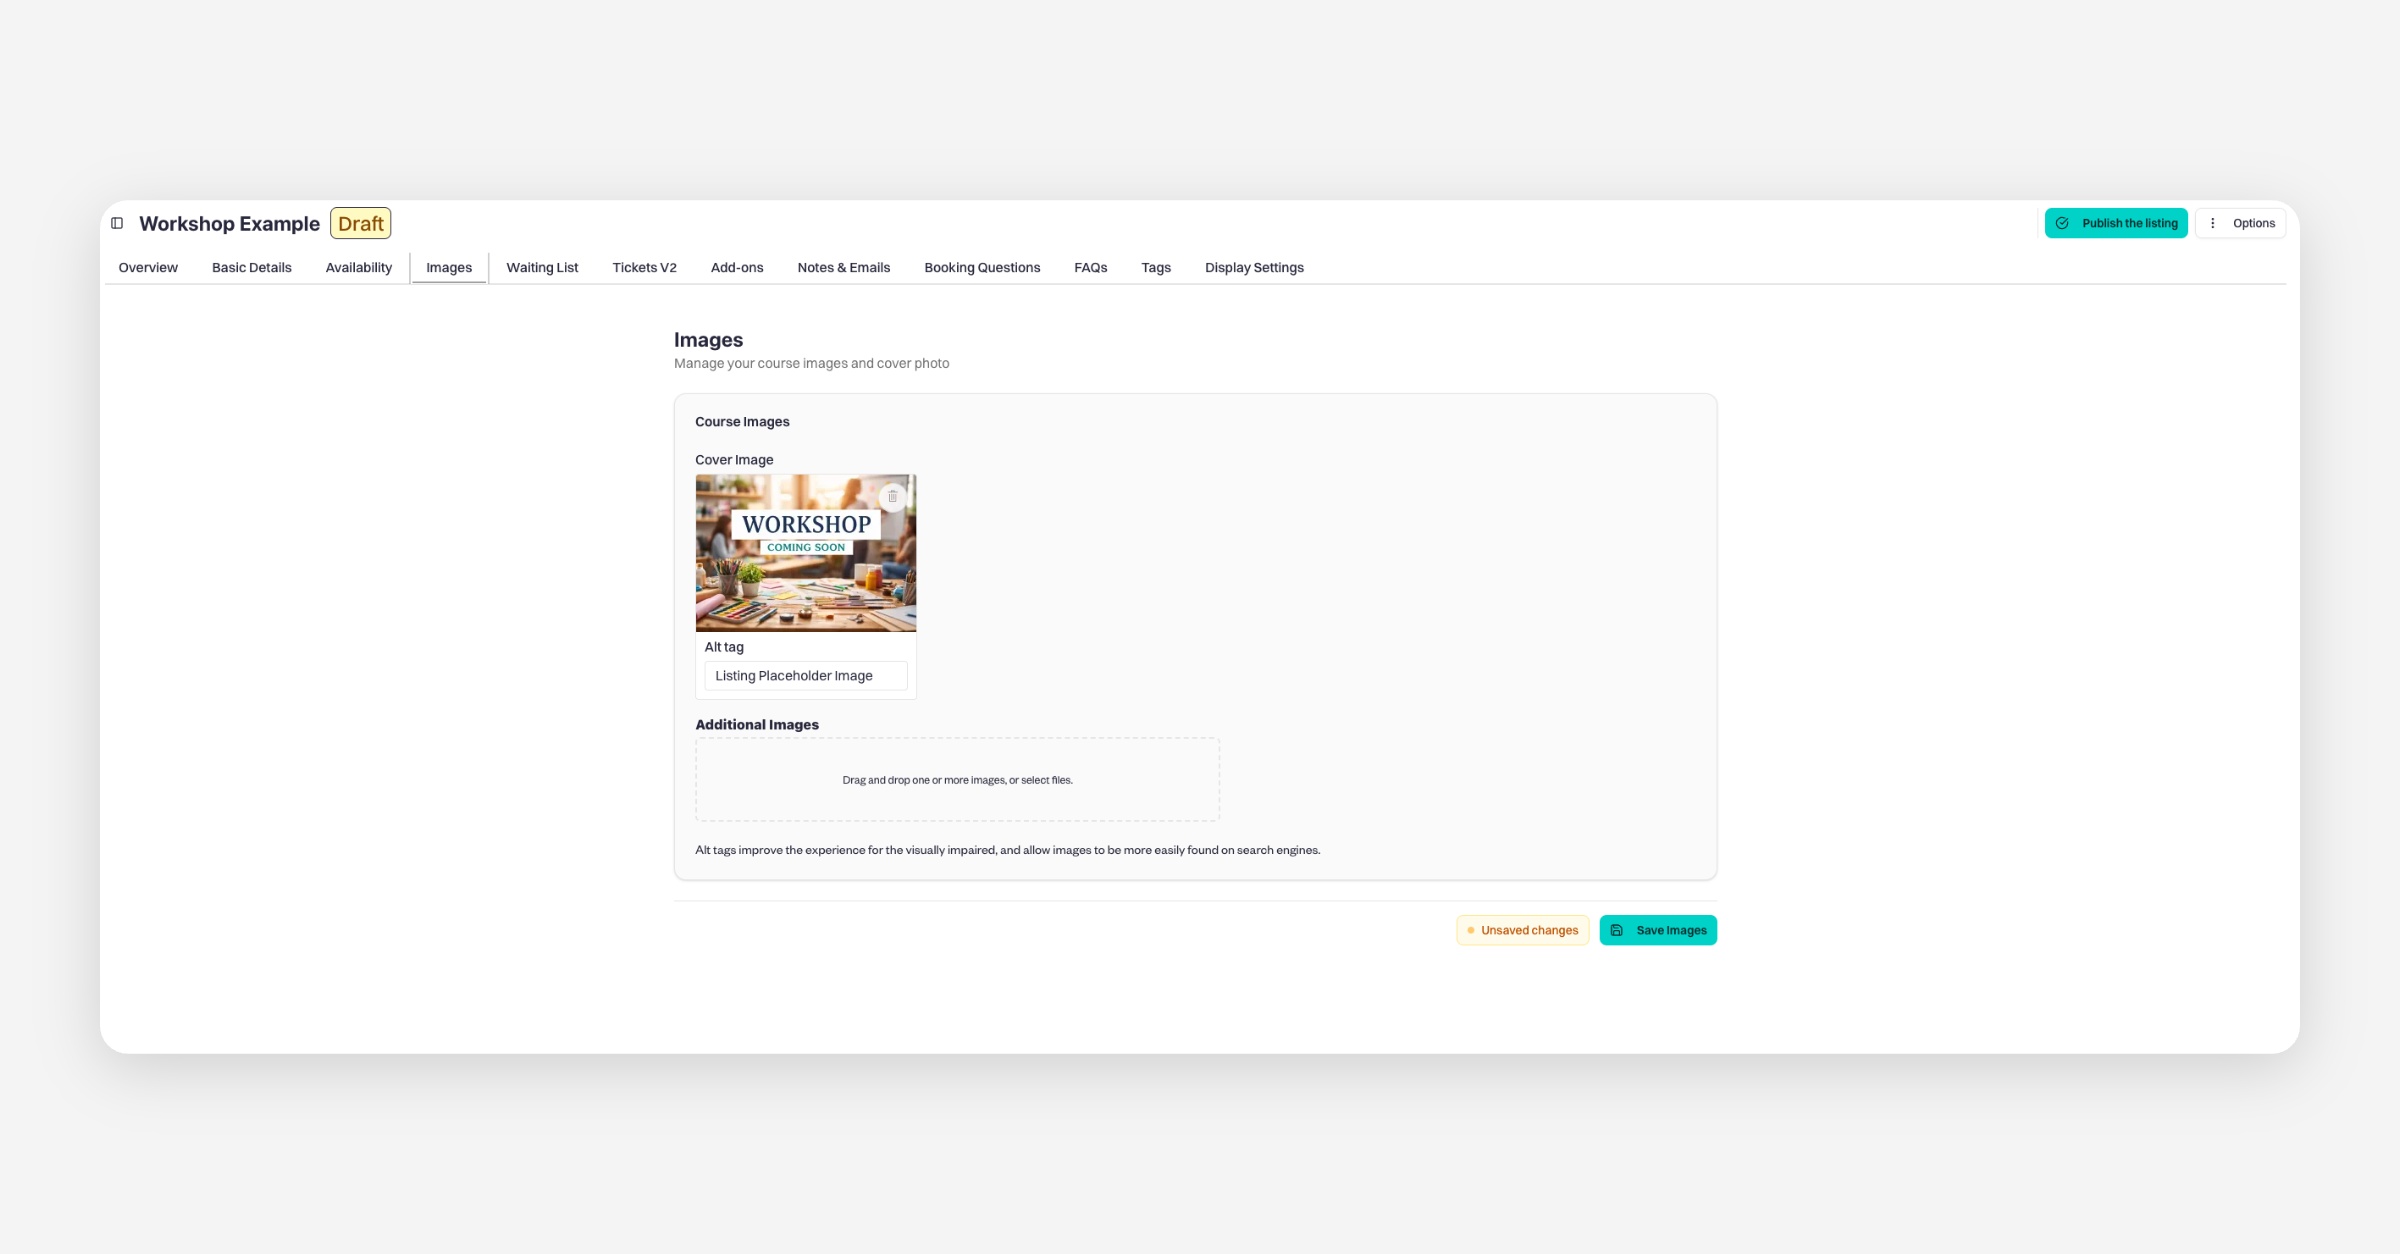
Drag and drop to reorder your images — the first image will be used as your cover image. Hover over an image to adjust the focal point and zoom level, with previews updating live as you make changes, or remove the image if no longer needed. Press 'Save Changes'.
Waitlist
The Waitlist feature is automatically enabled for your event.
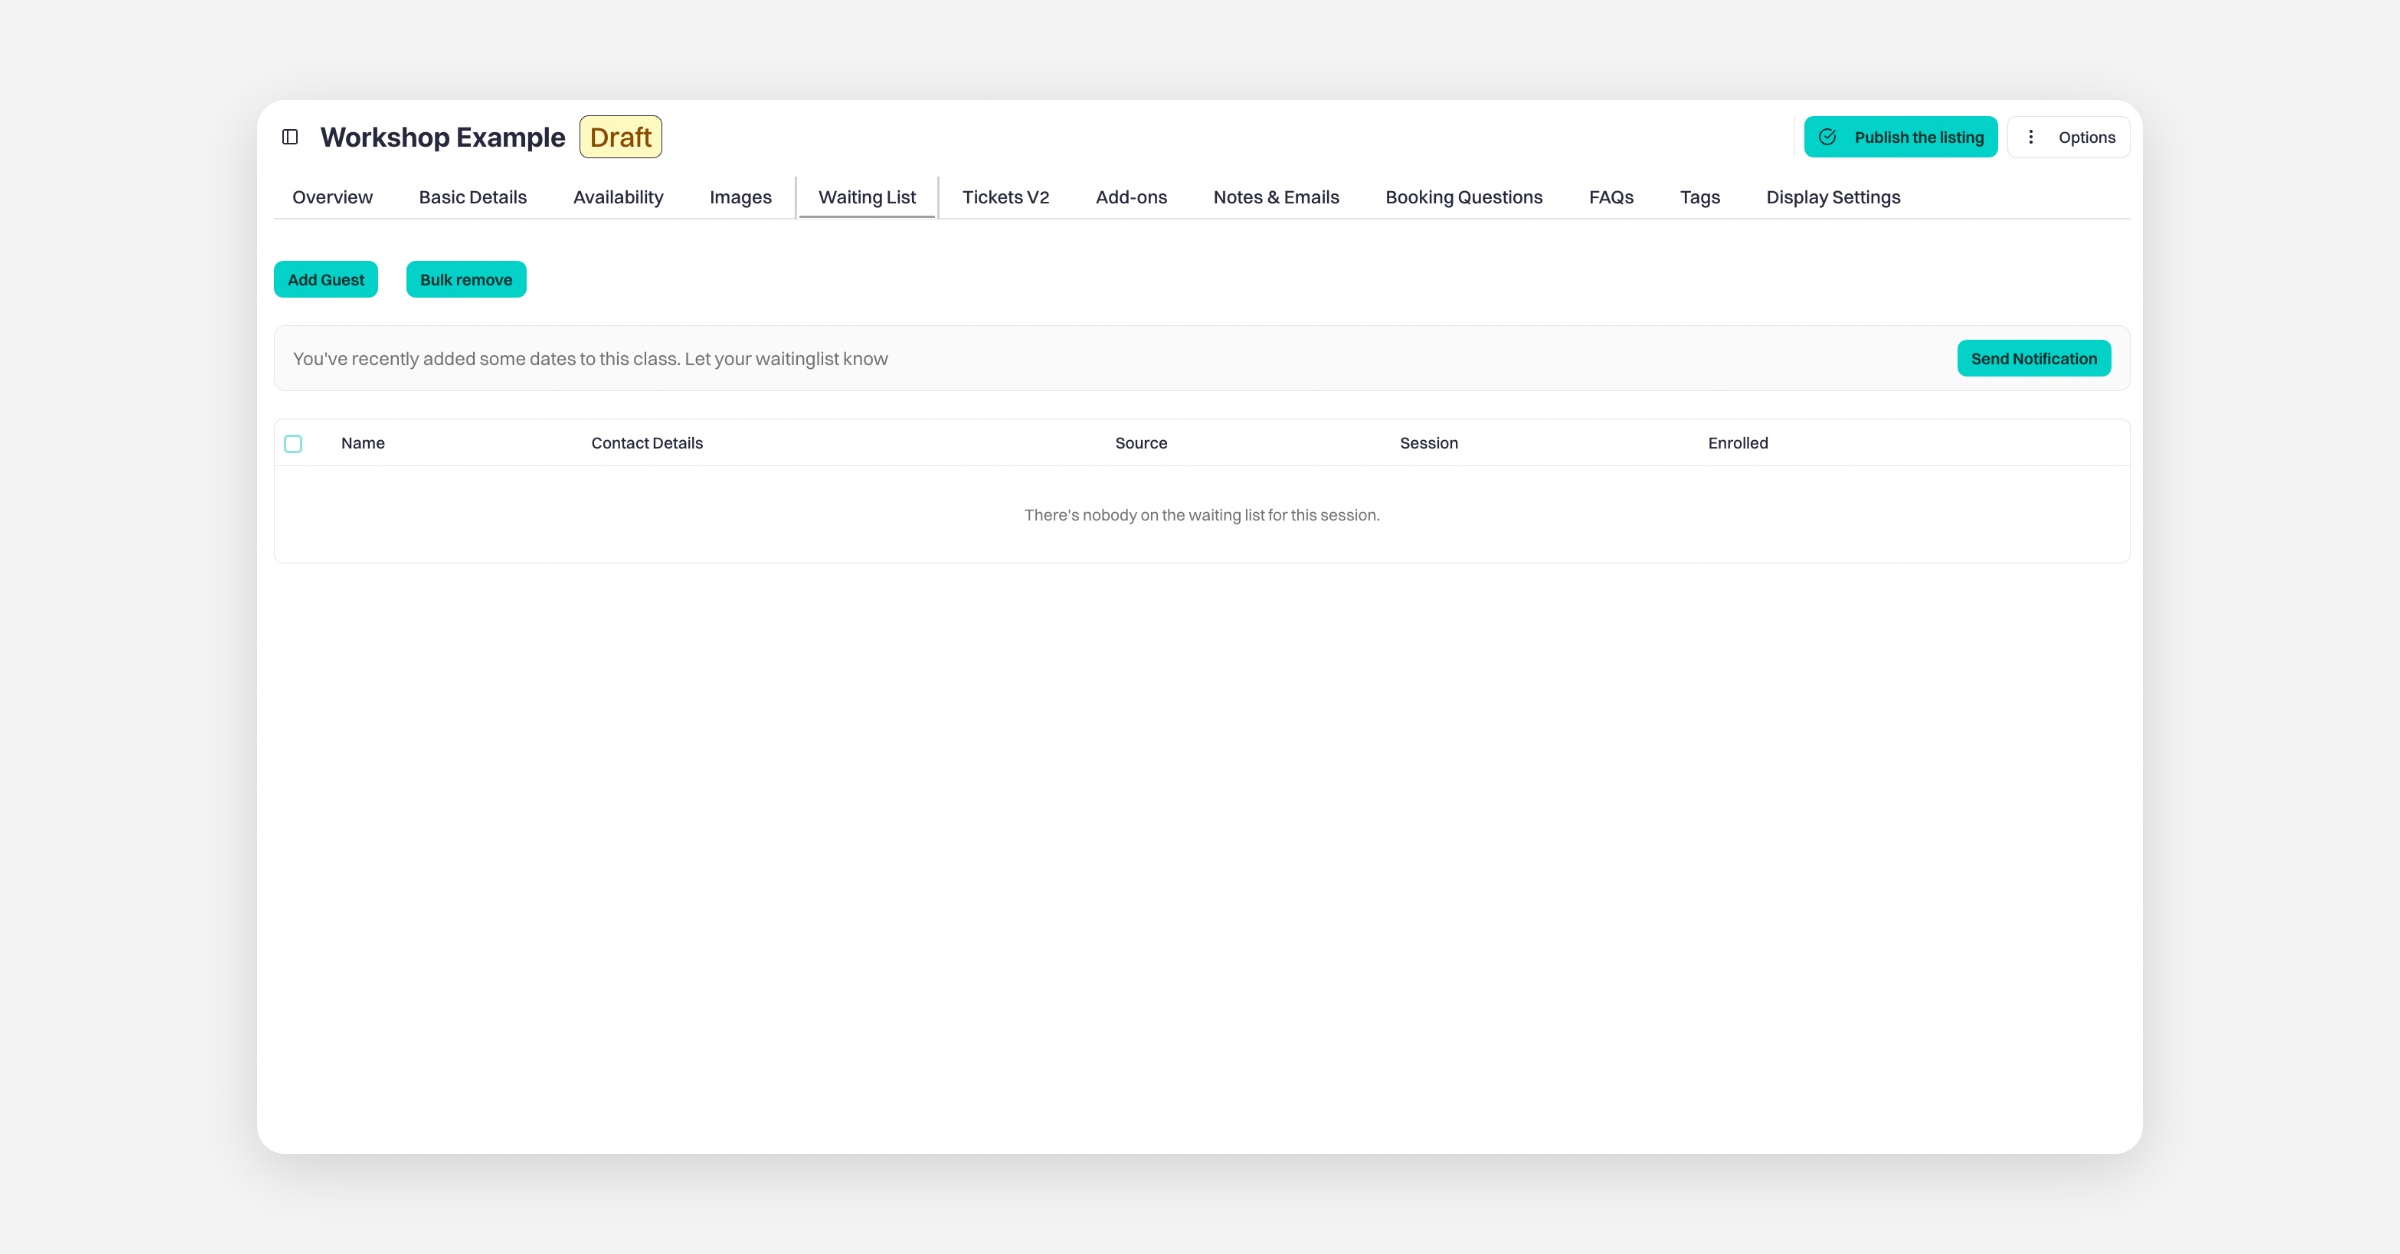
If customers cannot find a suitable date, they can join the waitlist and receive notifications when new dates are added.
From the Waitlist tab, you can also manually send notifications by clicking Send Notification.
Tickets (Tickets V2)
In the Tickets V2 section, you can manage ticket options for your event.
If you use a template listing, a standard ticket may already be included, but you can:
edit existing tickets
create additional ticket types
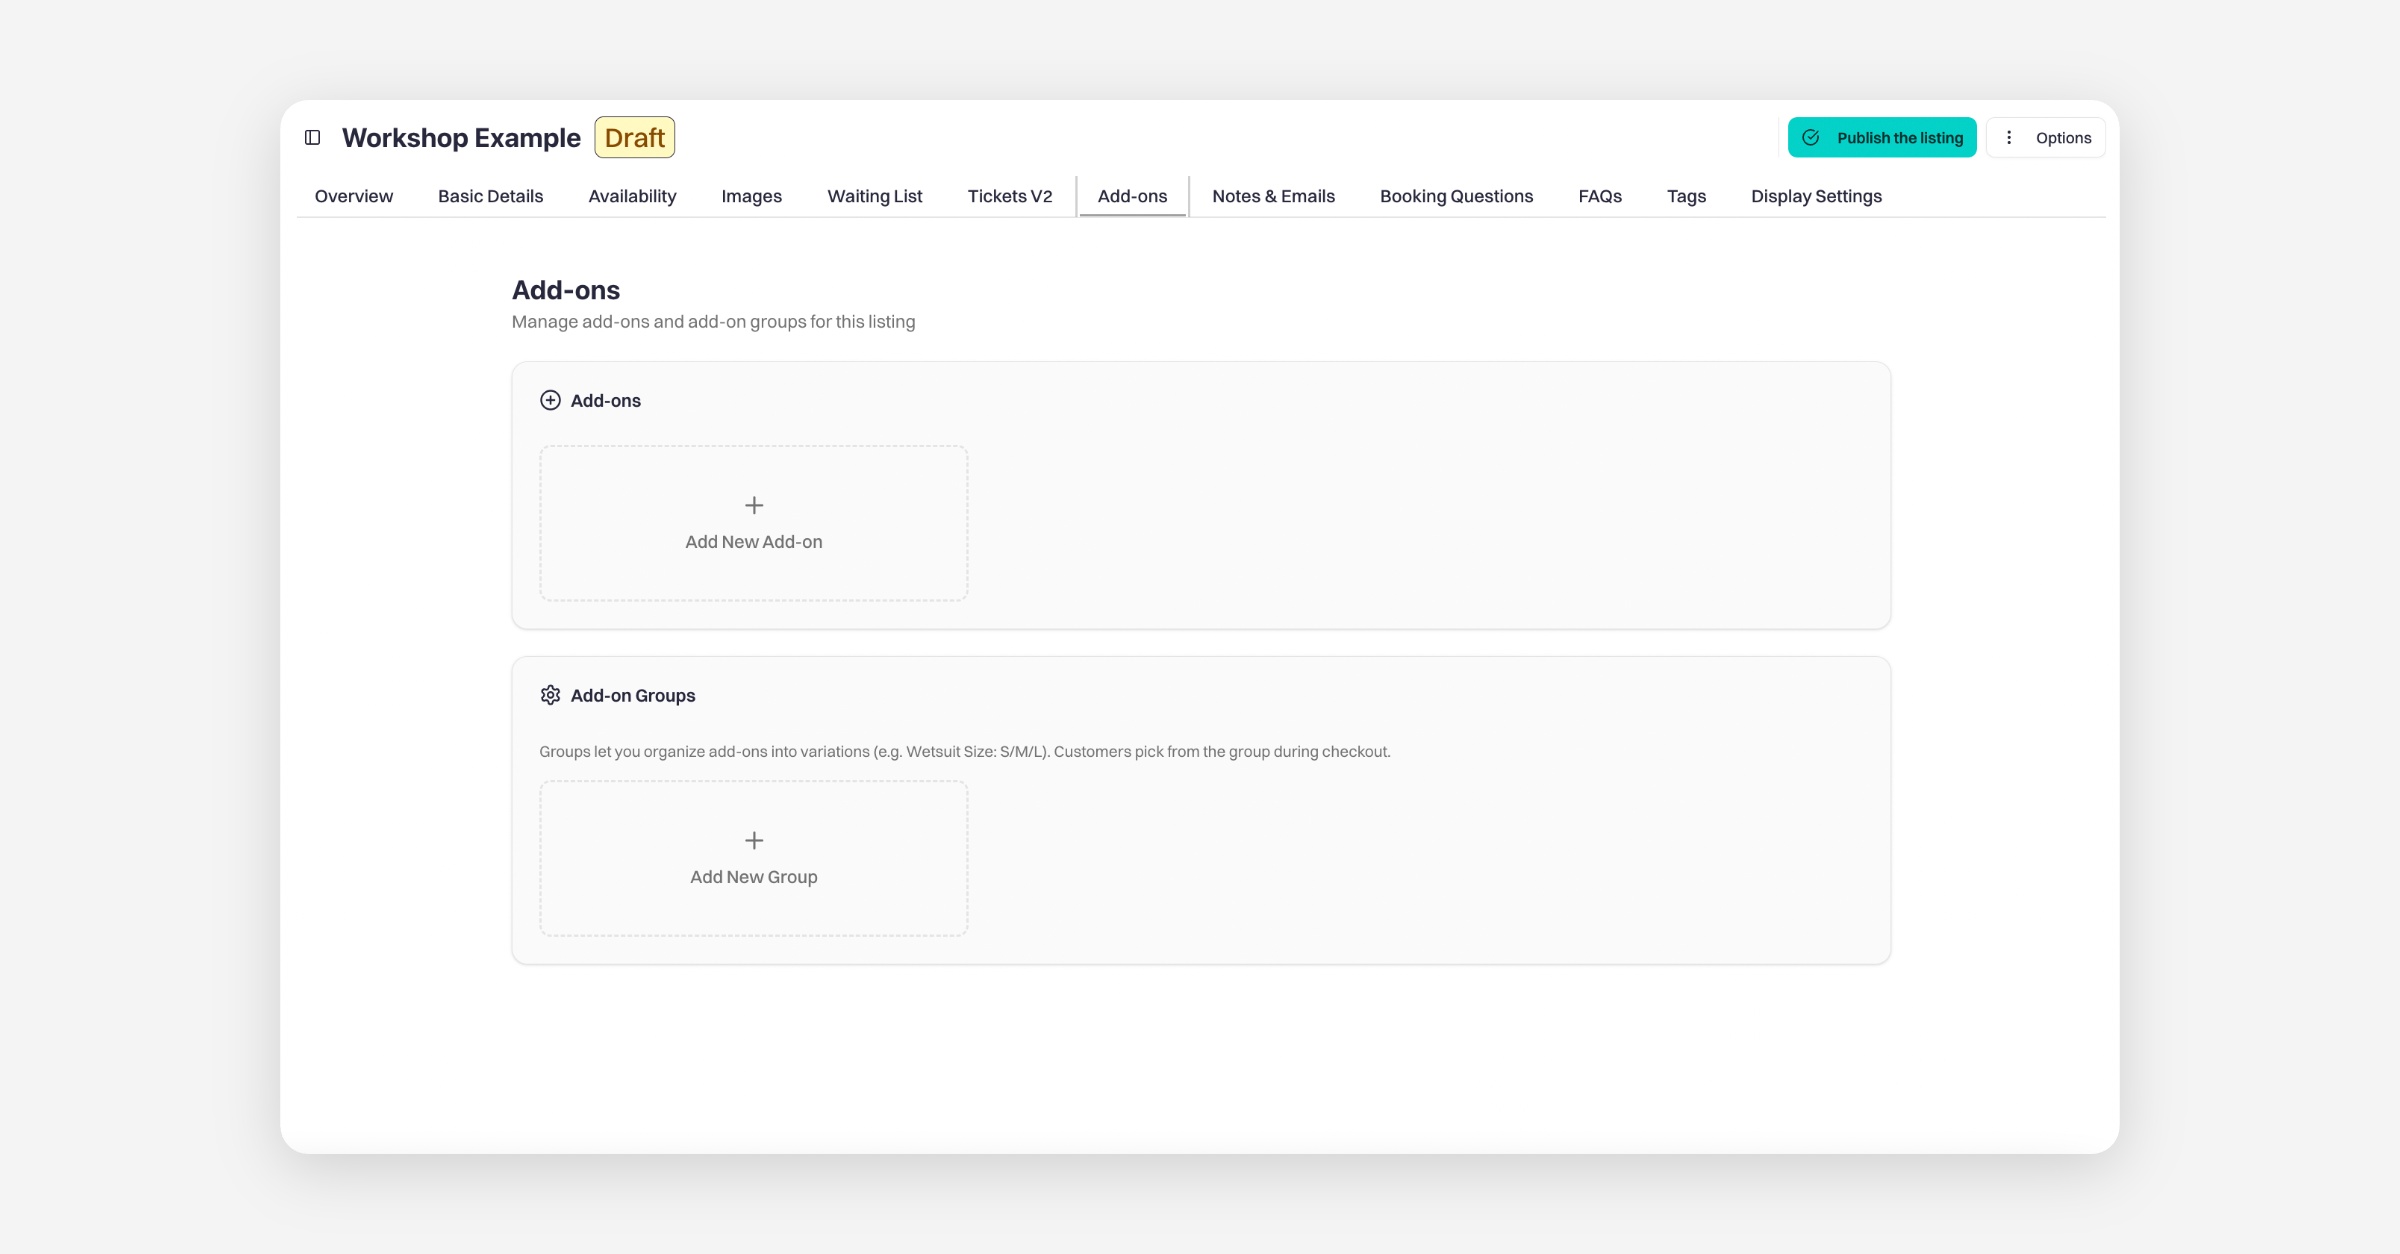
Add-ons
You can create optional add-ons for customers during checkout.
Notes & Auto Emails
In the Notes & Auto Emails tab, you can add pre-event and post event notes.
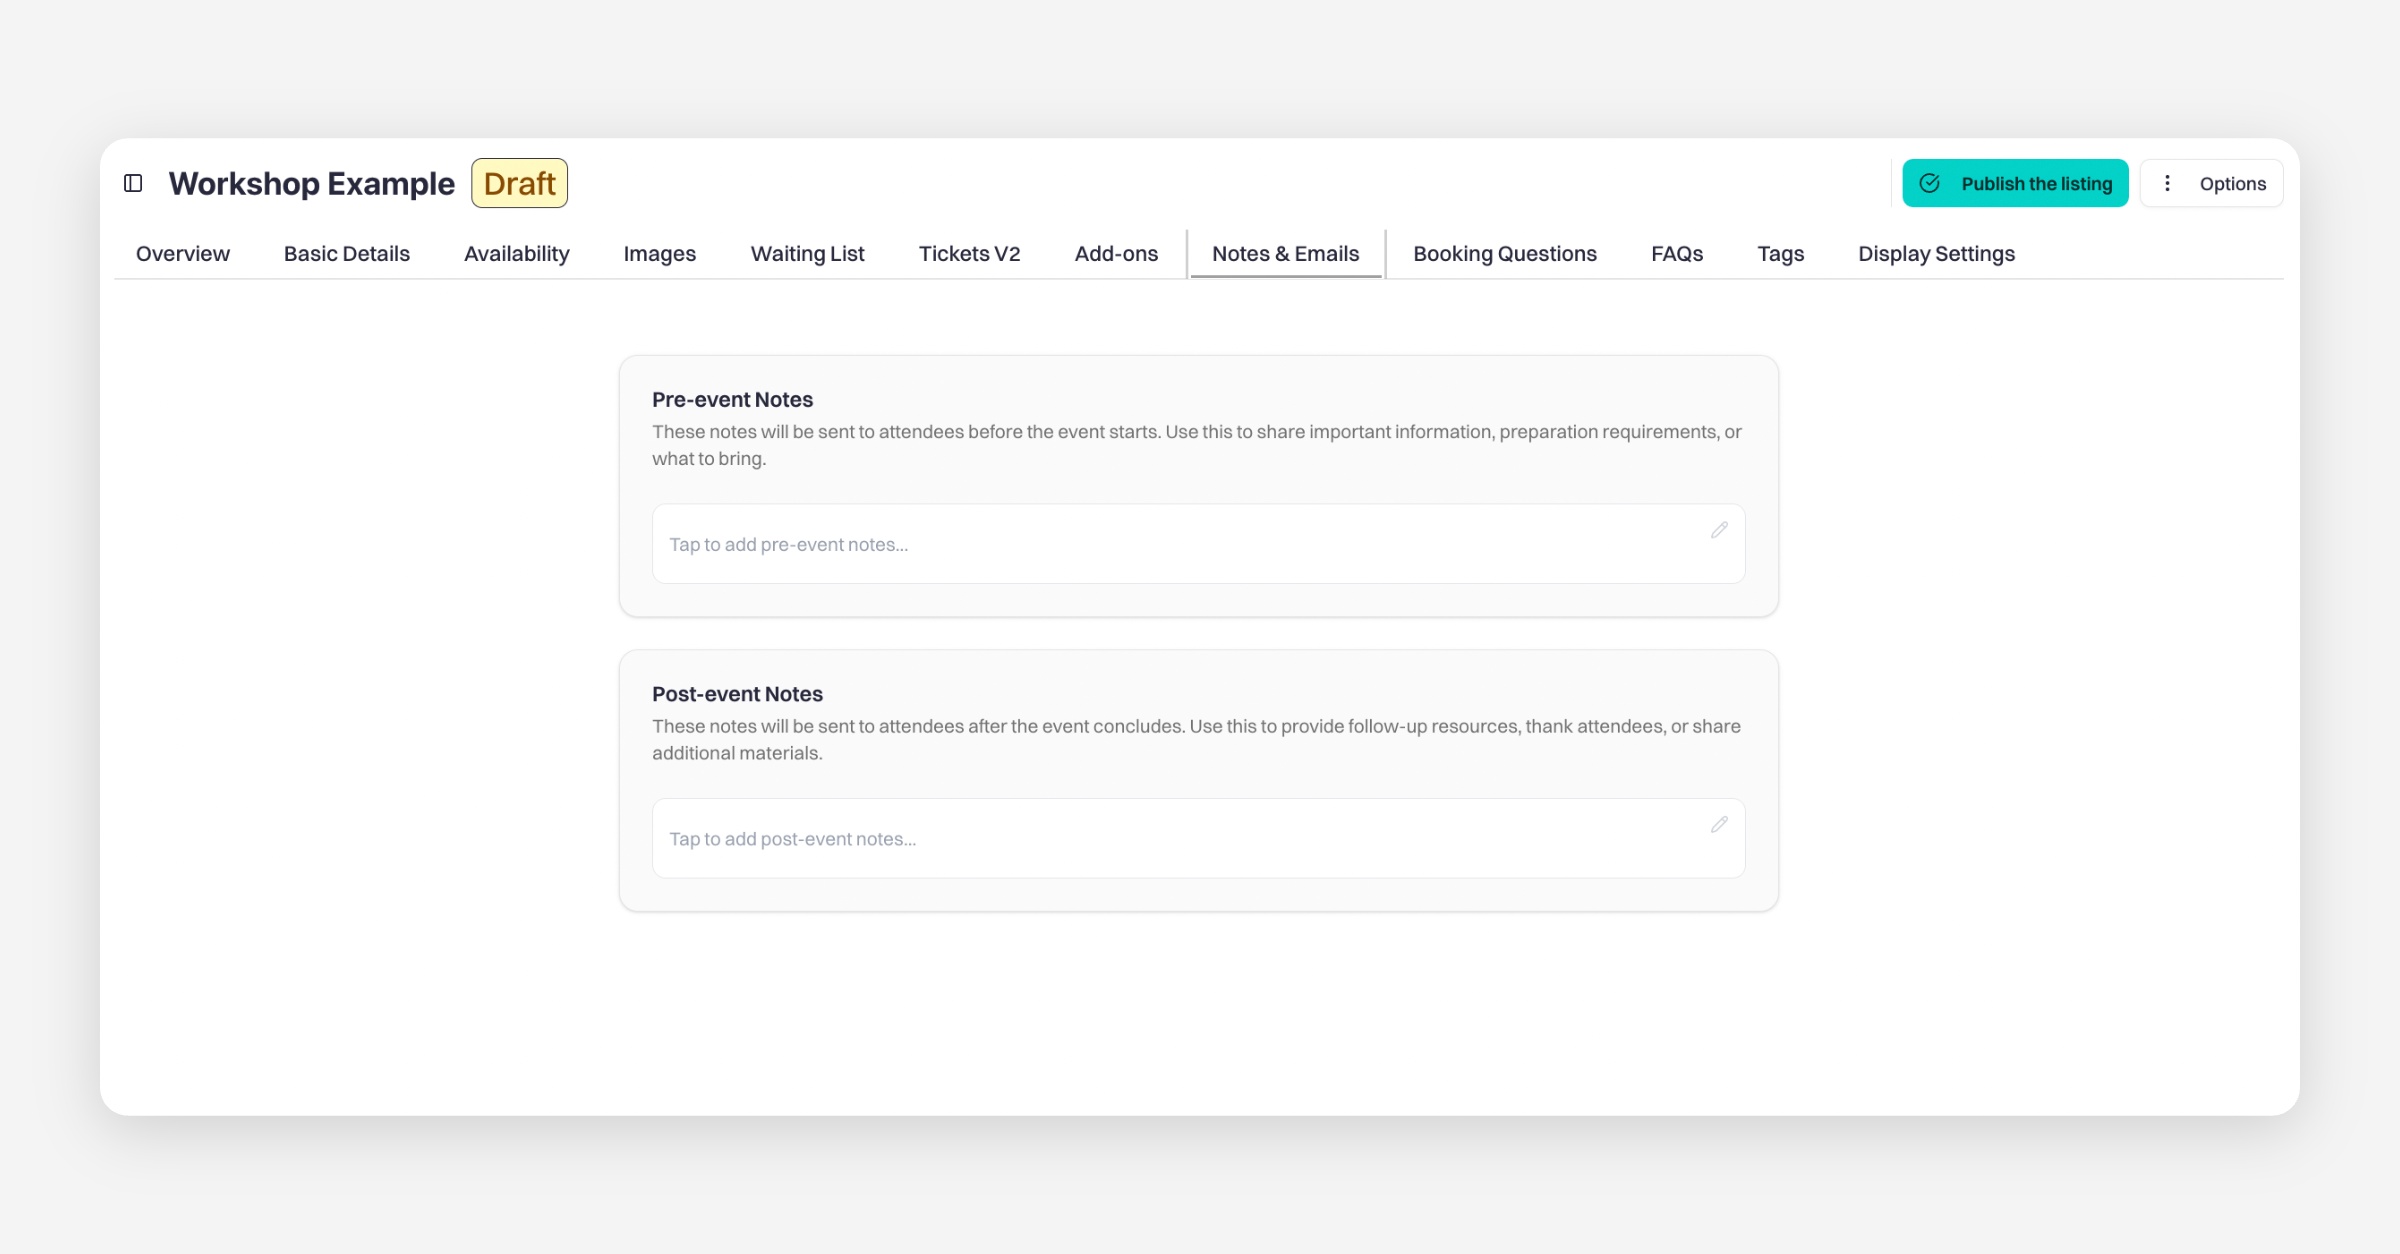
These notes are automatically sent to customers with reminder emails and post event notes are sent after event.
By default, reminders are sent 3 days before the event, but reminder timing can be adjusted for your business settings.
For more information:
https://intercom.help/baluu/en/articles/12067308-reminders
Booking Questions
Add booking questions to collect additional information from customers during checkout.
FAQs
Add FAQs to help answer common customer questions before they contact you.
These FAQs will appear on your event page.
Tags
Add tags to help organise your listings.
Tags can also be used when creating landing pages to group events into separate categories.
Display Settings
The Display Settings tab lets you control how your listing appears to customers.
Price Display — Automatically shows pricing based on your active tickets.
Hide Available Spots Count — Show general availability instead of exact remaining spaces.
Skip Guest Details at Checkout — Allows customers to skip entering guest details.
Display When There Are No Future Dates — Keeps the listing visible even without upcoming sessions.
Display When Sold Out — Keeps the listing visible when sessions are fully booked.
Blocking Strategy — Controls how bookings affect your availability and calendar scheduling.
Was this helpful?